Something old, something new, something borrowed, something blue.

Yes, I know that’s an old rhyme for a bride on her wedding day, however I think it applies pretty nicely to my process of getting ready to be a bridesmaid when I attended my brother-in-law’s wedding this past September.

I was totally thrilled when I heard the news that there would be a wedding in my husband’s family, although a bit less so when I realized I only had two months before we’d be getting on a plane and I’d need to have a bridesmaid’s dress to bring with me. Could I have bought one myself? Of course. As a sewist, though, such an idea seemed nearly incomprehensible. Where do people go to buy clothes these days anyways? I hadn’t purchased an article of clothing that wasn’t lounge or underwear in years, let alone a formal gown.

So, I steadfastly set to making my own dress. The colour for the bridal party was baby blue, so I ordered some viscose crepe from L’Oiseau Fabrics and chose out a pattern from my small collection of Burda Magazines. From the photo, it looked like a stunning, elegant dress that would be perfect for a special event such as this one.

BurdaStyle Magazine Issue 12/2012 Pattern 112

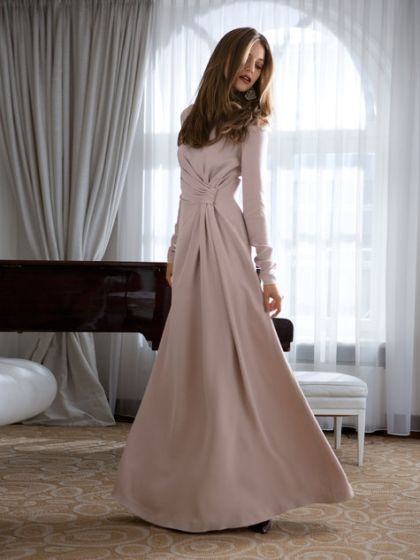
Although I was ordering the fabric online based on a not-super-clear photo, it turned out to be the perfect colour. I could hardly wait to get started. Until, that is, photos starting popping up in our bridesmaids’ WhatsApp group. Elegant gowns made up of layers of organza and chiffon – much fancier than my matte and drapey viscose crepe, which was probably a more appropriate choice for everyday wear. I didn’t know what to do. I was really starting to feel that the stress was building up, but I went ahead and made a toile of the Burda pattern anyways.

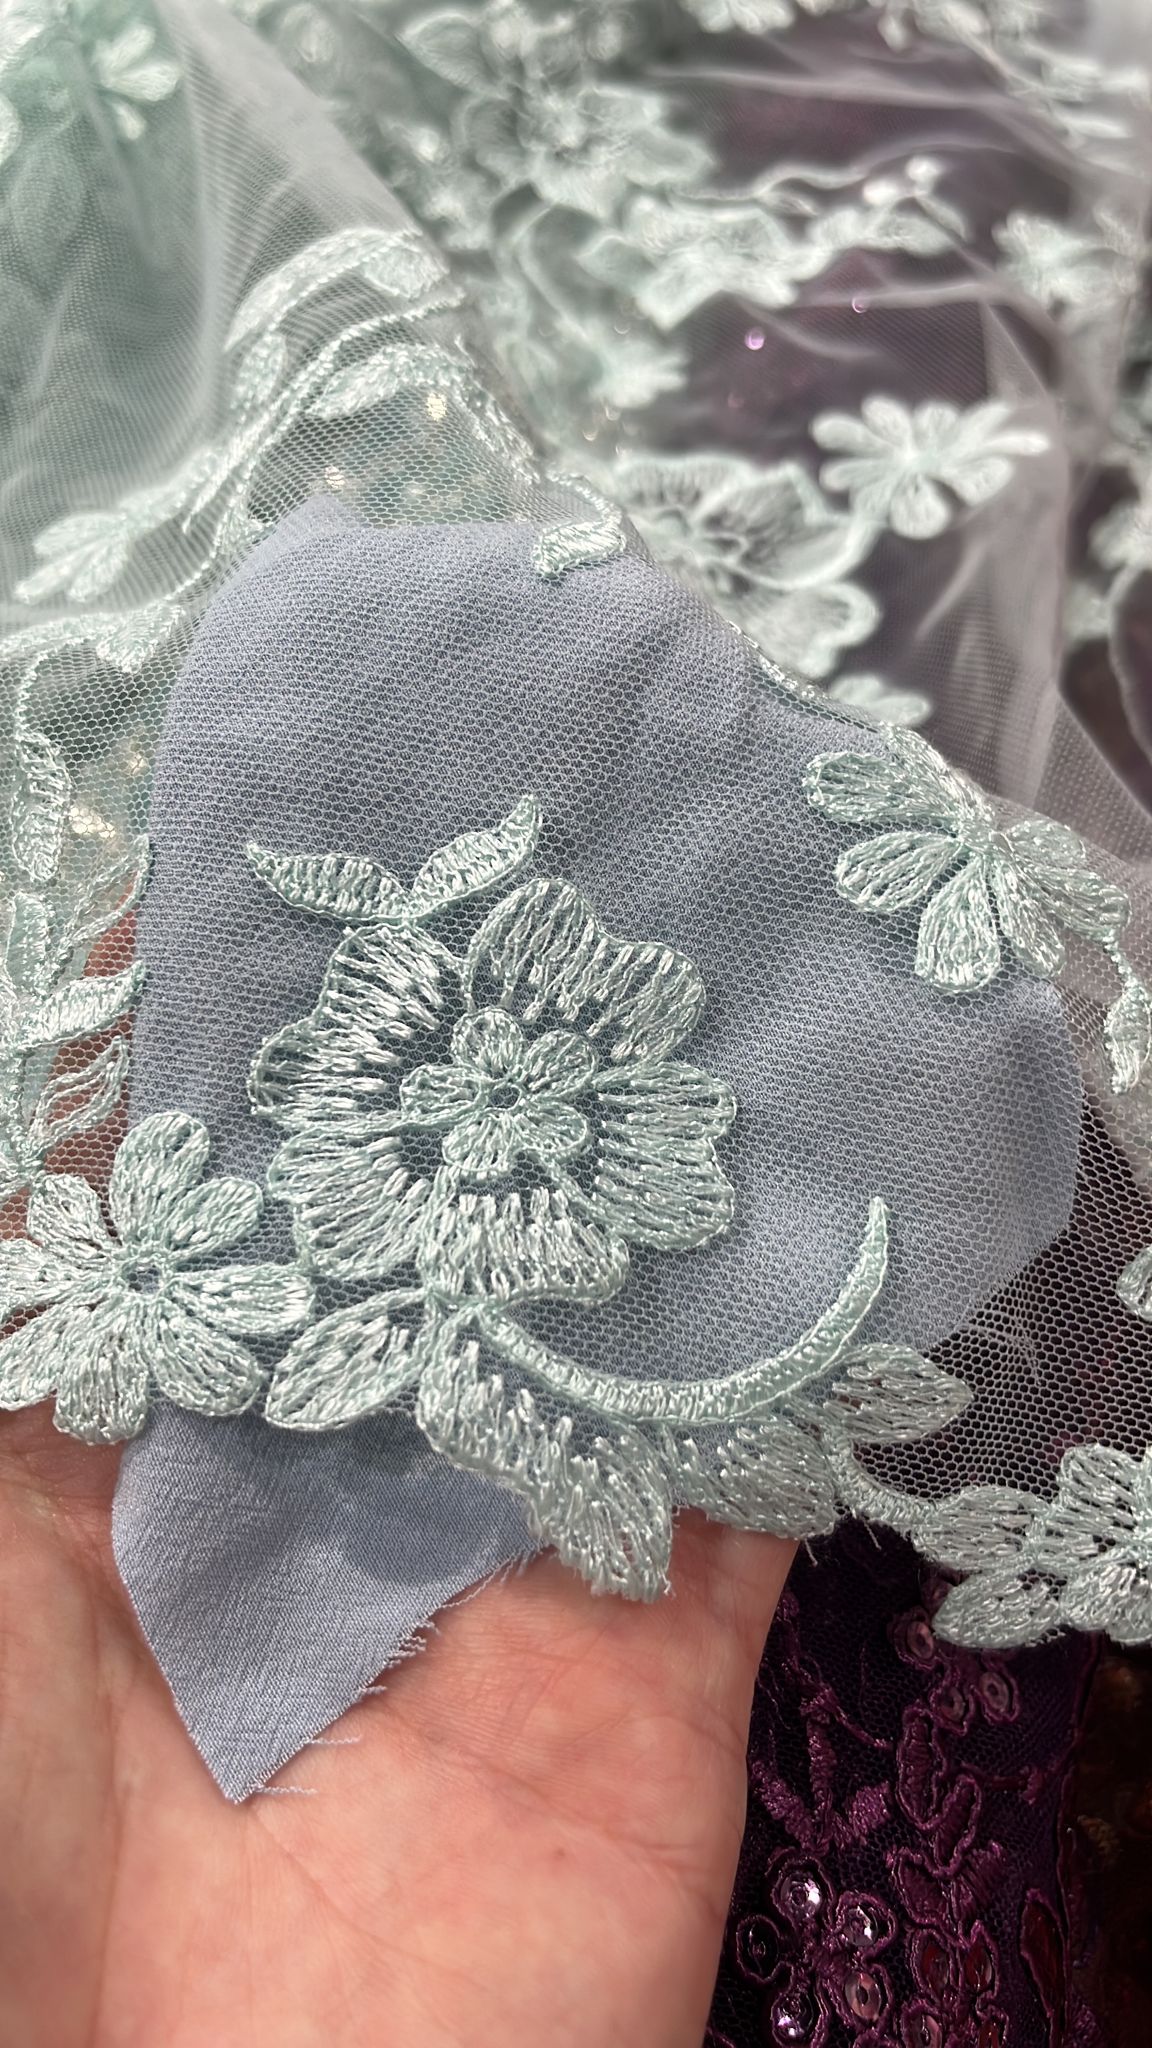
The fit of the Burda pattern right off the bat was actually fantastic. I just didn’t feel that the fabric I had purchased would do it justice. I decided at that point that I had to find a fancier fabric – a lace, sequinned fabric, or embroidered mesh that I could overlay onto the fabric I had already bought. I got to searching online at all the Canadian fabric stores I could think of (and trust me, I could think of a lot), but it turns out not so many online shops here carry gown-worthy fabrics (if you know of any, do let me know below in the comments!). I’m also lucky to live in a city full of fabric stores – none of which (other than Fabricland) were open in the evenings after I finished work or on Sundays, the only day of the week I was available to shop during daytime hours (whyyyyy????).

There was one new-to-me shop – City Choice Textiles in North York – which, based on their Instagram, seemed to be a treasure trove of laces and embroidered fabrics, and happened to be open until 7PM on weekdays (checking their hours now, they also now appear to have open hours on Sundays). One day I managed to finish work early and was able to make it up there for a visit. It really was a treasure trove (and the prices were amazing!), but amongst all the glitzy bolts, I found nothing in the colour I needed. I felt extremely disappointed, as it really seemed like if I were to find anything anywhere, this would be the place.

I was really starting to feel like I’d have to resort to buying a dress. I was at 3 weeks until our flight, and I still didn’t even have fabric.

My next plan of action took a bit of convincing my husband to do the shopping for me. He works downtown some days, so I asked if he would be willing to stop by Leo’s Textiles on Queen Street and do some shopping. He was hesitant and I was desperate, and anyways I had enough confidence in his eye for colour to choose something nice. He sent me a series of photos alongside a swatch of the viscose crepe I wanted to put underneath, and he came across some beautiful blue silk chiffon. I told him to grab 4 yards of it and take it home for me.

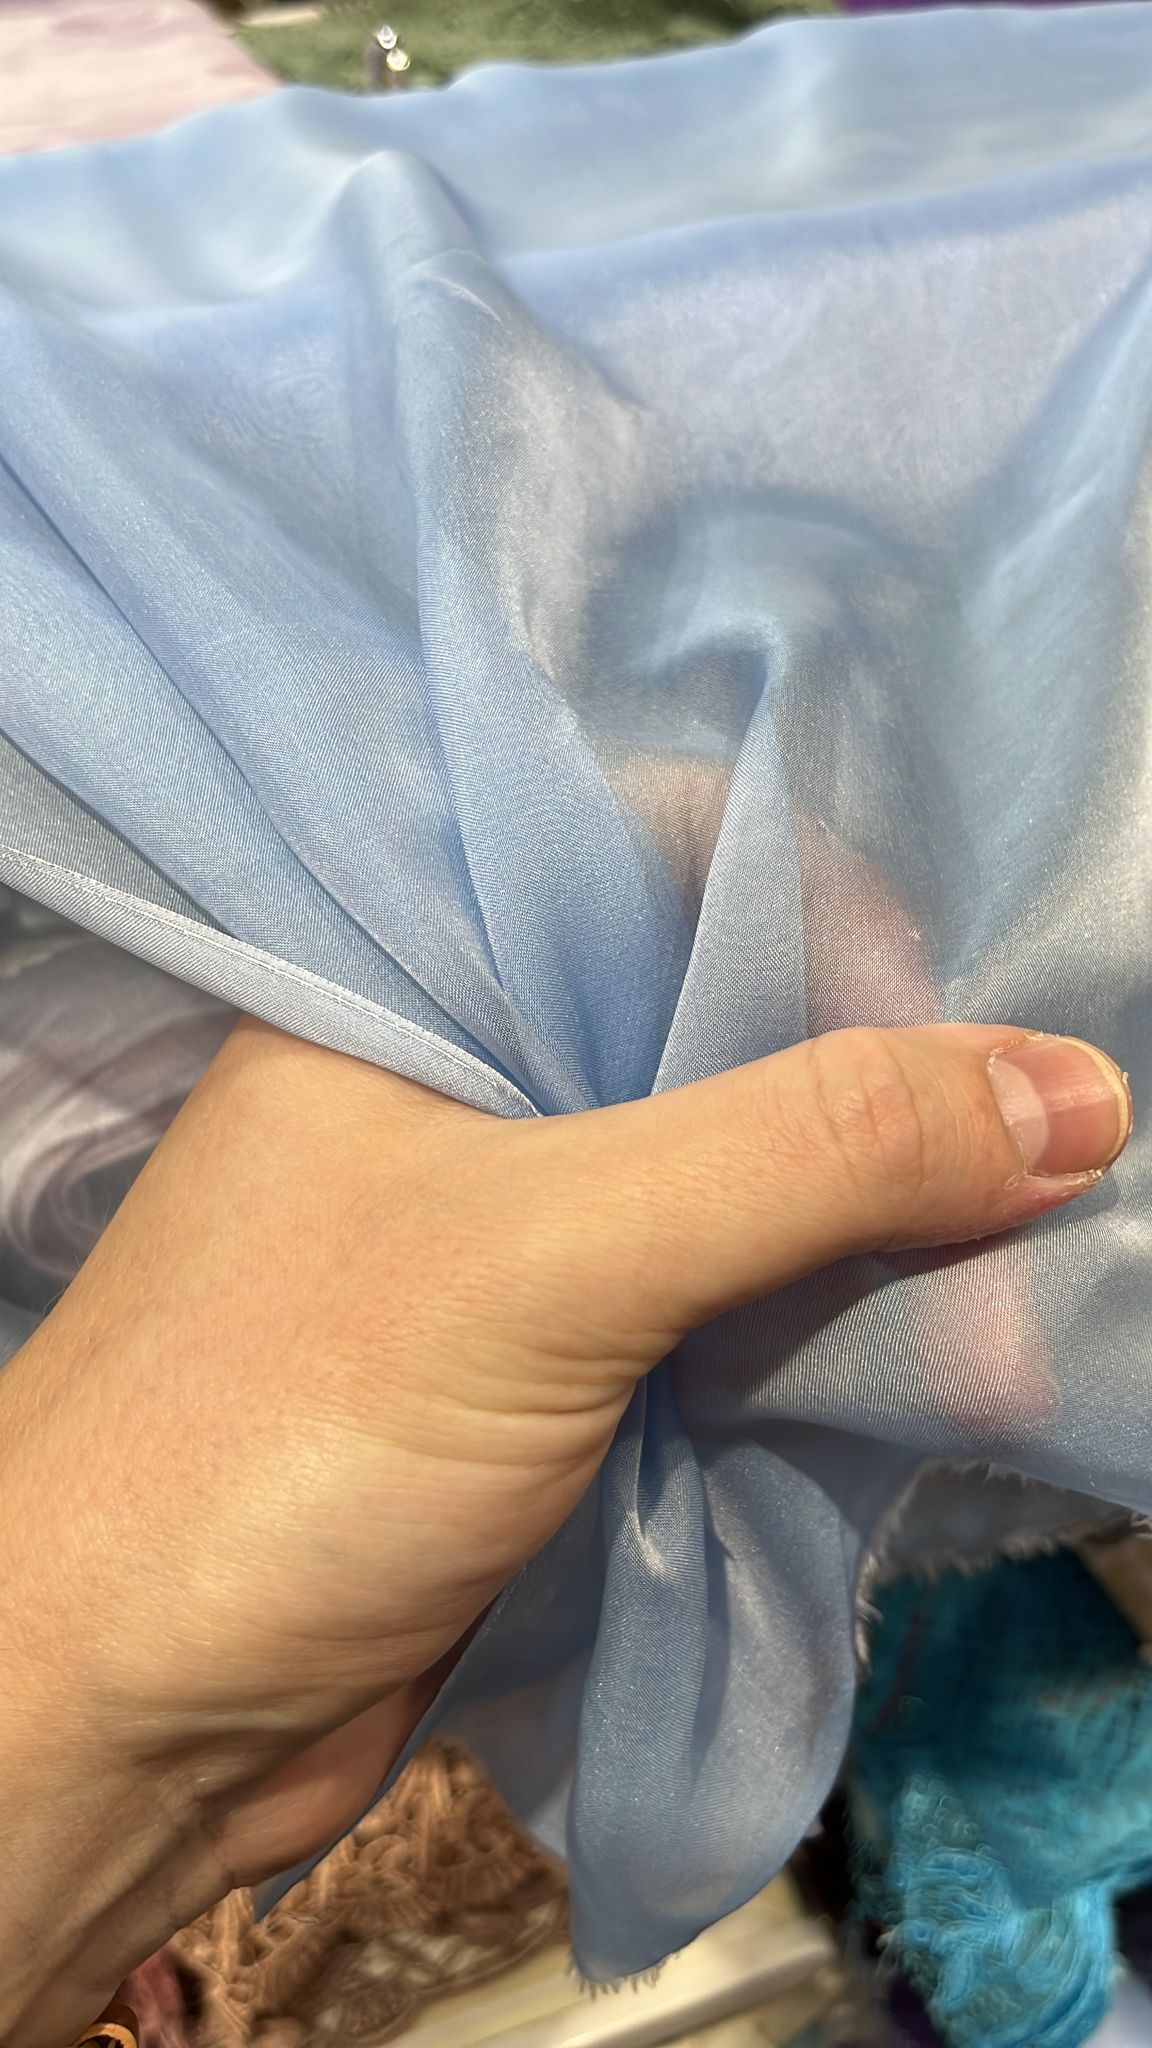
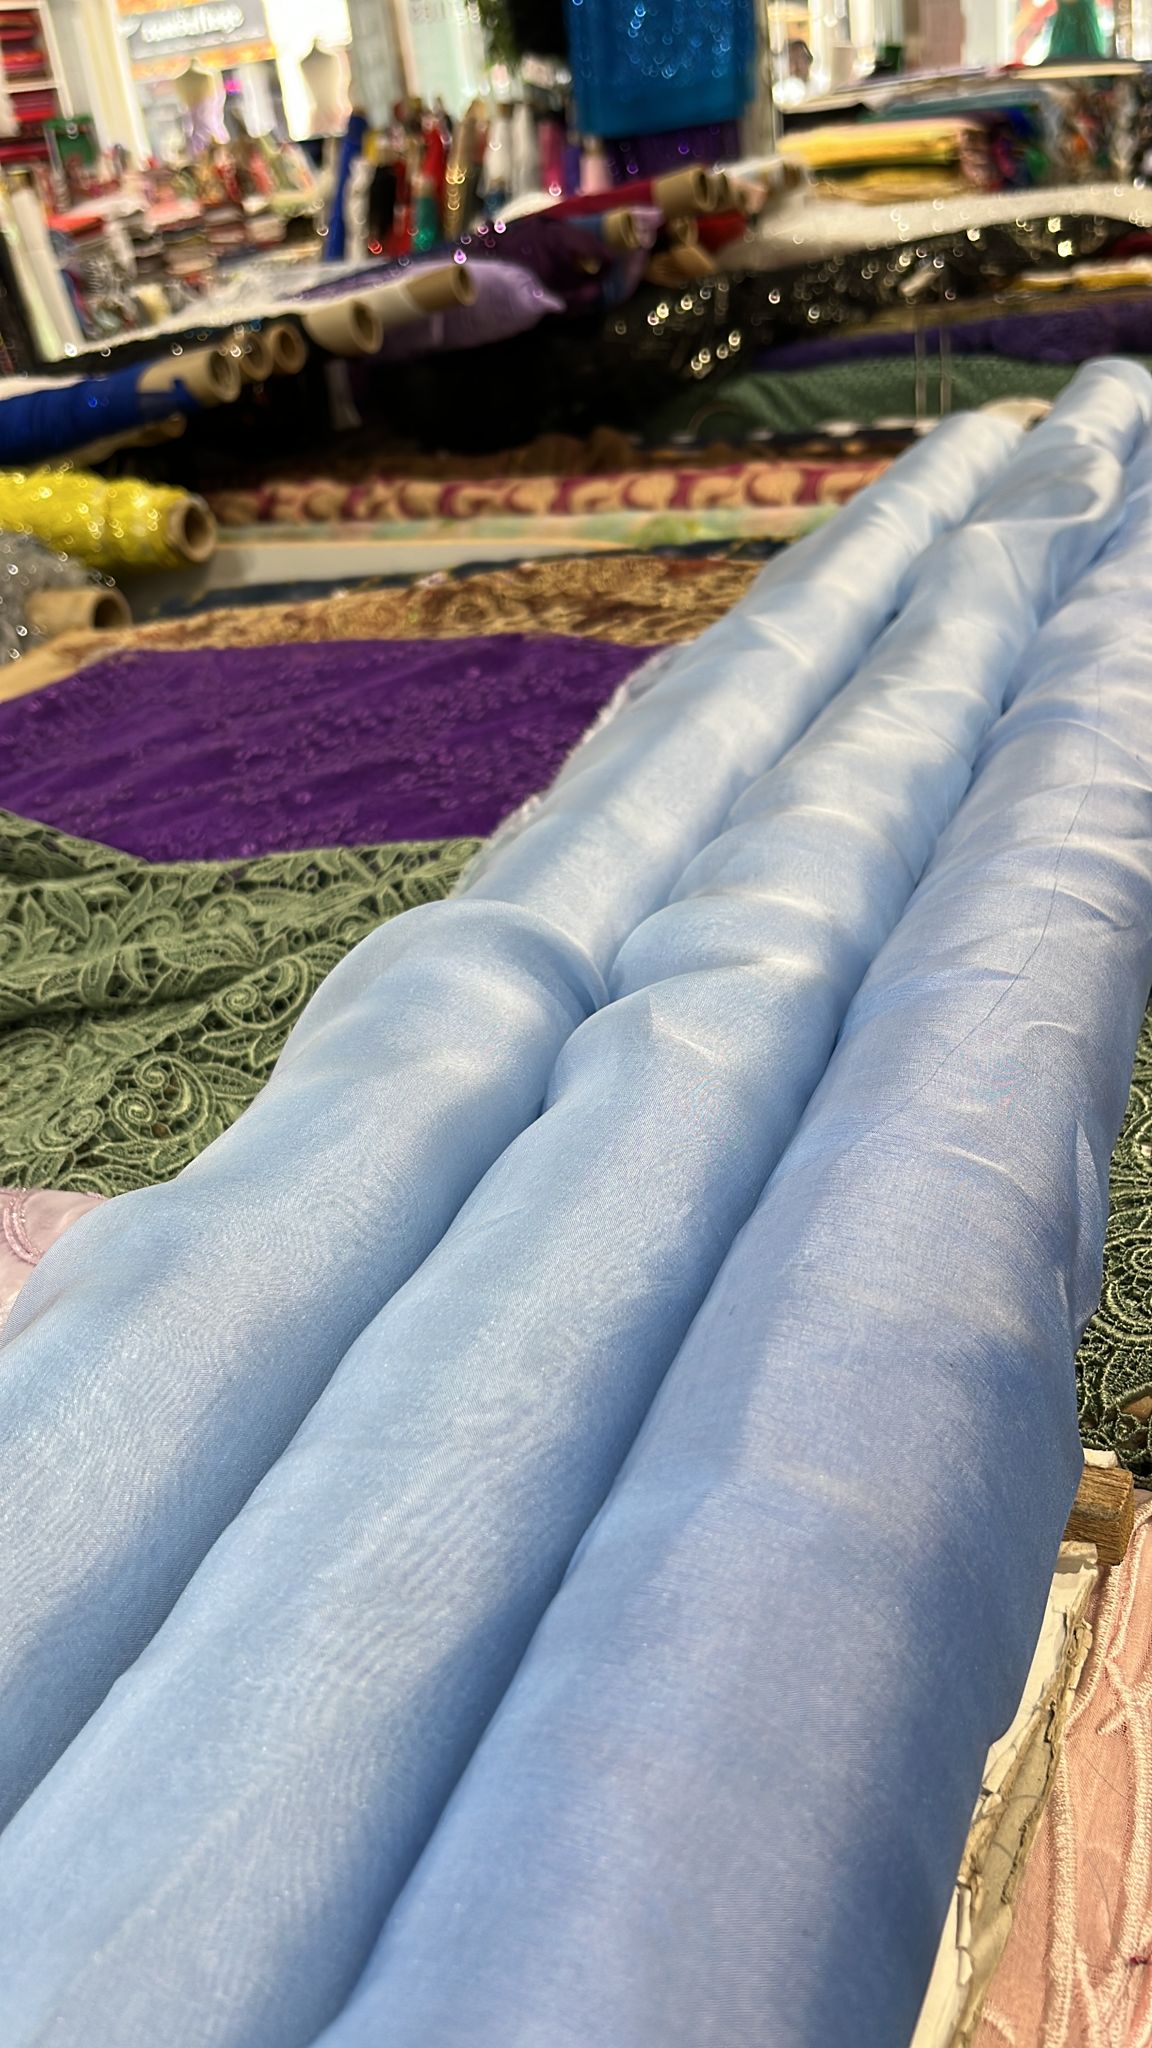
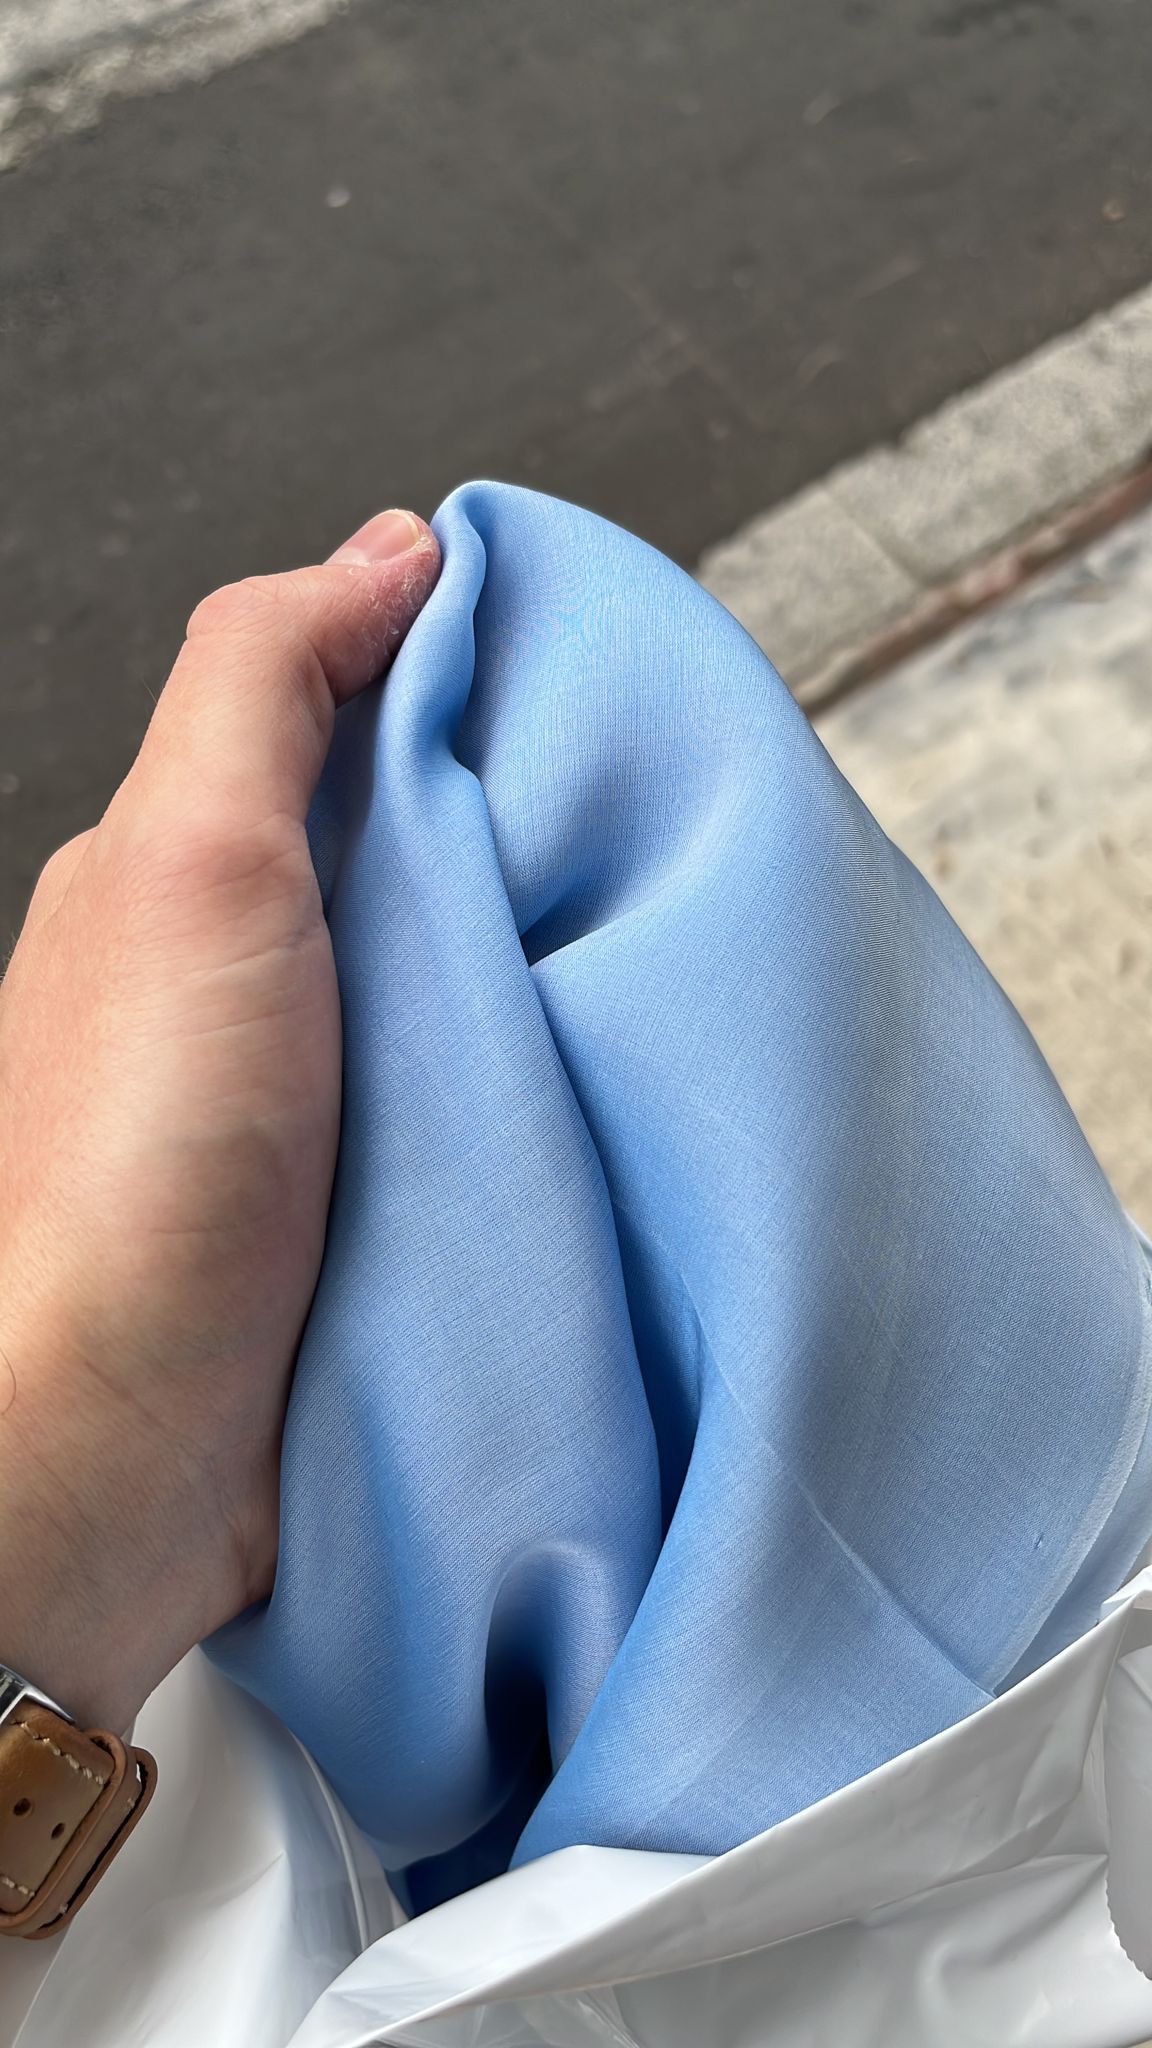
Honestly, he chose the perfect colour and fabric. Am I lucky or what?

Next I had to figure out what type of dress I was going to make – the Burda gown was too complex to do with two layers (and the silk chiffon was much too sheer without a lining). I figured I’d keep it simple – a bodice that I already knew fit me, some flutter sleeves, and a simple gathered skirt with an A-line lining (to reduce bulk at the waist). I wouldn’t have to make a toile and I wouldn’t have to try any fancy new techniques aside from getting used to sewing chiffon (which is rather delicate and sometimes does not appreciate going through the sewing machine – spoiler: sewing the chiffon actually turned out to be the least of my worries).

I really Frankenstein’d the pieces for this dress together. I started with the bodice of McCall’s 8032, which I knew I liked the fit of, and the skirt from Butterick 6138, and by now it’s been long enough that I can’t even remember which sleeves I altered to create the bell/flutter sleeves, but I think they were from the McCall’s 8038. I was going to use the A-line skirt from Gertie’s Ultimate Dress Book for the skirt lining (which I had used previously for a bridesmaid dress – also in light blue – but alas, I grew a bit since then), but once I drafted it to be floor length I saw the huge amount of fabric that it would actually use, and realized it would be way too heavy to wear.

Instead I went with the skirt for McCall’s 8038, which is more fitted and mermaid-skirt-y. This ended up being a good decision, I think.

I got to cutting everything out. I used tissue paper laid out underneath the chiffon to make cutting it out a bit easier. I used nearly every last inch of the chiffon (lengthwise, anyways), and carefully underlined it by hand with the viscose crepe (which I still had plenty of, thinking I was going to use it with the yardage-gobbling Burda dress). This was tricky, as the chiffon bubbled and fluttered with the slightest breeze that hit it.

I finally got to sewing up the bodice and that was when I hit my next road block. I tried on the bodice – and, well, let’s just say that the darts were especially pointy. I was crestfallen. I could not wear such a, erm, pointy dress to a wedding, let alone set foot outside in it. I decided to troubleshoot the dart situation, and found many sewing articles addressing that very issue. I seam ripped the bodice darts several times (not at all an easy thing to do with delicate silk chiffon) and sewed them over and over again. I changed the curve of the dart, how I sewed the tip of it, whether I back stitched or didn’t back stitch or tied knots or didn’t – every time they came out pointy. I figured it boiled down to the bubbly nature of the chiffon and there was no getting around it.

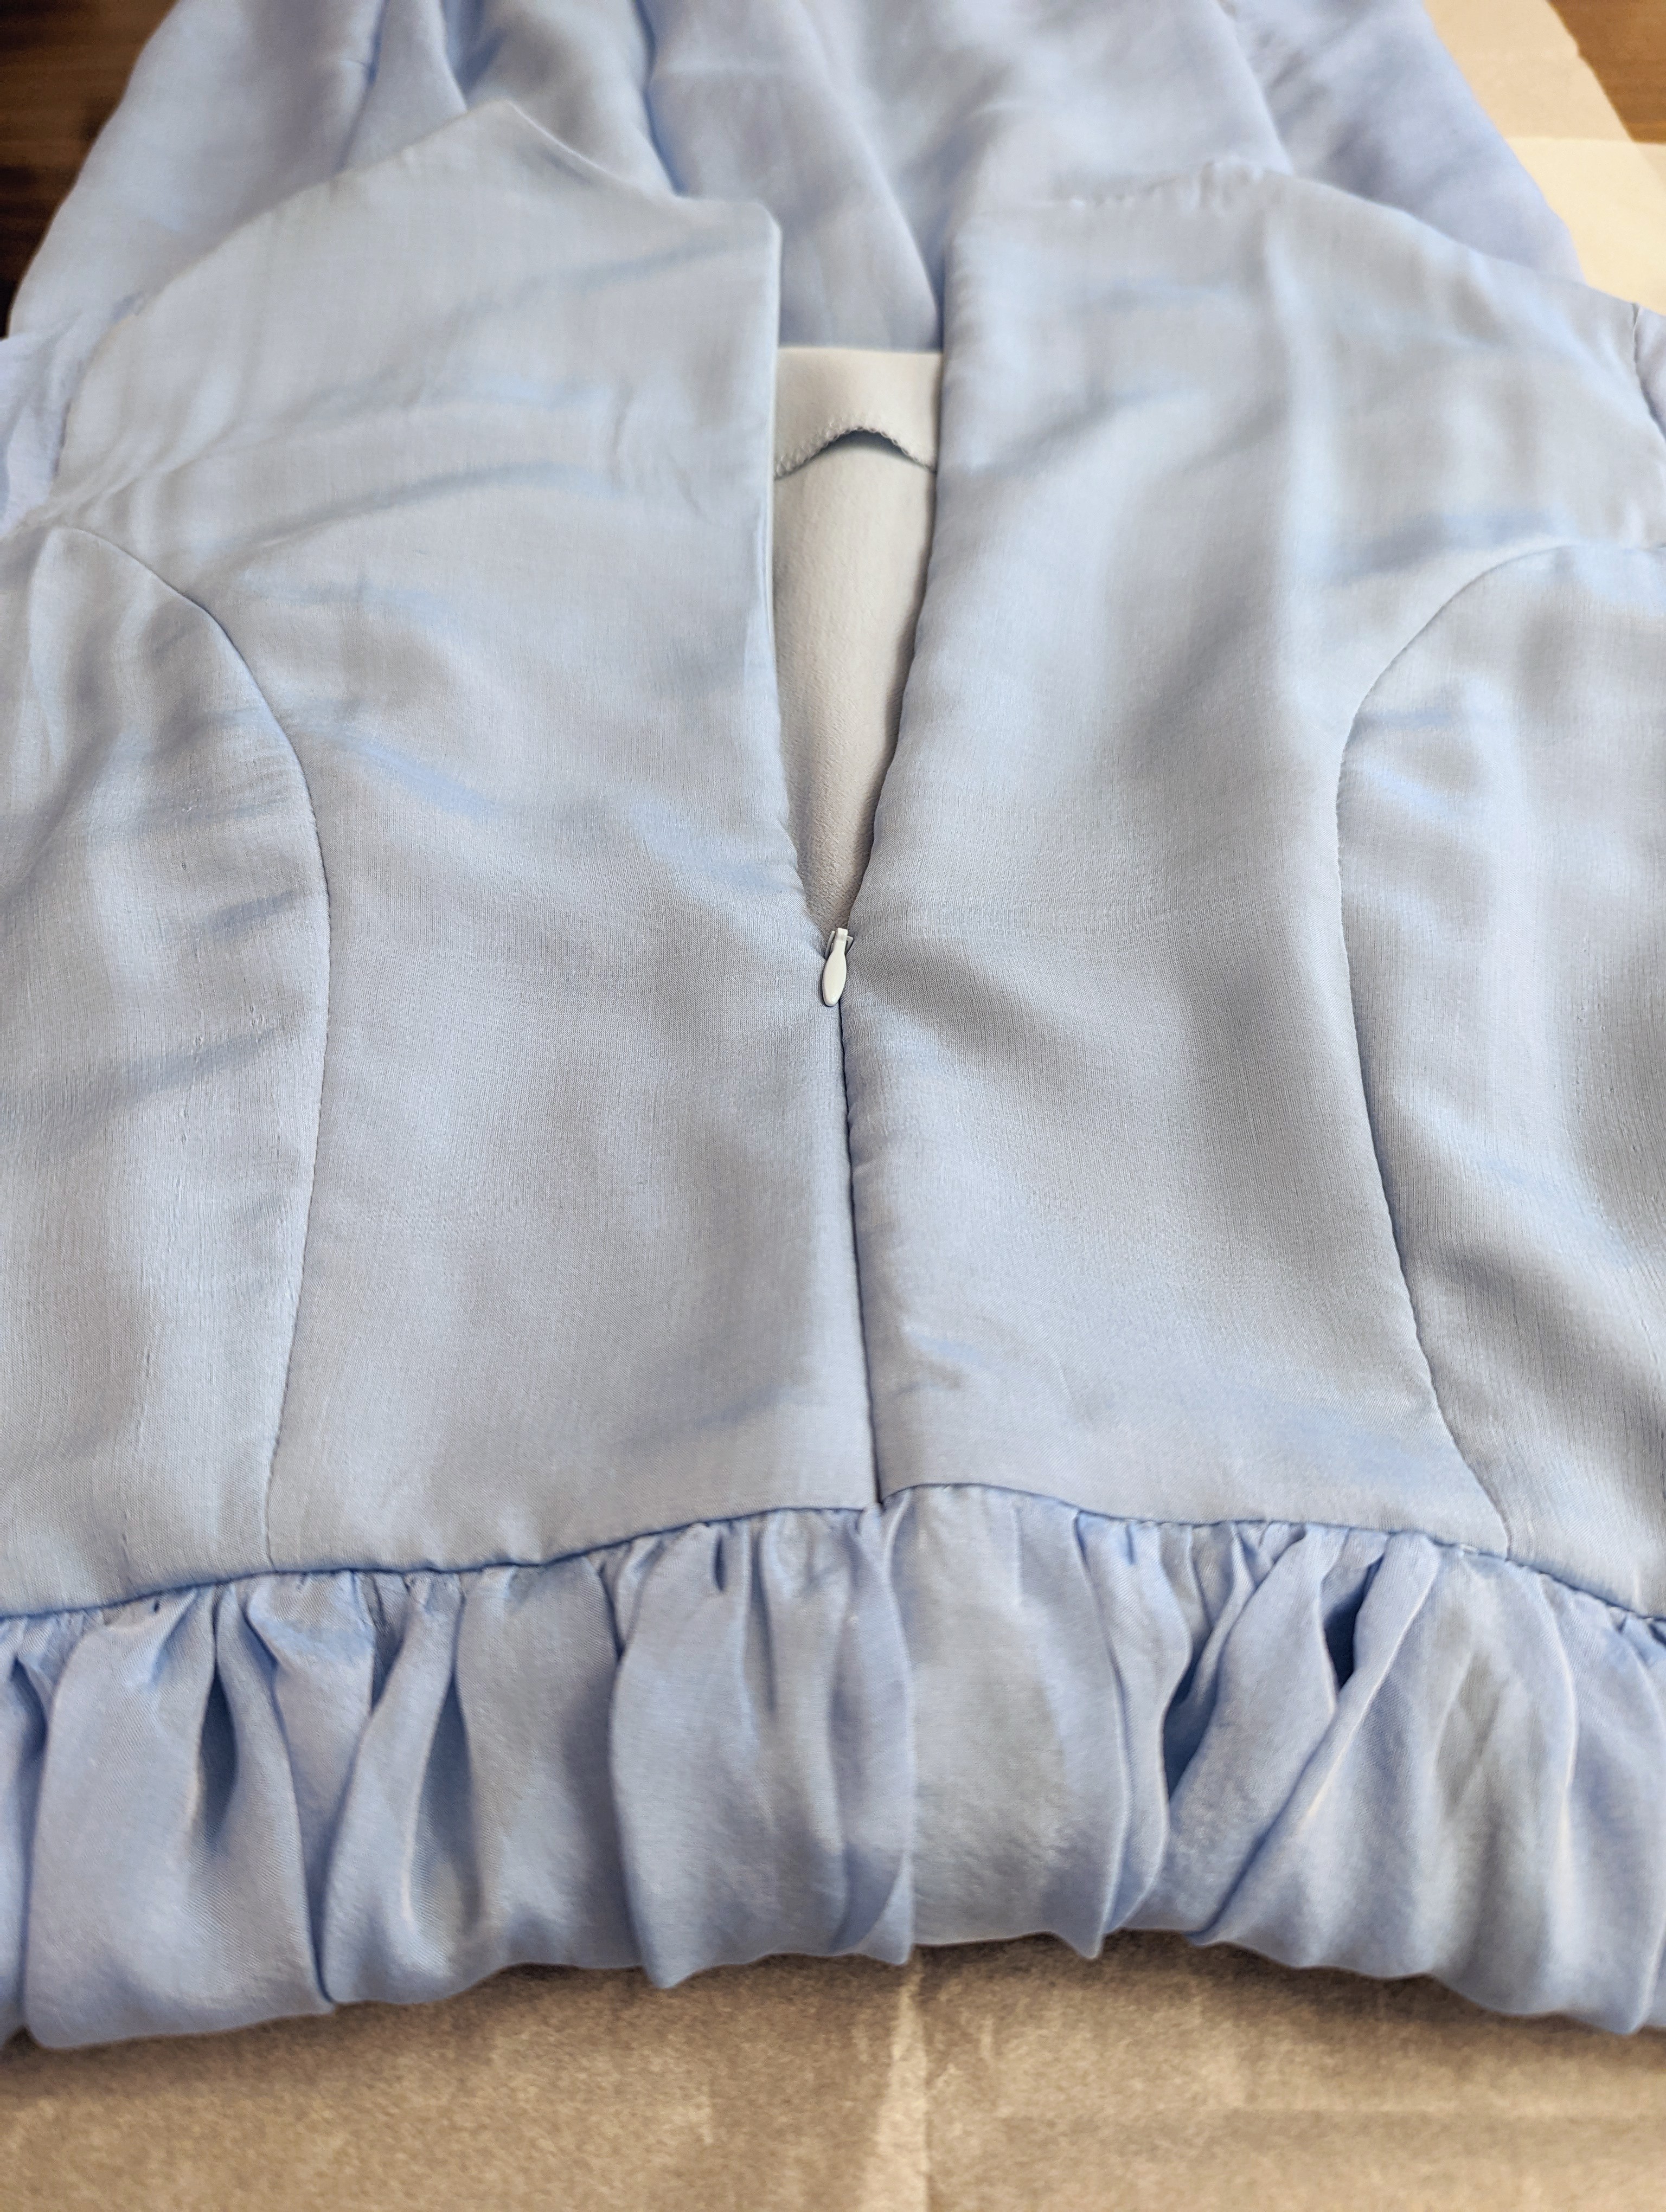
I was pretty much out of fabric. I didn’t have much time left. Starting over wasn’t really much of an option. The stress was really starting to set in. That’s when I decided to pull out the big guns – I was going to convert the bodice to a princess seam bodice. I used the bodice pattern and drafted it into princess seam pattern pieces. I used the existing bodice pieces for the larger centre portions of the princess seam pieces, and I scraped together the smaller side pieces out of the largest scraps I could find left of the silk chiffon.

And by golly! I did it. The princess seams were so much better. Not perfect – no. The chiffon still bubbled in places, and if you look closely, you can see the holes left from seam ripping the darts out. But I felt happy when I put it on, and that was enough.

The skirt was relatively easy after all that. I used French seams for it, so the seams would look nice as they were visible through the sheer fabric. The zipper area was tricky, as it’s hard to install an invisible zipper and also do a French seam. So, I did a sneaky thing and used the pieces of the fabric that were cut on the selvedge (which is already “finished”, technically!) so I wouldn’t have to worry about it finishing that seam.

I made the sleeves out of two layers of the chiffon rather than a layer of chiffon and a layer of viscose for a more ethereal look. I cut one layer shorter than the other so that the layers were apparent. They came out kind of uneven (because that chiffon is just so darn SLIPPERY and shifty) but at that point it was the kind of imperfection I could put up with.

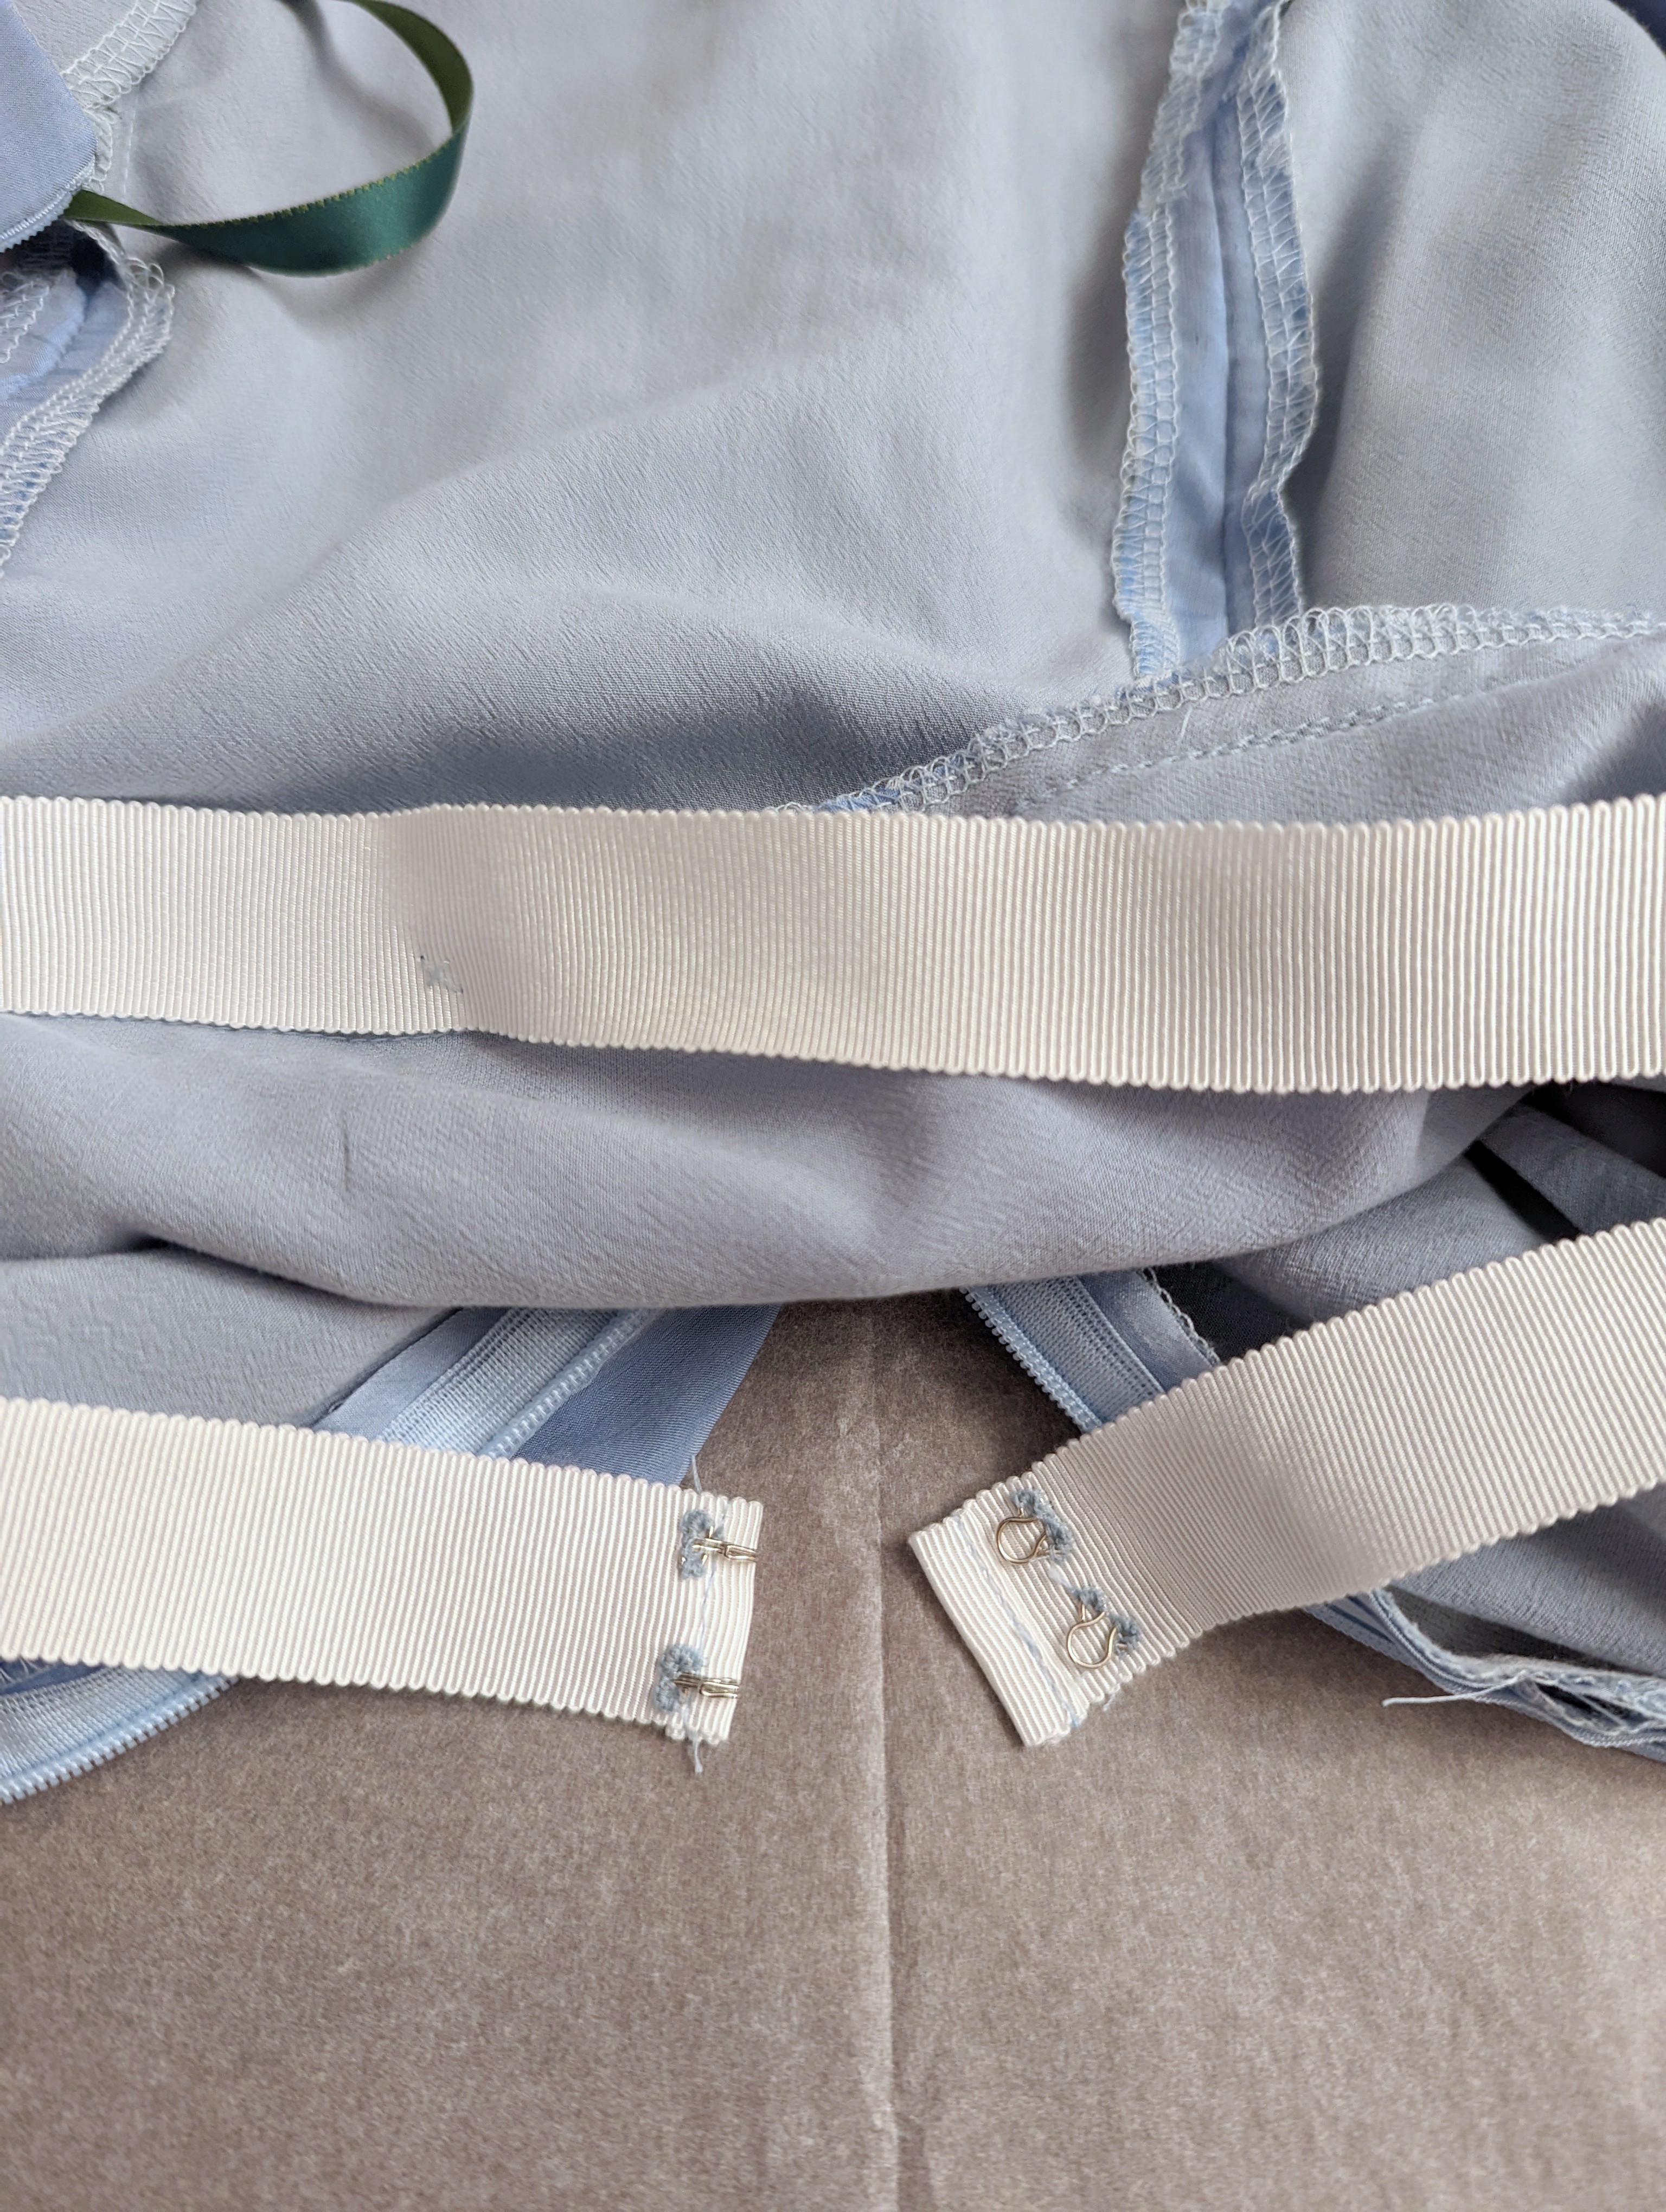
I hemmed the whole thing and inserted a waist stay to help hold up the skirt, which was a little on the heavy side, and it was finally done! I ended up later adding another row of hooks to the waist stay so that I could make it even snugger, allowing for any possible weight fluctuation. I also added some ribbons tacked down at the waist that could go on the hanger to provide a bit of extra support when the dress is hanging in a closet for longer periods of time.

To accessorize, my sister-in-law lent me the perfect silver heels which fit just right, and I had a fascinator from Lilliput Hats which I bought for my sister’s wedding and just happened to be the perfect colour to go with it.

After the long flight and before the wedding, I gave the dress a good press (how lucky was I that the apartment where we were staying had a fresh new iron?) and it was good to go.

Honestly, I was so happy with how it came out in the end. I felt like an absolute princess. The fabric was so wispy and floaty. The fit was elegant but comfortable. After all the stress and worrying, I was so glad with how it turned out. I got lots of compliments throughout the night, and people could hardly believe I had made it myself.

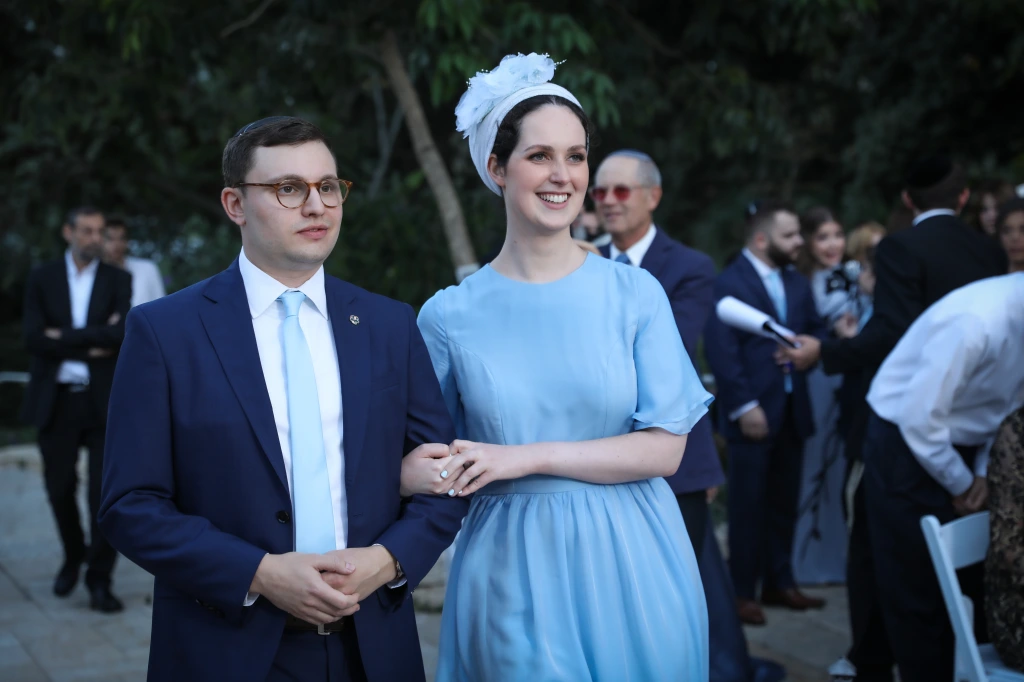
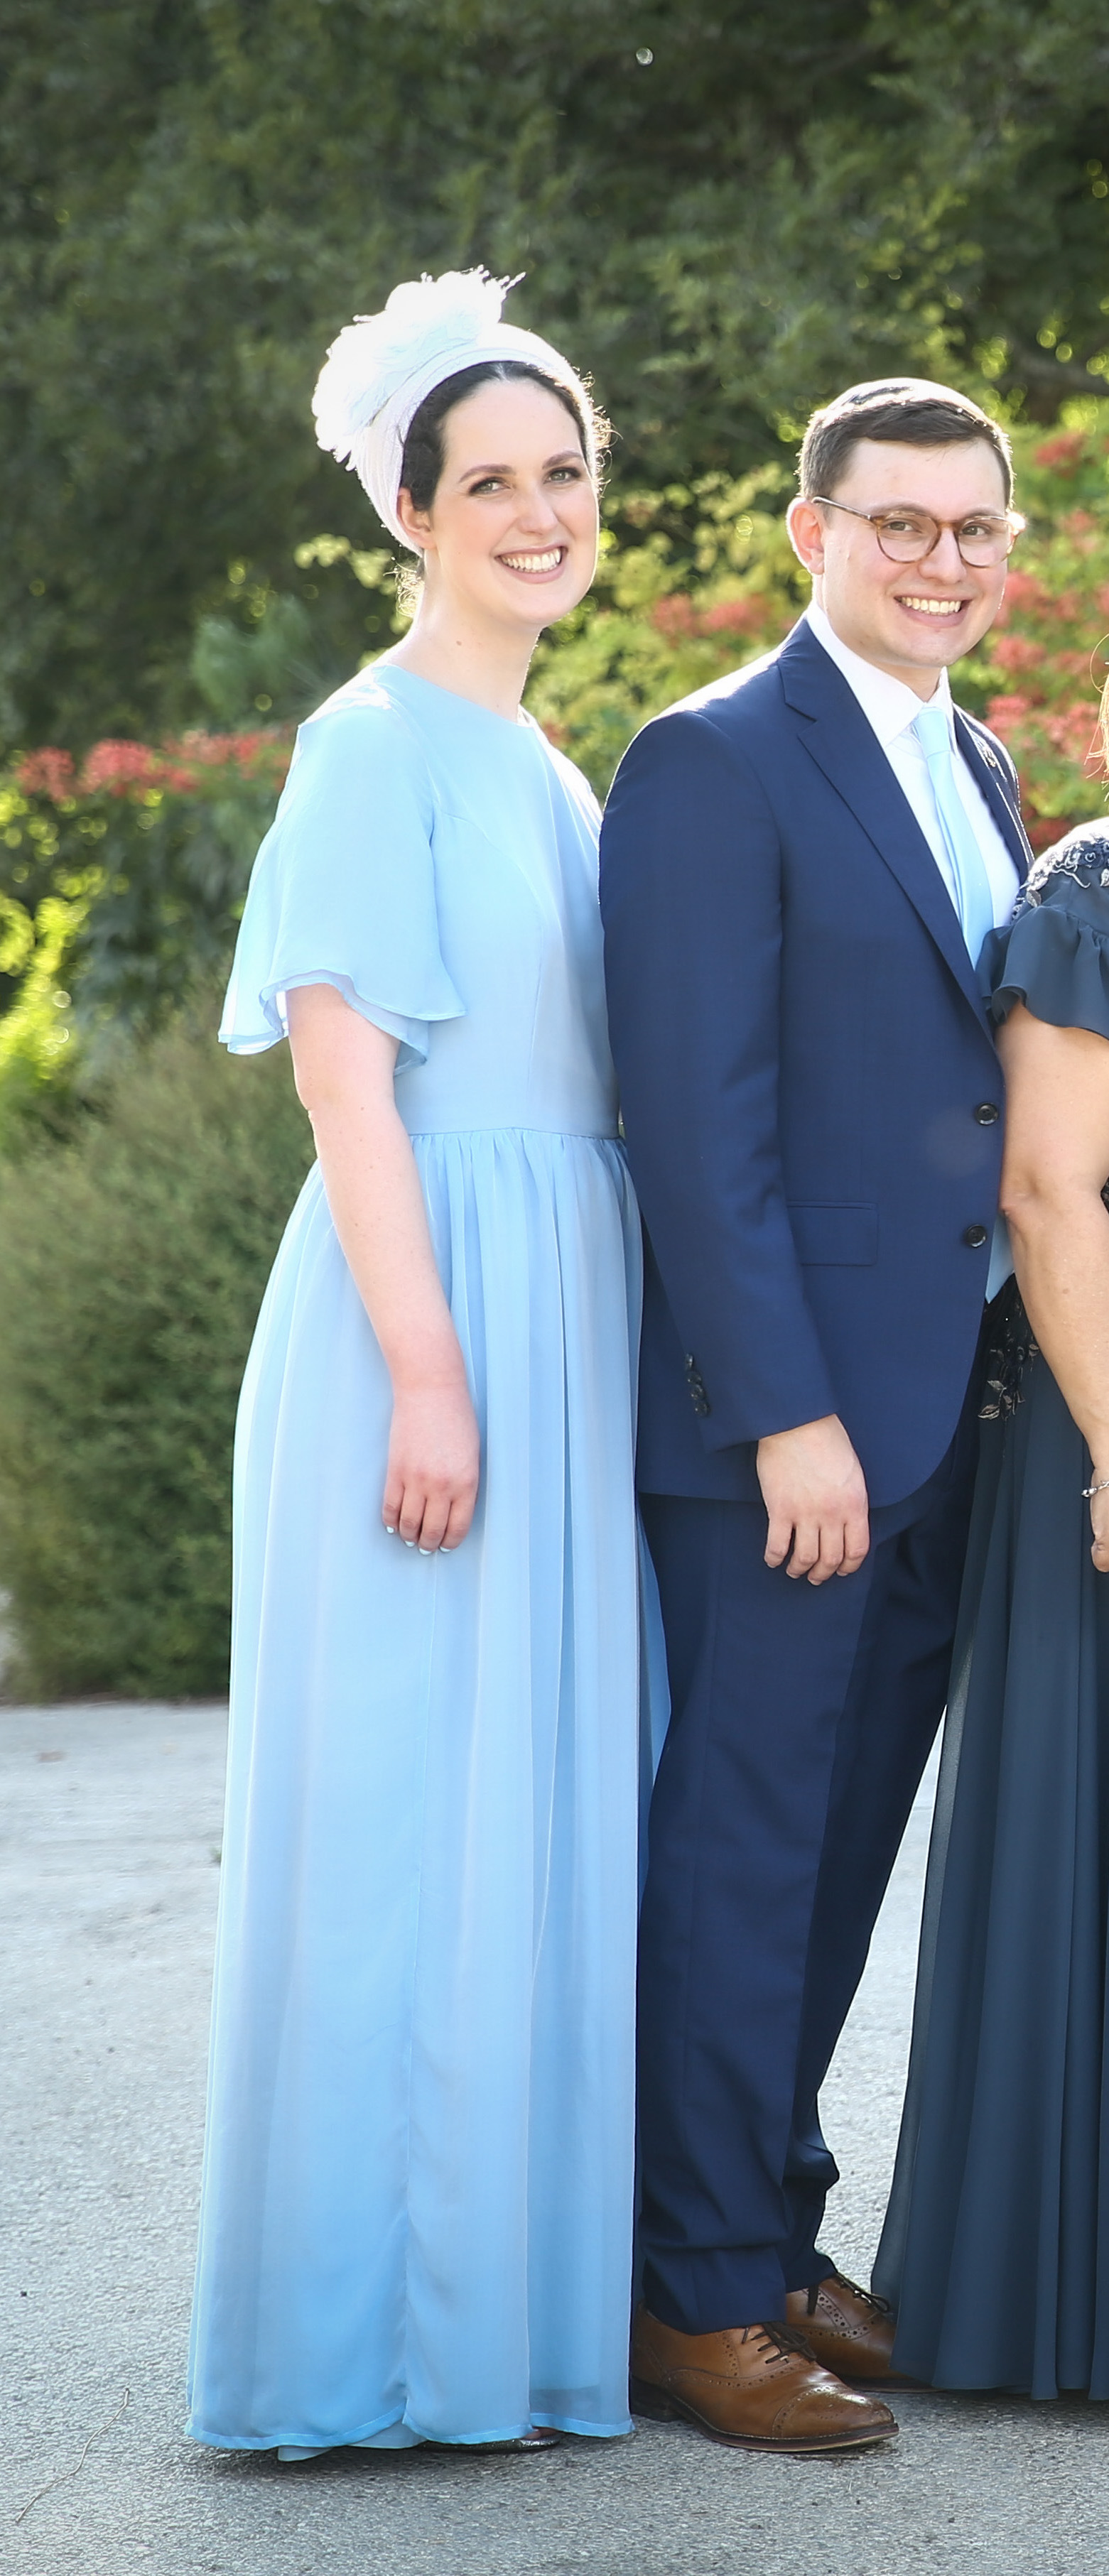
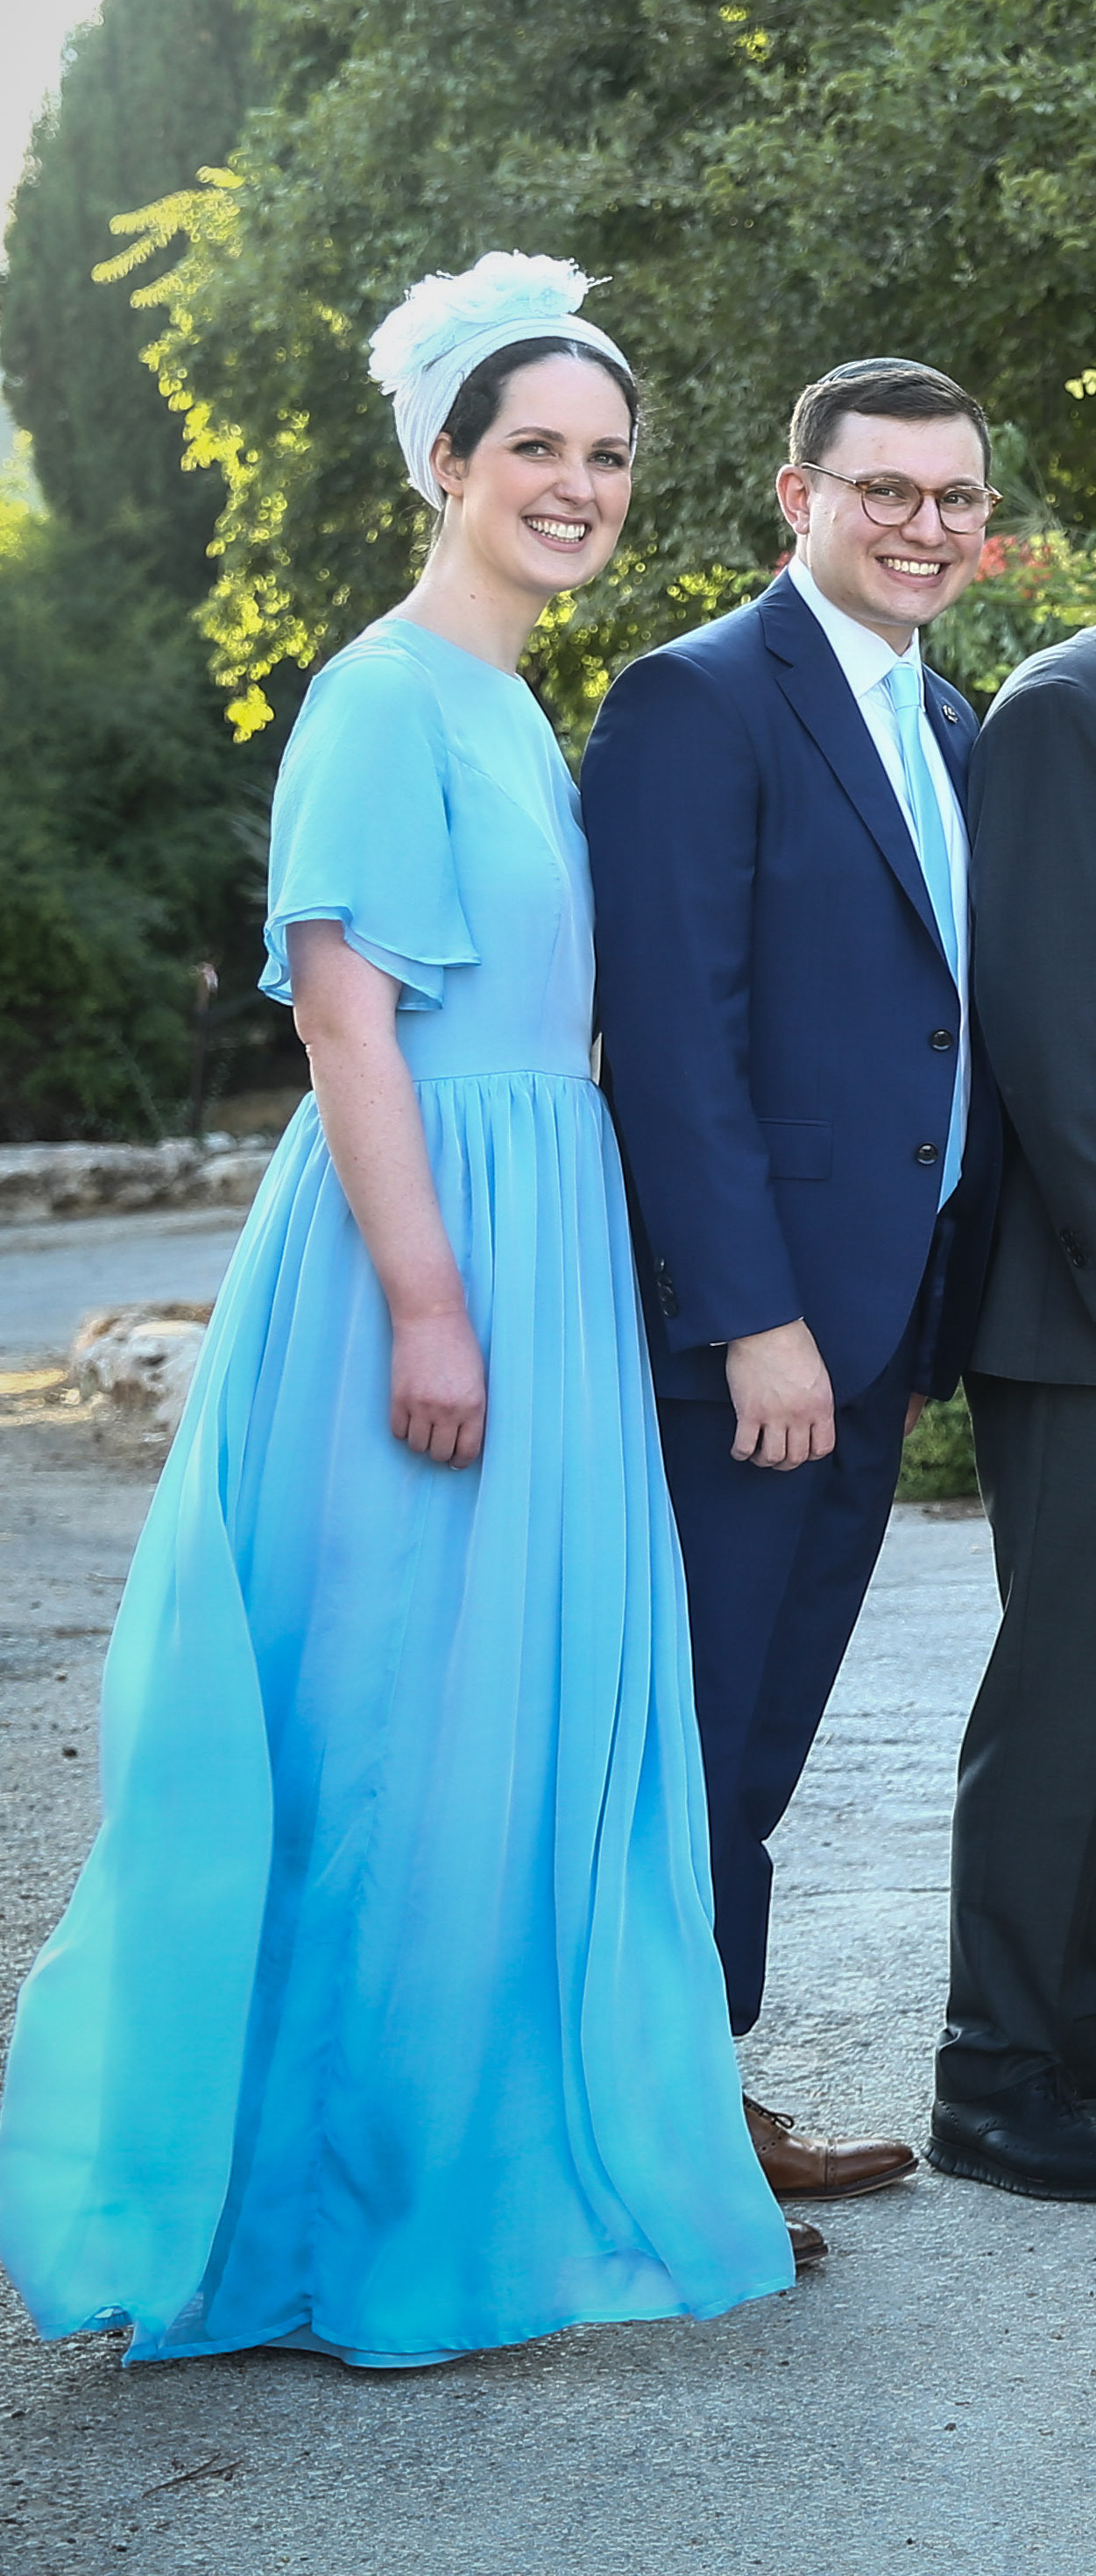
Here are some awkwardly-cropped photos from the photographer since I have no other full-length photos of me in the dress and didn’t want to include other family members without their consent (photo credit goes to Shmuel Diamond Photography). Not sure why I ended up in the same spot in every family photo but okay! I chose the one on the right because I like how you can see the flowy skirt blowing in the wind, hehe.

Anyways, that was a lot of talk about one dress! Honestly it was all a bit stressful getting such a big project done with a time crunch, and during the process it really seemed like all I could think or talk about was this dress (do other sewists experience the same thing? No?). In the end, I’m so glad it worked out and I could float around for the evening in such a special dress 🙂

Thanks for reading the first post I’ve written in a very long time 🙂

Please let me know if you’ve ever made a special garment for a special occasion that wasn’t quite as easy as you thought it would be! Did it all turn out in the end?

Blush Solina Dress and Breaking The Pattern Review

solina4_web

In the late fall, Named Patterns released previews of their book Breaking The Patternand I knew I had to have a copy. The book has ten base patterns with several variations of each, as well as suggestions on how to further change things up using other pattern pieces that come with the book. The styles included have the fresh and modern look that Named is known for. The photos in the book are beautiful and inspiring (though I’m not sure what it is with the trend of holding a leaf while posing these days) and had me flipping through the book over and over again.

When I saw the previews I had my eye on the Ruska Knot Dress, the Solina Dress, and the Saraste shirt dress. I made the Saraste shirt dress a few weeks ago using some Liberty of London cotton lawn, but I didn’t really feel I could pull off the button-up collar look. The pattern was well-drafted though and the dress came out beautifully, but it just wasn’t for me, so I sold it to a friend so it can be worn and loved.

shirtdress3

In sewing the patterns, I felt a bit frustrated by the instructions. Some of the steps had long chunks of text with few diagrams to break them up. A lot of the steps actually just tell you to go to another pattern’s instructions and follow a step there. At one point I actually turned to that step and the step told me to go to a different step for a different pattern. I felt kind of like I was looking at those little doodles in my elementary school textbooks where they told you “Go to page 89!” and when you went to page 89 it said “Go to page 203” and so on and so forth, and in the end it got you nowhere.

Since the instructions seemed kind of vague to me, I felt that a less experienced sewist would struggle constructing the garments from this book. Some parts of the book have actual photos to complete steps that include somewhat crucial sewing skills (like setting in sleeves or installing an invisible zipper) that I feel like someone should know if they’re making these patterns to begin with.

The patterns all come on sheets that need to be traced, since the pattern lines all overlap each other. What really bothered me is that there was no chart or numbers indicating where specific pattern pieces could be found, and the sheets weren’t all organized by pattern. So in order to find a piece I needed to trace, I needed to go through all the pattern sheets and open them up and flip them over until I found it.

Anyways, I would still recommend this book because the patterns in it are gorgeous and very well drafted (I sewed both the Saraste and Solina dresses without any changes to the pattern). Named patterns are often quite pricey (and don’t always come with several variations), so to get 10 (not including several variations) for the price of the book is pretty good bang for your buck.

Shortly after finishing and sending away my sort-of failed Saraste dress, I traced out the pieces for the Solina dress. It looks pretty complex with all its ties and interesting pleats, but I actually found it really quick to put together.

The pattern doesn’t have a lining and I can’t really picture how I could add one without needing tons of fabric (since there is no waist seam I can’t think of a way to only line part of it). This made it really quick but also the fabric I bought is slightly translucent so I’ll need some sort of slip or nude undergarments. I have no regrets about my fabric choice, though, because the tencel twill I bought from Matchpoint Fabric is deliciously buttery and soft, and I love the drape of it much more than the heavier tencel twill I usually buy elsewhere.

solina1_web

I was concerned throughout the project that the dress would be too long and would maybe look like a bathrobe? But once I had the waist ties sewn in I tried it on and loved how it looked. Fortunately I have long legs so the length doesn’t look awkward (the patterns are drafted for a 5’8″ woman) and I can picture it looking really cute with sandals in the warmer months.

I would also note that the sleeve ties are a touch long, and if you don’t wind them around your wrist twice you’ll have long lengths of ties dangling about. If I make this pattern again with the ties I would probably shorten them. To begin with having them there will be a bit impractical.

solina2_web
I give the “holding-a-leaf-except-it’s-a-flower” thing a try. I think I get the appeal!

I’ll be honest, I don’t really know when I’ll wear this dress. It’s quite the statement piece. I have a lot more fun making statement pieces though, so I don’t really mind. I’ve already been thinking about making more of these, but maybe with short sleeves and a skirt that ends at the knee for something more summer-appropriate and casual. It’s the kind of dress that you can really change up based on skirt and sleeve length and fabric choice.

Have you bought a copy of Breaking the Pattern? What patterns are you planning to try?


The Sew Frosting Challenge: Self-Drafted Satin Dress

satindress1web

This is a special dress.

When I saw the floral satin for sale on the Club Tissus website, I knew I had to have it. I generally hate polyester, and I’ve never worked with satin. I was so in love with the print, though, that I ordered almost 5 yards of it and decided that I would make something incredibly special for the Sew Frosting Challenge happening on Instagram. I went on about the challenge and its merits in my vintage coat post a few weeks back, but I didn’t make that coat specifically for the challenge, and I wanted to take the challenge as an opportunity to go out of my comfort zone and make something I wouldn’t normally make.

I knew exactly what dress I wanted to make from it – the Cassie dress from Wear Lemonade. Wear Lemonade makes beautiful sewing patterns that I am really hoping to try some day, and they also make some beautiful ready-to-wear garments. I was kind of sad that the Cassie dress didn’t have a pattern, and the ready-made dress is very much out of my budget. So I guess I had no choice but to make it myself!

I dug out the sloper that I very meticulously made in fourth-year university, when I drafted and embroidered a dress from scratch for my thesis. I don’t know why I haven’t used my sloper since then – it’s a basic block that I perfectly tailored to fit me! It was so easy to use it to make a bodice that would fit me exactly how I wanted. All I had to do was follow the instructions in my copy of Patternmaking for Fashion Design, and it was done! I had put aside a whole day for it and it took me about half an hour. I made a blouson bodice, which basically just has some extra ease in the waist that gets gathered into a waistband. I also made a boat-neckline, and drafted bishop sleeves and a cuff.

To support the very drapey (and static-y) poly satin, I underlined the bodice pieces with a lightweight cotton/silk fabric I had in my collection of lining fabrics. I left the rest of the dress unlined because I didn’t want it to feel weighed down.

The skirt was a very exciting and new process that I tried – professional pleating! There is so little information about profession pleating out there! I consider myself a research fiend, and I spent a few days figuring out how to prepare my fabric for pleating. I knew the fabric had to be polyester, and thanks to a new friend of mine from the Toronto sewing community, I found a place nearby called Sterling Button that has an in-house pleating service. I never would have found it if not for the Toronto Sewcialists Facebook group – Sterling Button doesn’t have a website and nowhere online does it say they do pleating!

satindresscloseupweb

From what I found, hemming pleated fabric is tricky. If you turn up already-pleated fabric, the pleats head in the opposite direction and don’t fold up neatly. If you machine-hem the fabric before pleating, you might shift the grain of the fabric and the pleats will come out wonky. I didn’t know what I should do.

Then I turned to my trusty Kindle copy of Claire Shaeffer’s Fabric Sewing Guide. That book is like the bible of how to sew with every fabric, and in the “special occasion fabric” section, she tells you that hemming should be done before having your fabric professionally pleated. Thank goodness for Claire Shaeffer!

Still, I didn’t want to serge the bottom and throw off the grain, so I hemmed the selvedge edge which I knew wouldn’t need finishing, and I stitched the whole thing by hand. I threw in 5 extra inches of width to the rectangle, just in case. I must’ve done my calculations wrong, though, because 2 days and $25 later, the pleated fabric came back about 3 inches too narrow (albeit beautifully pleated)!

I panicked for a few minutes, and then I decided to slightly ease each pleat apart until the width of the skirt matched my waistband. It worked! I was so pleased. I wasn’t able to match up the pleat folds by the zipper, but it was more important to me that the skirt fit around my body.

After stitching the skirt to the bodice waistband, I basted a grosgrain ribbon into the waistband for added support (I don’t want the waistband to go slouchy with time). I enclosed it with a waistband facing so the inside looks nice and neat.

To insert the zipper, I used pick stitches sewn by hand, since I had carefully matched the floral pattern on the back pieces and I didn’t want to mess it up by sewing it on the machine.

Really, the whole thing wasn’t too tricky a process, but with all the outsourcing and hand-stitching, it took me more than a week to complete this dress. I really enjoyed the creative process of drafting and took a lot of pleasure in all the hand-stitched touches. I also cannot get over the sleeve cuffs and the beautiful pearly shank buttons that Jenny at Sterling Button helped me choose. They just look so elegant!

satindress3web

I don’t know when I’ll get to wear this very special dress – I’m already waiting for the perfect special occasion to wear it! Still, the #sewfrosting challenge isn’t about practicality – it’s about making something extravagant just for the sake of it. I think this dress fits the bill.

Hinterland Sew-Off and Pattern Review

Hinterland2a

Several weeks ago, when Tori of The Doing Things Blog and Sara of The Sara Project announced the Hinterland Sew-Off, honestly, I wasn’t super-pumped. I was feeling kind of overwhelmed by the projects I had lined up for the fall, and wasn’t interested in buying any new patterns. They were hosting a giveaway of the pattern (by Sew Liberated) on Instagram, so I entered, because I thought it was a pattern I would want to make at some point in time.

I forgot about the sew-off, until I won the pattern giveaway (yay!). Still, I didn’t think I’d get to be a part of the Instagram challenge, as the pattern was being mailed to me from the States and I didn’t expect it to arrive with enough time for me to meet the challenge deadline. Spoiler: It did. It arrived by courier 4 days before the challenge was scheduled to end.

Once I had that pattern in my hands, I knew I had to make one.

I am not exaggerating here – I got started immediately. Within 6 hours of opening the package, I had the fabric cut out and ready to go (luckily I had this lovely Cotton+Steel rayon in my stash already washed and it just needed a quick press). I didn’t even bother with a muslin – I did a hasty tissue fit to make sure everything seemed to be in order and moved right along.

I made a few changes to the pattern that used up more fabric than I would have normally used. It was actually very satisfying to see a small pile of cut bits remain after moving away all the pattern pieces. It was tight, fitting it all in to 3.5 yards of 44″-wide rayon. I opted for a facing rather than a bias-bound neckline, and even squeezing that out was tight. But I did it.

I followed Sara’s instructions for hacking the sleeve to make a bishop-style sleeve, but I reduced the fullness quite a bit. I wanted more of a subtle “poof” in the sleeve, since my fabric already has quite a detailed pattern. As Sara did, I also raised the neckline (by 2″) and made the bodice without a button placket. In an effort to copy the style of a RTW dress I own and love, I added a 1″ waistband along the bottom of the bodice – I sewed the waist ties into the waistband, rather than into the main bodice pieces.

Hinterland4a

I was a little concerned when I tried on the bodice (I like to try on after every step of sewing – I’m impatient to see how it’ll look before it’s finished) – the darts didn’t look right at all. I hoped the fabric print would hide it and I could still get away with wearing it. Once the skirt was sewn on, it added some weight to the dress and the darts “grew” – and they ended up looking fantastic! I do think that if I make this dress again in something stiffer like a cotton (which I already have in mind), I would have to do some sort of bust dart adjustment. Also, like some people commented on Instagram, this dress needs a major forward-shoulder adjustment for me. This is a change I always need with Big Four patterns and only with some indie patterns, so when I sew indie patterns I always wrongly assume this isn’t a change I always need to make. So next time, I definitely need to make that fix.

I honestly didn’t have high expectations for this dress. I always feel unsure about boxier dresses, and even though the Hinterland looks great on so many other sewists on Instagram, I wasn’t sure it would suit me. Once I added those waist ties and cinched everything in the back – I was in love. The bishop sleeves were the clincher for me. I am crazy about this dress. I stared at it and stared at it when I finished it.

I love how many variations of this dress can be made and the hacking possibilities it has (I’ve already considered trying a version with a gathered waist or elastic-cinched waist). I would love to make one with a button-placket when summer rolls around again. Once I get the right alterations down, oh baby, the possibilities are endless!

Vintage Patterns: Butterick 6796

HouseDress1web

Every once in a while, I like to treat myself to vintage patterns from Etsy. I bought a couple from SewUniqueClassique a few months ago, but as is usually the case when I buy vintage patterns, I don’t have something specific in mind to make. I’m always tempted by the envelope illustrations, but I try to look past them for something I might actually make or wear, and for something that’s a bit more unique than the standard darted bodice with a gathered rectangle skirt.

Vintage 1953 Butterick 6796 Sewing Pattern Misses' One-Piece Dress - Wide V-Neckline Size 14 Bust 32

Butterick 6796 is one of those patterns. It looks relatively simple, but I loved the charming, vintage vibe it has. (I was also really pulled in by that lace version. One day.) Also, any vintage pattern I find needs to have a neckline I’m comfortable with (or seems easily adjustable), and sleeves that cover the upper arms. This pattern fit the bill.

When I was at Fancy Tiger Crafts in Denver, Colorado, I picked up the last of an incredible charming Japanese cotton lawn with little houses on it. Thinking of many vintage dresses with novelty patterns, I thought the cotton lawn would be a perfect match. The pattern is cut on the bias, and I thought the horizontal print would emphasize the bias cut nicely.

When you’re sewing a vintage pattern a muslin is pretty important – especially since my Japanese fabric was expensive, and, thanks to yours truly, sold out. I bounced back and forth between two muslins. I tried the pattern with no adjustments other than making the waist a bit bigger – even though the pattern is a size 32 (in vintage patterns, a 34 usually works perfectly for me), as when I measured the pattern piece, there seemed to be plenty of ease. So I kept the bust as-is. I raised the neckline just a bit and added a fifth button. The original pattern had a huge pleated circle skirt, and since I didn’t have loads of fabric for that, I decided to sew together a few a-line skirt pieces and gather them.

As is pretty standard with vintage patterns, the bust dart was high and pointy. When I tried lowering it, it just lowered the pointiness (not a charming look). So I decided to try using my Butterick 6318 (a vintage repro that I’ve made before), and I had the same issue, plus it was much less fitted than the original. I realized that perhaps since the fabric was cut on the bias, the dart was just coming out more pointy. I went back to the original muslin, lowered the dart, and decided to work out a solution on the real deal.

To try and “soften” the dart, I underlined the bodice with a white silk/cotton blend fabric, and then stitched the bust darts by hand. I figured the machine was stretching out the already-stretchy bias fabric, and was making the darts pointier. It was a nice little “slow sewing” project. I also used basting stitches to mark in all the other darts (two back darts, and three by each elbow – a vintage touch I really love).

I liked working on this dress because the construction was a bit different than I’m used to (which is why I usually like vintage patterns). The v-neckline is self-faced, and it all came together very neatly. It was supposed to have a side zipper, but I really hate side zippers, so I put a 14-inch zipper in the center back (I didn’t want a zipper at the top of the back ruining that lovely V shape). I sewed binding onto the sleeve hems before folding them in and hemmed them by hand. The sleeves are kimono sleeves, so I also like to stitch a small piece of seam binding along the curve for extra reinforcement. I also stitched binding along the waist seam as a sort of waist stay.

The short-sleeve version of the pattern is supposed to have bias-bound edges (around the neck and button placket edges), and I specifically hunted down some mango-coloured Robert Kaufman cotton lawn for the purpose. It was supposed to bring out the pink-y coloured houses in the fabric print, but when I sewed it on I realized it was a touch too orange. I tore it out and topstitched according to the long-sleeve version’s instructions instead.

I really didn’t feel like setting up my sewing machine for the buttonholes, so I followed the instructions that came with the pattern and sewed all five by hand (yes, my laziness has no logic). I flipped back and forth about which buttons to use (I’ve never sewn buttons on one of my own garments. Fun fact: I had a phobia of buttons when I was 5. I cried when I learned my school uniform would have buttons). I wanted to cover my own buttons, but I couldn’t find the right size button kit online, and when I tried a (non-matching) fabric-covered button from my stash, I really struggled to get it through the buttonhole. I had some vintage buttons from a Fibre Share package, and those worked perfectly.

HouseDress3web

Like many vintage dresses I’ve sewn, this dress is tough to get on and off (I have very prominent shoulder blades and it makes it hard to get the dress past my shoulders). Wearing it makes me feel very 50s house-wifey (especially if I have my crinoline on), but the fabric isn’t too retro-looking for real life and it makes a pretty spiffy semi-casual-dressy dress (does that make sense? No?). I’m not sure the skirt I made up really works for it – a plain ol’ gathered rectangle would probably work better. I do have some real vintage fabric that I think would be perfect for the dress – so I would like to make it again. It’s a light, yellow floral fabric, so it’ll have to wait for the spring. Oh, and I’ll have to make that lace version too…

Vintage Patterns: McCall’s 5142

McCalls5142d

love vintage patterns. I have been obsessed with 50s silhouettes since I was a teenager, and when I discovered vintage paper patterns, I couldn’t get enough.

I find that if I follow my high bust measurement and add a bit to the waist, vintage patterns usually fit me to a T. I also love that you can find patterns with special details that you don’t always find in today’s patterns. I tend not to shop (modern) Big Four (Simplicity, McCall’s, Vogue, Butterick) because the huge selection overwhelms me, and they can be expensive in Canada if they’re not on sale. I love Indie patterns, but lately they have been trending towards more relaxed looks. Vintage patterns really hit that fitted and feminine sweet spot for me, and, if you do it right, vintage patterns don’t have to make you look like you stepped out of a pin-up (if that’s not what you’re into) – Allie J. does a great job making vintage patterns look fresh and modern.

Anyways, sometimes I get sucked down a vintage pattern rabbit hole, and last summer I spent FIVE HOURS one day searching for the perfect pattern. I found McCall’s 5142 for sale on Etsy in the LastPixie’s shop, and I fell in love with it. I hadn’t seen a similar dress anywhere else, it was in my size, it had a sleeve length that I loved…but it was a bit pricey, once shipping from the States was included. I tried looking and looking for a pattern that I would love just as much, or another seller that had the same pattern (I found another, not on Etsy, selling it for 50 USD). I couldn’t. Somehow, though, I managed to convince Eitan to let me order it.

A few weeks later, it was mine.

I made some adjustments to get the fit just right, but I needed to find the perfect fabric. I was really in love with the envelope illustrations (I mean, isn’t that half the reason we buy vintage patterns?), and I spent a long time looking for just the right print. I needed a crisp cotton, and it needed a little more heft than cotton lawn. Also, the print needed to have a vintage floral vibe, and finding cottons (non-quilting cottons) with lovely prints on them in general is tough.

McCalls5142b

I finally found the perfect fabric on Minerva Crafts (uch, why does the UK have such a good selection of fabrics to shop from!) and once my birthday rolled around, I had the casheesh to order it. It is lovely – soft, slightly crisp, opaque, and with a vibrant floral print.

The dress pattern didn’t require lining, and while I almost always line my dresses, I felt that lining this one would add unnecessary bulk in the bodice. Instead, I followed the directions pretty faithfully. People often say about vintage patterns that they have very few instructions, which makes them difficult for beginners to sew. I’ve actually found that, at least with patterns from the late 50s onwards, they have really detailed, helpful instructions.

Without the lining, I felt the seams needed some extra protection. The instructions tell you to stitch some seam binding along the clipped seam of the kimono sleeve, just under the armpit. I actually carefully basted the binding along the entire seam (sleeve hem to waist), and neatly topstitched close to the seam on both sides. It doesn’t look that great on the inside, since I used purple bias binding (I wanted to use what I already had, and it happened to be vintage bias binding).

McCalls5142c

The only part of the instructions I didn’t follow was the zipper placement, which places the zipper at the middle of the back, with the back seam near the neck closed. I was skeptical that I would actually be able to get the dress on if I did it that way, so I sewed a handpicked zipper (one of my favourite vintage sewing techniques) the “normal” way instead. I also pattern matched the seams in the back, which wasn’t too tricky because the print is on the bigger side.

I finished the all the seams with pinking shears, again because it has a bit more of a vintage look. I hemmed the skirt using a folded hem and took a few hours to stitch it by hand.

McCalls5142a

Since it wasn’t lined, apart from sewing the hem by hand, it actually didn’t take me very long to finish this dress! I love putting it on with a crinoline underneath and some red lipstick and high heels. I just wish I had some white gloves to complete the look!

Elisalex + Emery

LibertyElisalex3_Web

Pattern: By Hand London Elisalex + Christine Haynes Emery

Fabric: Liberty of London Tana Lawn

I generally try not to rush my sewing, and I find that when I give myself deadlines of any kind I have a lot of trouble getting through a project stress-free.

I made this dress in the midst of a very busy time – Passover cleaning. It was my first time cleaning our apartment for Passover (usually we go to family for the entire eight days), so it was extra stressful. Still, I was convinced that I had to finish sewing the Kelly Anorak I had been working on (more on that in the next post!) – and, miraculously, it was finished just within a week of starting it. And, of course, I cannot be without a project, so as soon as I finished my Kelly, I got started cutting out the next piece of fabric in my stash.

Of course, in order to avoid deadline stress, I told myself I was just trying to make progress, and not to expect to finish anything before the holiday (as you’re supposed to avoid doing any “handiwork” during Passover). I do hate starting things and leaving them unfinished for a long period of time, but I told myself that I would rather get something done rather than leave it.

And, well, by Friday (the first night of Passover), I had finished all of the dress except for the zipper, facing, and hem. At that point I had to finish it! So I spent the entire day sewing away (at a surprisingly calm pace), until I finished the dress a mere three hours before the start of the holiday. Isn’t it nice when things work out that way?

This Liberty Tana Lawn was actually not intended to be a dress. At Liberty’s, I wanted to buy two different fabrics, but it was too expensive to get 3 yards of each (3 yards is my standard yardage for sewing dresses) – so I bought two yards of one, thinking I would finally sew my first blouse out of it.

Well, once I laid the fabric out on my dining table and played around with my pattern pieces, I discovered that I could actually squeeze a dress out of it (will I ever make a top??). I combined the Elisalex bodice with the Emery skirt, since I know both those patterns work well for me and I wouldn’t have to deal with a muslin. I spent a long time toying with the idea of making the sleeves puffed, and in the end settled on easing the original sleeve pattern into a cuff (giving the sleeves just a slight puffiness). I shortened the sleeves considerably to fall just above the elbow, and then cut out two rectangles that were sewn into cuffs.

LibertyElisalex2_web

Since this Tana Lawn print is quite translucent, I underlined the bodice pieces with white cotton lawn. The skirt is lined with Bemberg rayon so it won’t cling to my legs too much (but also mainly because I didn’t have enough of the cotton lawn left). I serged all the seams because I wanted to keep things simple.

I also cut out fabric to make a matching sash, but I was really impatient to have a wearable dress ready, and so I may make and add the sash later. I am really pleased with the dress on its own though, and am still waiting for warmer days so I can wear my light and cotton-y dresses. Shouldn’t be long now, should it?

LibertyElisalex1_web

Liberty of London Zoe Dress

Zoe_web

Pattern: Zoe Dress by Schnittchen Patterns

Fabric: Liberty of London Tana Lawn

My thought process throughout making this dress certainly had its ups and downs, as the pattern I used had its…mysteries. This was the first time I sewed anything by Schnittchen Patterns, a German pattern company with some really lovely modern designs. I bought the German-language pattern as a PDF (I actually thought I was purchasing an English-translated one. Turns out only the pattern pieces were labelled in English), figuring that regardless of the language barrier, I could interpret the instructions, IKEA furniture-style. Well, this was the first time ever that I got a pattern with text-only instructions. Nevertheless, I figured I’d just follow the sew-along linked to somewhere on the website. Well, the link was broken, but using the magical powers of Google, I found it. By using Google Translate (which offered some laughable translations), the sew-along helped me enough to sew up the dress.

Something else mysterious about the pattern was that nowhere on the internet – not in Google searches in English or German, not on Instagram – did I find more than three photos of a finished dress. Two of them were posted by Schnittchen (one on the product page and one in the sew-along), and one of them was posted by Tassadit on her blog, Rue Des Renards.

Do people not make this dress? I scoured Instagram – first I tried the English hashtag, #zoedress – which was much too vague and gave me hundreds of children’s dresses. Then I tried in German – #kleidzoe – turns out there’s another German pattern company that has a “Zoe Dress”, because that’s all I saw. I didn’t find anything else. It surprised me, because it’s a nice enough dress, and it’s beautifully photographed on Schnittchen’s website.

ZoeCloseUp_Web

But I didn’t let the lack of photos stop me, and I figured it would be a bit of an experiment. Of course, since I used the precious Liberty Tana Lawn that I bought at Liberty’s this past October (I was drawn to the little orange frogs and peaches!), I made a muslin first. I was a bit worried, because the shaping of the pattern looks pretty unusual (the centre back dips upwards and the back neckline is quite high, and the sleeve cap looked especially curvy) – but after making the muslin, the only change I made was adding a bit of ease at the side seams and centre back. The dress doesn’t have a lining, and I opted to pink the seams and bind the armholes with matching bias binding.

There were a few things in the actual pattern that bugged me, but they aren’t really problematic if you’re familiar with garment construction. One was that there weren’t notches in a lot of places that I felt needed them (in the waistband side seams, and the notches in the armscye are the same in front and back), so I had to add them myself. Another was the French cuffs on the sleeve – there was too much excess fabric in the sleeves to sew the cuffs down without puckers, so I just cut them off and hemmed them as I usually would. Not adding the collar was a personal choice, as I didn’t really feel it suited me.

Also, you can’t really see the pintucks because of how busy the print is, but the pintucks in the skirt don’t line up at the skirt side seams. I considered sewing the skirt pieces and then sewing the pintucks, but I decided to follow the sew-along’s instructions. Since my pintucks were folded just a few millimetres off, they don’t line up with each other (if you’re a perfectionist this would really bug you). Luckily, the print hides it and I can barely see the tucks in the first place. These are just little things you’d want to be careful with if you were sewing the dress in a solid colour, or if you’re a bit more nitpicky.

That said, I wouldn’t say the fabric I chose was the right choice for this sort of pattern. There are so many lovely little details that just get hidden in the print. I do love the print, so I’m still quite pleased with the dress, but I don’t think it was a match made in heaven.

ZoeDetail_Web

The dress overall is quite well drafted, but I also don’t think that the shape of it suits me. It has quite a high waist, and together with the gathers, it’s a bit too “baby doll” for me. I like a dress that comes in at the waist. I considered lengthening the bodice so that it would fall at the waist, but the pattern was intended to be high-waisted, and I really wanted to give a different style a try. I probably wouldn’t make it again, but I would certainly recommend the pattern to someone who’s a fan of the high-waisted/empire look. Also, the neckline is really very high. I actually sewed the neckline facing 1/4″ deeper to make the neckline a bit more open – it didn’t require any adjustments, just a matter of sewing a 5/8″ seam allowance instead of the 3/8″ the pattern calls for.

In the end, it’s the beautiful Liberty fabric that makes this dress feel truly special, and despite the parts that aren’t just right, I’ll probably wear it quite a bit if (when?) the weather ever warms up.

Zeena Dress in Nani Iro Double Gauze

ZeenaAlt2_web

Pattern: Zeena Dress by By Hand London

Fabric: Nani Iro Suzuran Field – Double Gauze

I don’t know what took me so long to get around to this dress. Sometimes there’s this one little hurdle to just get over before you can get sewing. Either you’ve lost your sewjo, you just didn’t buy a matching zipper or thread, you don’t feel up to tracing/cutting the pattern…we’ve all been there.

For me, it was the fit adjustments. I have forward-thrust shoulders, and adjusting for it is always pretty straightforward with set-in sleeves (it involves taking a wedge from the front of the shoulder seam and adding it to the back). I struggle a lot when it comes to kimono sleeves though (which is annoying because half of my vintage patterns are kimono sleeves). Since the sleeve and bodice are one piece, I can’t make an adjustment to the shoulder without having to adjust the entire sleeve. Yes, I found one or two tutorials, but they involved cutting an impossible-to-shape triangle out of the shoulder (comment below if you know of other solutions!).

So when I sewed up an adjusted muslin, I moved the entire shoulder seam (neck to sleeve hem) forward more than an inch! I tried on the original muslin and then the adjusted one, and they both looked exactly the same. I felt so dumbfounded that the pattern sat gathering dust atop my scrap bin for about 5 months.

Last week I finally mustered up the courage to try again – I still felt conflicted, but my gut told me not to make any adjustments to the original pattern.

After all that, the whole dress (minus hemming) was done in a day.

I love it, though. It was my first time working with double gauze, which I found to be surprisingly “sticky” (for lack of a better term) – easy to sew, but trying it on over leggings wasn’t a good idea. But overall, it’s soft, lightweight, and just opaque enough that I could get away without a lining.

I almost always line my dresses, so since I wasn’t lining this one, I opted to do French seams for all the seams except the zipper and waist seams (I had to serge those. I didn’t want to, but I had gotten impatient at that point. It got the job done). I would recommend French seams if you’re working with a lightweight fabric – my fabric was borderline thin-enough to get away with it. Since double gauze has two layers, I was also able to slip stitch the neckline facing down all the way around.

ZeenaFull_Web

After all my non-adjustments, I found that the fabric still pulls kind of weirdly around the neck. I’m not sure if making my shoulder adjustment would have changed that. All in all, the fit is perfect around the waist and I love the pleats that go all the way around the skirt. It’s cozy but flattering. I also cannot get enough of the fabric – the colour, the print…I couldn’t even tell till I started sewing it, but the little white dots are actually bits of silver! Ah, Nani Iro, you have me under your spell.

ZeenaHanger_Web