A Crafter’s Guide to Kyoto
Welcome to part two of my Japanese crafting adventures! If you haven’t read part one yet, which is all about the crafty places I visited in Tokyo, you can read it here.
Today I’m excited to share all the crafty sights we saw while visiting Kyoto, a city that is renowned for its traditional craft industries.
On our first day in the ancient capital, we arrived via bullet train and were fortunately permitted to check in to our AirBnB early (lugging your luggage around on public transit in Kyoto is a huge no-no, so we were grateful to be able to unload it so we could see the city!). We dropped off our things and went straight to [hus:], a small yarn store I had stumbled across thanks to the YouTube algorithm. They were only open on Saturday and Sunday, and considering we didn’t have a full weekend in Kyoto, I wasn’t expecting to be able to make it there, so I was glad we were able to drop by!
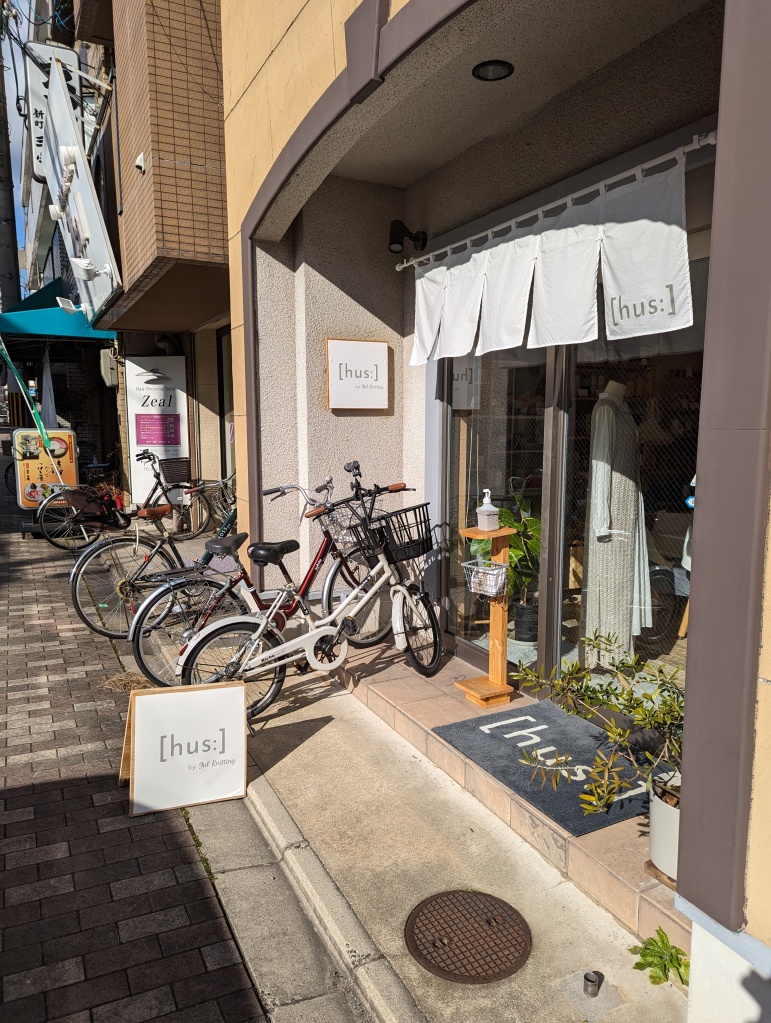
[hus:] was a sweet little store with a nice, clean aesthetic and kind staff. This is a great place to go if you like to make amigurumi or other small crochet items, as they have lots of neat yarns and kits suitable for those sorts of things. I fell in love with a very soft tweedy yarn, sold in cones, and bought a sweater quantity which will eventually become a cardigan for Eitan.
The next day we went to a large number of shops mostly in central Kyoto.

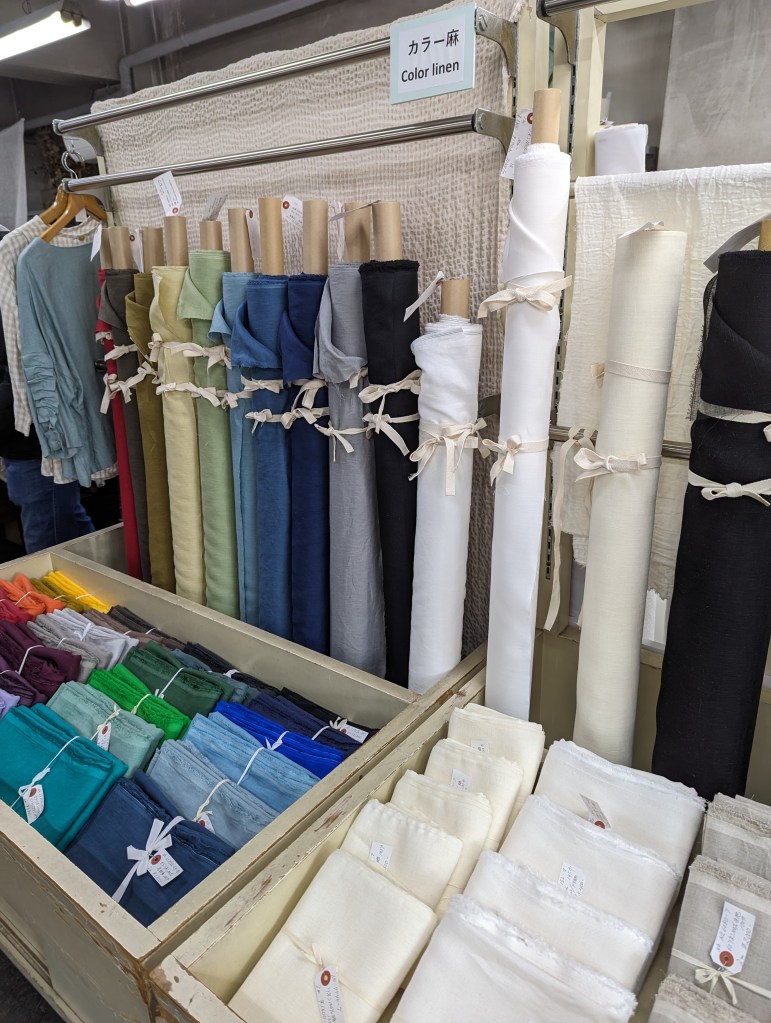
Our first stop was Linnet, a real teeny tiny little fabric shop that specializes in linens. It’s worth noting that (I’m pretty sure) the fabric is on display as fat-quarter-type pieces, and you select what you want and they cut the yardage you need from stock in the back. I didn’t actually end up buying anything, so I’m not sure this is actually how it works, but it’s something I saw in a review of the shop, and I saw very few actual bolts in the store, so I’m guessing this is the case. No staff offered to help me, but I was happy to browse and just didn’t find anything that really pulled to me.
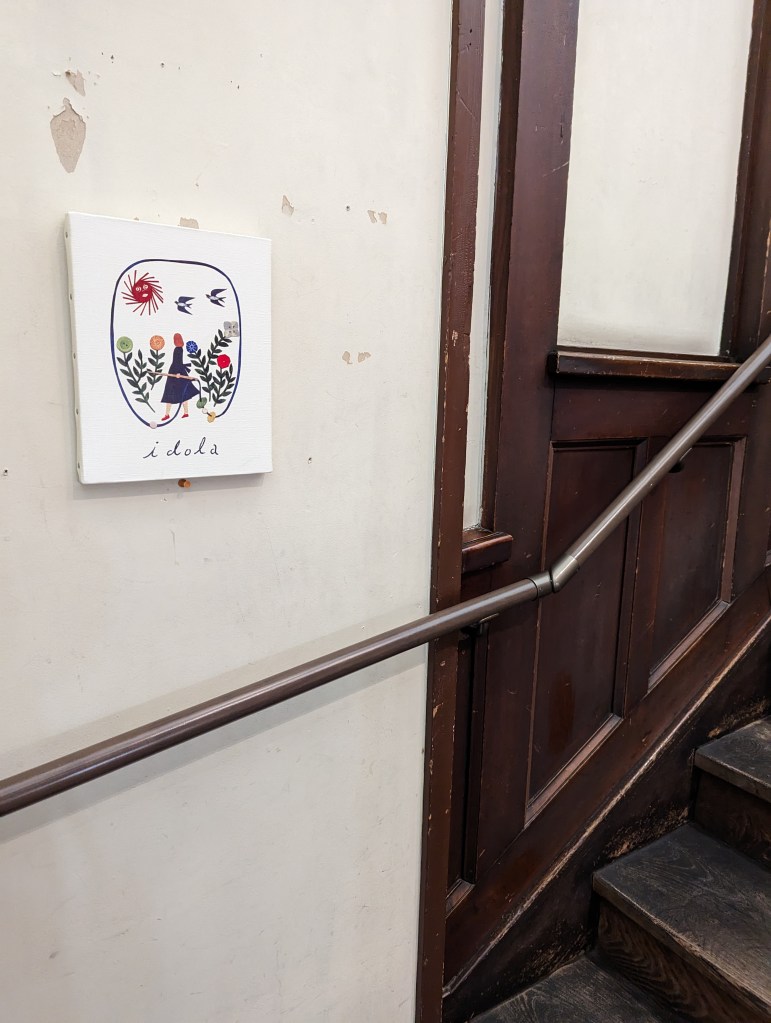
After that we went to Idola, which was an incredible button store on the third floor of this beautiful old building with a lovely wooden staircase. When you reach the landing where the store is located, they have little lockers where you can store your personal items and grab a tiny shopping basket to do your button shopping.
Idola had lots of great vintage buttons (as well as beads and sequins) but I was so smitten with the ceramic buttons by nonomura minami – they were incredible works of art and I just couldn’t resist getting a few.


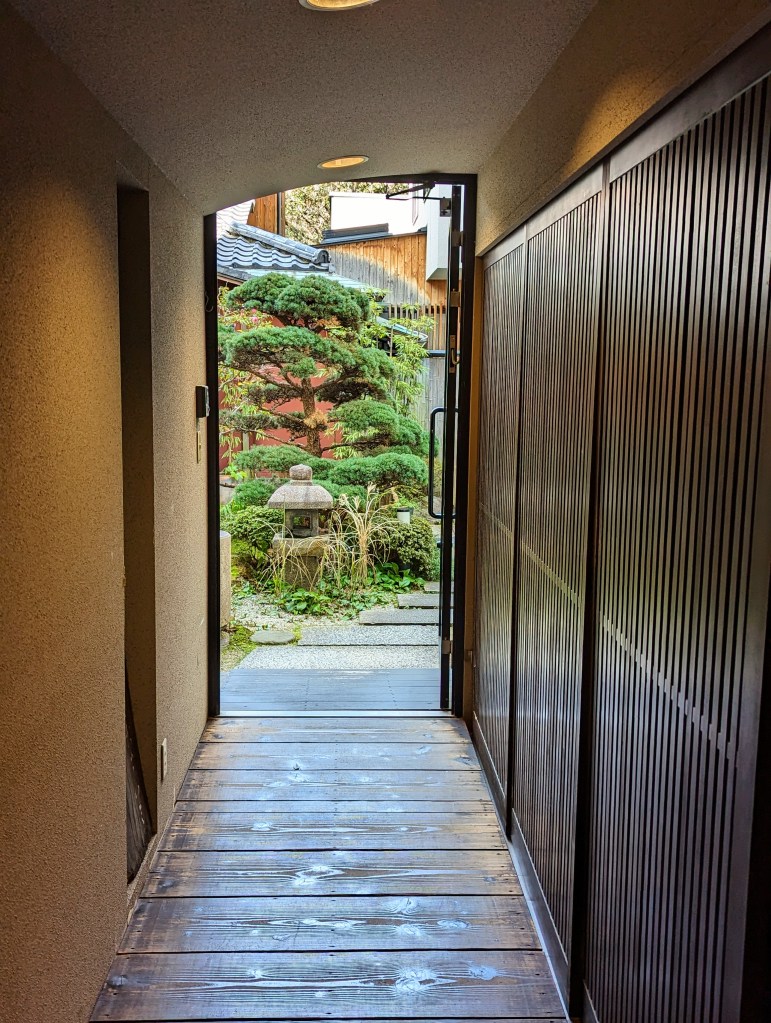
After that we went to Misuyabari Needles, which I had seen on a few other sewing blog posts about Japan. Apparently it’s a very old shop – from what I’ve heard at least a hundred years old. It’s very much tucked away, and it’s very tiny (only a few people can fit in the shop at a time) and it’s surrounded by a beautiful traditional Japanese garden. The staff there were very welcoming and friendly. They really just sell one thing – needles and pins – as well as decorative storage boxes for them. They sell pins with tiny handcrafted heads shaped into different animals (think dogs and cats!) or objects (like teeny sewing machines) – there are many to choose from! I asked the man working there what you’re meant to do with them, and he told me they’re decorative; I think the Dalmatian puppy pin I chose will be an adorable addition to one of my more decorative pin cushions! I also bought a very cute felt needle book, which I was actually in need of and very happy to find.

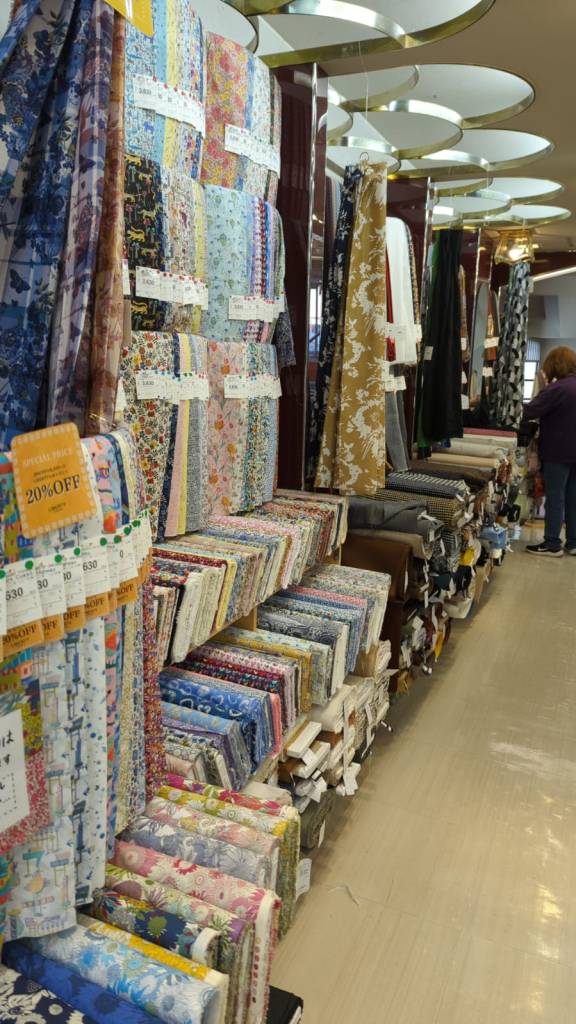
We then made our way to Nomura Tailor. This was my favourite fabric shop on the whole trip – I probably could have spent all day in there (I was in there for at least an hour before I even realized there was a third floor, where they have loads of books, notions, and kits). This was the Japanese fabric store of my dreams – interesting prints, luxurious Liberty fabrics, and beautiful linens. I enjoyed myself so much walking around and came home with some beautiful fabrics, including some Liberty prints I’ve always loved and never got around to buying.
I actually went back to Nomura Tailor the next day for another round of shopping, and to check out Nomura Tailor House, which I hadn’t known existed until after I went to Nomura Tailor (I think it’s because I realized that I had seen a different shop sign in some photos online?). It’s just a few minutes’ walk away in the nearby covered shopping arcade. I’m still not really sure what the difference was between the two shops, but Nomura Tailor House was smaller and seemed to have more quilting fabrics and pre-cut fabric pieces. Either way – don’t miss it like I almost did!

One last fabric stop we made was mina perhonen, which was an incredibly beautiful store, however it was also (at least for us) incredibly expensive (think over $100 CAD per metre…). I should have known when the employee there gave us a look, but gosh, their fabrics were indeed lovely! The fabrics there felt like they were very high quality, but there was nothing I loved so much that I was willing to splurge.

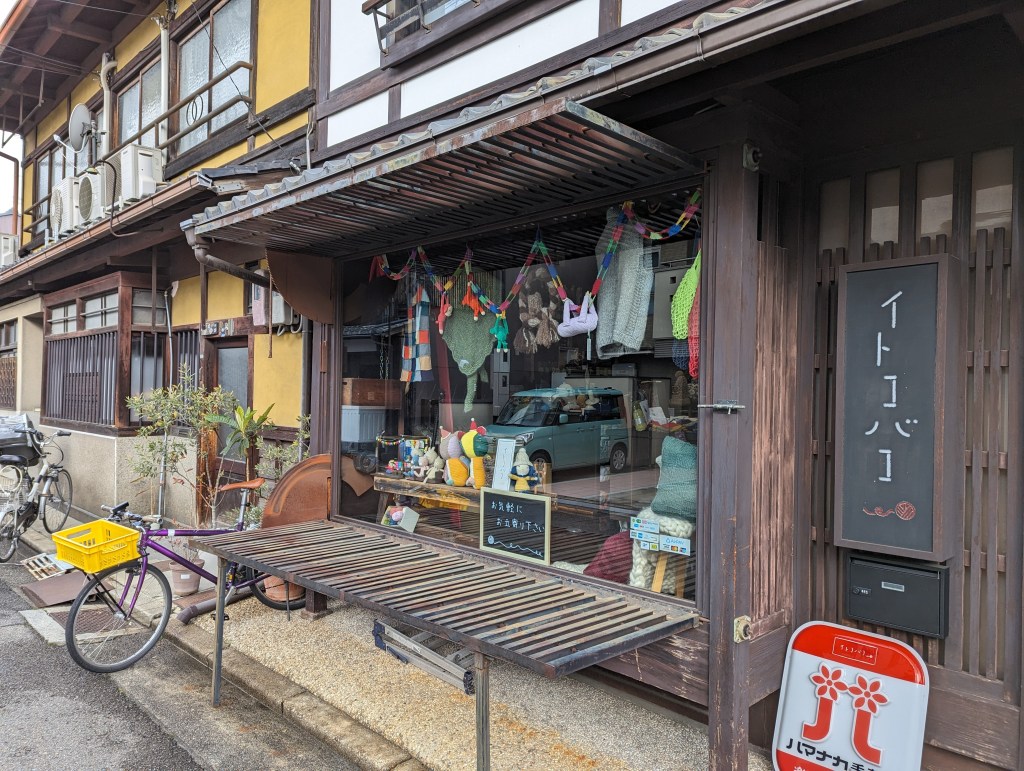
My last crafty store stop in Kyoto was Itokobaco, which is in a beautiful old house (make sure you take off your shoes before you go in!) with a very cozy vibe. It’s a good place to get solid colour yarns in many colours, or pick up some cute crochet kits. They have a nice selection of books too!
Other crafty things of note:
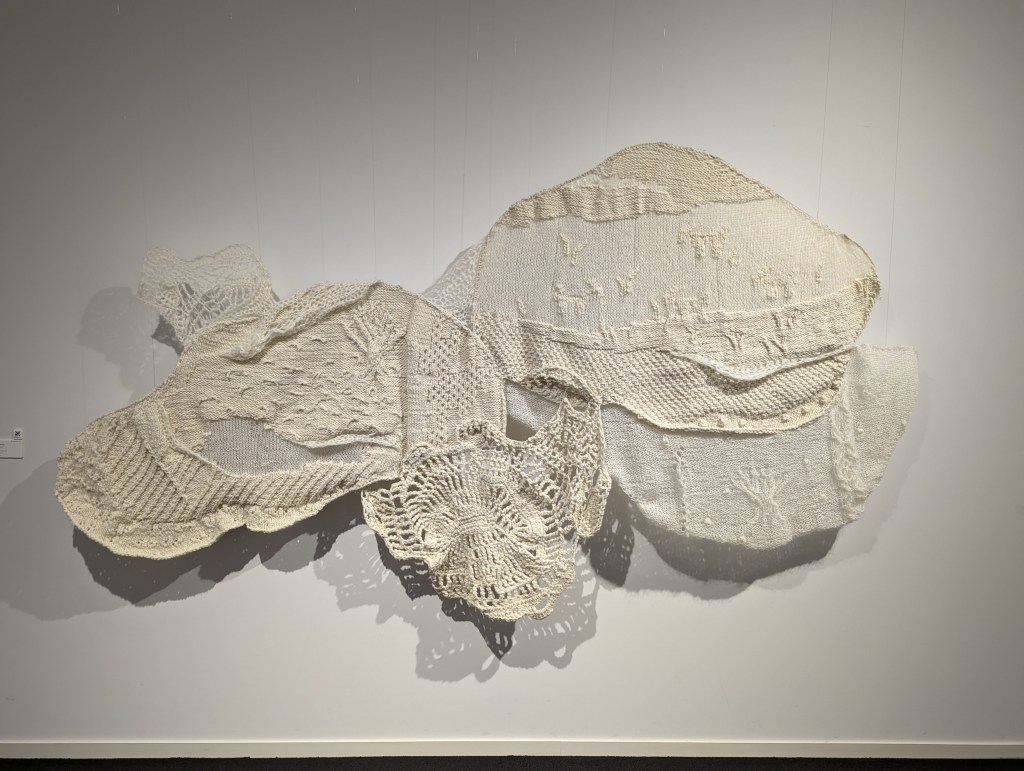
The Kyoto Museum of Crafts and Design is a great place to spend a rainy afternoon. You don’t need much more than an hour or two there, but it’s worth the stop. They have a great permanent exhibit on the traditional crafts of Kyoto, with demonstrative displays of how they are done (including some where you can try it yourself!). The temporary exhibit on while we were there was of the works of craft students (I believe from the Kyoto Arts & Crafts University), which, as graduates of an art and design university, was very interesting to look through and took us back to our art school days!

Another stop we loved was Suzuki Shofudo – if you love Japanese paper products, definitely check it out – they have incredible washi paper by the metre, but it was also a great place to load up on special Japanese souvenirs. We stocked up on lots of goodies for ourselves and family there!
That’s all, folks!
We had such an amazing time on our trip to Japan. After all that planning, it’s hard to believe the trip has come and gone!
Japan certainly is a wonderland for crafters or anyone who appreciates great craftsmanship. Which of these places would you love to visit most? Is there anywhere I missed that you’d recommend to others planning their trip?
I hope you enjoyed reading and please let me know your thoughts, questions, and comments!
EDIT: My colleague recently shared with me this fantastic reel from @loupystudio of a Kyoto yarn tour. I was absolutely flabbergasted at the number of places I missed despite my thorough research! Just goes to show you how much is on offer (and that I have a reason to go back!) – so please enjoy this helpful bit for your travel plans 🙂
A Crafter’s Guide to Tokyo

Last month, I was lucky enough to finally make it to Japan for the first time ever. My husband and I initially booked a trip to go in March of 2020, and I think it’s safe to say we all know what happened to world travel then. I had created a full itinerary for that trip, and I built off of it a bit when planning it the second time around. While the wait was hard (and that initial cancellation painful), I’m glad that I had more time to do research on all the crafty places I could potentially visit on our trip.
Here, I will share that research, and where I ended up going – as well as what I discovered along the way – with you.
FABRIC & TRIM:
Our first day in Japan, we took it easy on our jetlagged selves and walked around in the Ueno Park and Tanaka neighbourhoods, which weren’t too far from where we were staying in Arakawa-ku. It was a beautiful day and the streets were quiet, and we walked by a store called Biscuit – I was very intrigued, but the lights were all off and the door shut. The sign on the door translated roughly to, “I will be opening late today”, but with no indication of when “late” would be. We decided to continue walking around the area and went back about half an hour later. I was disappointed to see the store still dark, until Eitan pointed out the shopkeeper making her way down the street to open up shop.
I had so much fun browsing Biscuit – it was full of fun little vintage knickknacks, as well as vintage fabrics, buttons, and a wall filled with spools of vintage ribbons. Unfortunately I didn’t find any vintage fabrics I liked that were in a large enough piece for me to make use of, but it was still fun to look through and see what was there. I couldn’t help walking out with a few yards of vintage ribbon, which was, in typical Japanese fashion, perfectly wrapped up for me to take home.

Now, I’m sure that if you’re into textiles and you’ve looked into or gone fabric shopping in Tokyo, you’ve heard of Nippori Fabric Town. Well, you should know that I take my fabric shopping very seriously – so much so that I booked our Air BnB about a 12-minute walk away from Nippori. I imagined carrying so many loads of fabric that I would want to easily return to the Air BnB to unload and have a snack before heading back for another round.

In truth – and maybe this is a very unpopular opinion – I actually was very underwhelmed. Sorry, I know. Nippori Fabric Town is like a mecca for textile lovers visiting Tokyo. Maybe that’s the thing – maybe it was so hyped up that my expectations were just too high. I didn’t find all that much that I didn’t feel like I could find at home (maybe I’m just spoiled with Toronto’s fashion district?). I had visions of incredible printed linens and exclusive Nani Iro prints… and, well there were cute quilting cotton prints and lots of cute canvas prints, but not the kinds of things that got me excited. Maybe this was for the best, as I didn’t feel overwhelmed and as though there was too much pressure to choose.
The star of Nippori Fabric Town is Tomato. There are a few locations, all specializing in different types of fabric. My favourite location was the “fancy” store (Tomato SELECT-KAN), where I saw some of those beautiful linens and wools I had dreamed of, and purchased what was left on a bolt of dark green floral linen. I was tempted by some fabrics in their “interiors” store (I always have been drawn in by curtain-y type fabrics for garments, à la Maria from Sound of Music), but the thought of fitting bulkier fabrics in my suitcase, and right at the beginning of the trip, had me nixing that idea.
One of the reasons I’m glad I was staying nearby was that I had a chance for a second round. When I got home that first night, feeling underwhelmed by my first experience of Nippori Fabric Town, I checked out their official website to see if there was something I had missed. Turns out, I had missed l. musee buttons, which I had had on my list of places I wanted to visit. They have a location on the main street that’s focused on beads, and I was so disappointed not to have found any buttons there. It was only after I checked out the website map again that I realized the button shop was a separate shop on one of the side streets.
I also learned from a second look at the website and map that there were more stores east of the main “strip”. My favourite of these was Humongous, a store specializing in block prints. The store is small, but very beautifully organized (photos were not allowed). The fabrics were expensive, but beautiful, and I felt they had that charming and unique Japanese quality I was after. The staff member working there was also kind and incredibly helpful, and more than willing to communicate using the translation apps on our phones.
So aside from stopping in at Humongous on our second visit to Nippori, I picked up some vintage buttons at l. musee (embarrassingly enough, I didn’t realize that the price listed was per button and not per card…) and some stunning woven ribbon from E & Son Fabric’s trim shop (which also did not allow photos – trust me, though, it was a beautiful shop). The trouble I have with trims is I love them, but have no clue what to do with them. I have a drawer full of beautiful trims…and yet, I can’t resist buying more. If you’re a fan of special trims and ribbons, you’ll have fun exploring the little trim shops in Nippori.
I think what was a little overwhelming about Nippori Fabric Town, and about Tokyo in general, is you kind of don’t know what’s down the little side streets or in the teeny tucked-away shops or in second-floor shops (many multi-storied buildings in Tokyo have shops and businesses beyond the first level!). I started to feel like there just wasn’t time to look at everything, so I tried to be selective so I could actually enjoy my time there. I’m the kind of person who doesn’t enjoy bargain hunting, or digging through dusty bolts of fabric that have been haphazardly stacked all over the place. If a store didn’t fit the sort of shopping vibe I wanted to be in, I skipped it, and spent more time perusing the stores that excited me. It almost felt like a relief not coming away with piles of fabric, especially since I knew it was just the start of our trip. What’s nice about a neighbourhood with such a large number of fabric and sewing shops, though, is that there’s a bit of something for everyone – whether you like high-end vintage buttons, or searching for that special fabric you managed to get at a steal.
Have you been to Nippori Fabric Town? And if so, did it meet your expectations?
YARN:
My yarn shopping adventures in Japan were hit by a bit of disappointing news early on in the trip. At the very end of February and just a few days into our trip, the famous AVRIL Kyoto (as of writing this their website is still up, though online shopping is no longer available), which I had been very excited to visit since first planning our trip in 2019, announced their store’s permanent closure. It seemed to be very out of the blue (one of my Japanese colleagues said she was so surprised she was convinced I had just misunderstood the Instagram post when I told her!). Comments on the announcement post on Instagram seemed to imply that customers were totally caught unaware by the news. I was pretty upset, and had been planning to visit their Kyoto flagship location just a few days after the announcement was made.
The Kichijoji (Tokyo) location was to remain open. Eitan and I had just been near Kichijoji to visit the Ghibli Museum, but AVRIL was closed that day – I wasn’t bothered about missing the Kichijoji location at the time, because the Kyoto location was on the itinerary for later in the trip. Kichijoji isn’t exactly in the city centre, but when I heard the news I managed to convince Eitan to make the trip back there so I wouldn’t have to leave Japan without having made a stop at AVRIL (there may have been coffee bribery involved…) I also visited l.musee’s second store location which is in Kichijoji as well and just minutes away from AVRIL. And yes, I did buy more buttons.


The majority of yarn at AVRIL is sold off of spools by weight, so I picked up a few grams of a fun pom pom yarn that they seem to be famous for.
On our day in Shibuya, we made stops at a few different yarn stores in that area.
First up was Daruma, which actually only just opened up late this past Autumn. I was really excited to hear that they were opening up a physical location that I would be able to visit on my trip, as I’ve always been a fan of their yarns and their patterns. I was even more excited to learn that one of their kits that I had been eyeing would be a part of this year’s Spring/Summer kit release, and that that kit would become available for sale on the same day that I was planning on visiting.
I did end up getting the kit (in blue, of course), but I also ended up getting one of their books and the yarn to make these cute sewing-themed mittens. The staff there were really nice and helpful too and I really enjoyed shopping there!


Next up was Amimono SPIN, which I think is also a relatively new shop as it didn’t come up in my initial 2019/2020 Japan research. Amimono SPIN was somewhat small, with all their yarn sold in pretty cakes (however, the labels don’t have any information about the yarn on them – I found most of what I needed on their website, though). I ended up buying some solid blue-green Aran-weight yarn to hold with the pom pom yarn I bought at AVRIL (I think that’s going to make some very cute mittens). The main highlight of Amimono SPIN was meeting some expats sitting and knitting in the lounge area of the shop, and sitting with them and chatting about knitting for a little while while we rested our weary feet.

Next up was WALNUT Tokyo, which felt a bit obligatory to stop at as a knitter visiting Japan. It was a lovely shop, however maybe I’m a bit spoiled, as I found that the majority of the stock they carried I could find at The Knitting Loft back at home. I did treat myself to two skeins of their house brand yarn, because it’s nice to pick up some souvenirs, and it was pretty lovely!

The next day we visited Itoricot, which to me was an incredible and new concept for a yarn store (maybe you know of other places like it where you are – please comment below!). How it works is that they sell yarn off of cones of factory leftovers (kind of like deadstock fabric?), and you purchase the quantity you need, which is then wound off onto a new cone for you. Since a lot of the yarns were for use on industrial knitting machines, many of them are very thin (about thread weight), but you can mix and match them and the store will wind them together for you onto a new cone (for a small fee). At first I was incredibly overwhelmed by the options and possible combinations. Fortunately, I did come in with a project in mind, and the staff there were incredibly patient working with me to get the thickness and colour of yarn and quantities I needed. Honestly it was a little stressful at times, since I had trouble gauging how many strands of very thin yarn I needed to get more to a “hand knitting” weight that I’m used to, as well as trying to envision how the colours would look once “plied” together. It was a very unique experience and in the end I’m really glad I made a stop there.


Here’s a video of them winding up my “custom blend” for me!
Other crafty things of note:
I follow Yumiko Higuchi on Instagram and have been a huge fan of her embroidery work for years, so I was thrilled that during my time in Tokyo she shared on Instagram that she would have kits for sale as part of a handcraft pop-up shop at the Japanese department store giant, Isetan. The pop-up was being hosted at the Shinjuku location, and I was almost jumping for joy at the beautiful tables of artisans we found when we arrived. I bought the sought-after kit from Yumiko Higuchi, but I also treated myself to a skein of naturally-dyed yarn from NONA Temari. I had heard of NONA Temari before, but didn’t know that she dyed yarn, and I just couldn’t resist getting a skein. Also, after all the research I had done, I didn’t know she had a brick-and-mortar location. I felt like I got my fill at the pop-up, though, so I didn’t go out of my way to visit the store.
The pop-up also featured COHANA, a brand I am familiar with as they carry a few of their products at The Knitting Loft, and it was nice to see all their goodies in one place and in the country where they’re made.


Other places on the list were Yuzawaya and Okadaya, which we unfortunately just didn’t end up having time for. I had visited so many crafty places in Tokyo that I wasn’t feeling too bummed out about it, but I would still like to visit if we ever go back to Japan. The Bunka Gakuen Shop was also on the list, but it wasn’t really near any of the other places we were planning to go, and I didn’t feel a need to go out of our way to visit. We also didn’t make it to chocoshoe as the store hours didn’t line up with when we were already in the area – but again, I didn’t feel like I was missing out because I had already come away with so much great yarn.
On a little visit out to Jiyugaoka we came across a cute little shop called Hobbyra Hobbyre which had a lot of cutesy Liberty fabrics and cross-stitching kits. The store had a very feminine and clean aesthetic.
In Kuramae, Maito Design Works is a lovely shop to pick up naturally dyed threads, as well as naturally dyed garments and accessories.
Finally, one of my favourite stores that wasn’t initially on our list was Tokyu Hands. We went to the Shinjuku location and wow, I felt like I was in a crafter’s paradise – it was just floor after floor of amazing DIY products. One of the floors does have some yarns and embroidery items, but my favourite section was all the miniatures kits. Definitely check out Tokyu Hands if you can. We picked up a lot of our souvenirs for friends and family there too!
That’s all for our visit to Tokyo! Coming up next will be all about our crafty stops in Kyoto.
Have you visited Tokyo? If so, which crafty shops did you visit? If you haven’t made it there yet, what’s on your list?
Protected: Something old, something new, something borrowed, something blue.

On using up my stash: Part I
In August, I set a goal for myself that I would use up all the fabric in my stash before buying anything new. This wasn’t too crazy a goal – at the time, I only had about 10 pieces of “usable” fabric in the large translucent watertight bin under my desk. By “usable”, I mean fabrics I actually intend to cut up and use for projects. There are some vintage fabrics I have that I bought because I found their prints to be unique enough that I wanted to own and hold onto them, but aren’t practical for my wardrobe. Currently, I have 3 of these. Not excessive, in my opinion. I consider these collectors’ items.

Since it was the end of August, I also had 4 pieces of fabric I had aimed to sew up for the summer months, that I just couldn’t get in by September. These I also didn’t consider currently “usable”, because I wouldn’t want to sew them over the winter months.
So for two months, I didn’t buy any new fabric. Honestly, I didn’t. I had my eye on some fabrics, though, so I slowly built up wishlists on Club Tissus and Etsy, intending to make some big and excessive purchases when my fabric ban was over. Then in October, a very special vintage Liberty of London fabric went up for sale on Etsy, with the owner telling me they wouldn’t hold it for me for long. I decided to make an exception to my ban and ordered it. The same happened with another vintage fabric on Etsy. Then in November, Shop La Mercerie in the US had the perfect dark teal viscose crepe for sale – and with only 2.5 yards left in stock only days after it went up, I acted fast and bought that too.

I told myself that these were all exceptions – special fabrics that would be gone if I waited around till after I used up my stash to buy them. After all, I wasn’t buying fabrics that I could really get at any time. But then when Cyber Monday sales came along, I broke down and bought many of the fabrics on my Club Tissus wishlist.
My fabric ban had obviously been broken. But I had been realizing something – and slowly realizing it long before I broke down and made a big Cyber Monday purchase.
The goal of using my stash was destroying my creativity.
I am the kind of person who likes to clear things out and check boxes and cross things off lists. If I have a stack of library books that I finished but still have a week to return, I like to return them right away – get the books off my shelf and check off the box of getting them returned. I work that way with a lot of things, probably to a point where it’s a bit weird.
I realized that in using up my stash, each piece of fabric used was a box I could check off. And I literally do this – I organize my stash using Evernote, and every time I finished a project, I would go to my Evernote notebook and delete the note, feeling an immense feeling of very fleeting satisfaction.

I was no longer using my stash for the fun, joy, and creativity of it – but rather, the short satisfaction of ticking a box. Once you tick all the boxes, I told myself, you can buy all the fabric you want. All the fabric on that wishlist. You can even order something from Europe and pay the 30€ shipping. I would also get the satisfaction of writing a blog post about how I was probably the first person in history to use up her stash for real.
But all that came to a crashing halt when I made that Cyber Monday order. I had failed at my goal. At the same time, though, I realized I was finally allowing myself to consider my stash more carefully. I had been starting to rush to think of ways to use up my fabric, and was no longer taking the time to let it simmer, to let the creativity come forth and give me new ideas. When I broke my fabric ban, in just a few short days, I started thinking more slowly and creatively about what I wanted to make, because I no longer had my reward to rush to. I had bought these gorgeous vintage fabrics and was forcing myself to think of what to make with them so I could hurry up and use them and replace them with more fabric.
I am currently at a point where if I had not bought fabric over the past two months, I would actually be one fabric piece away from completing my goal. It’s fabric to make a skirt – it could potentially be finished in one day. My infamous Cyber Monday fabric hasn’t been shipped yet, so I can’t sew it. My special exceptions fabrics haven’t been washed yet, so I can’t sew those either. I realized that once I sew that one piece of fabric in my bin, I will have no garments to start sewing. I never truly considered what it would be like to get to the end and have nothing to do about it.
And what happened is that I slowed down. I started to think of ideas for the vintage fabrics that I hadn’t thought of before. I started thinking more about what I would truly enjoy wearing, not what would use up the fabric fastest. I also started to think more about selfless sewing – a baby quilt I had been meaning to start since August, baby clothes for my niece and nephews, Hannukah gifts for loved ones… All things I avoided because I felt they would slow me down in achieving my (selfish) goal. I feel less pressure to make all the things and to finish a certain number of projects in a week.
I also began to understand that, at least for myself, I don’t need to worry about stash guilt (honestly though I don’t think anyone should worry about stash guilt). I’ve seen so many people on Instagram who have closets full of fabric and share them with pride. Stashes that make you wonder how they’ll use it all before they grow old and die. Me? I have a stash I could count on one hand.
You would think my little tiny stash is a lovely, considered, minimalist stash. It isn’t considered, though, and it should be. I am beginning to be less impulsive in my fabric buying habits. I have had too many fabrics in my stash that I bought because I loved the fabric, and when I used them, I didn’t end up loving the garment. When I made my latest purchase, the one that broke my ban completely, I went through each fabric and told myself what pattern I would use it for and how I would style that garment. I asked myself what occasion I would wear that garment for and if it went with other clothes in my wardrobe. If I couldn’t answer all those questions, I deleted that fabric from my cart.
I’ve learned that for me, there’s nothing wrong with having a fabric stash if it has pieces I want to use. My previously impulsive buying habits, though, had been leaving me with a stash full of fabric I wasn’t excited about sewing. I do like the idea of keeping my stash small, so that I can keep tabs on what I have and allow ideas to simmer without feeling overwhelmed. Sketching those ideas out helps, too.
I always thought that having no stash meant no stash guilt, and that that’s what would make me happy. It turns out though, that just like with my wardrobe, I need a to have a curated stash. And if my whole wardrobe ultimately begins with my stash, then doesn’t my stash need to be just as intentional?
So I’d like to ask you, dear reader, do you feel stash guilt? Do you think of a garment first, and then buy the fabric, or vice versa? Do you purchase fabrics impulsively or with purpose? How do you fill your life and home with textiles you love? I truly believe there’s no shame in having a large stash or buying fabric impulsively – but ask yourself these questions, and ask yourself if you’re happiest building your stash this way or you wish you’d do it differently. After all, fabric is such a huge part of our sewing practice, and if your stash isn’t making you happy, it won’t make your sewing happy either!
SneakerKit Round Two
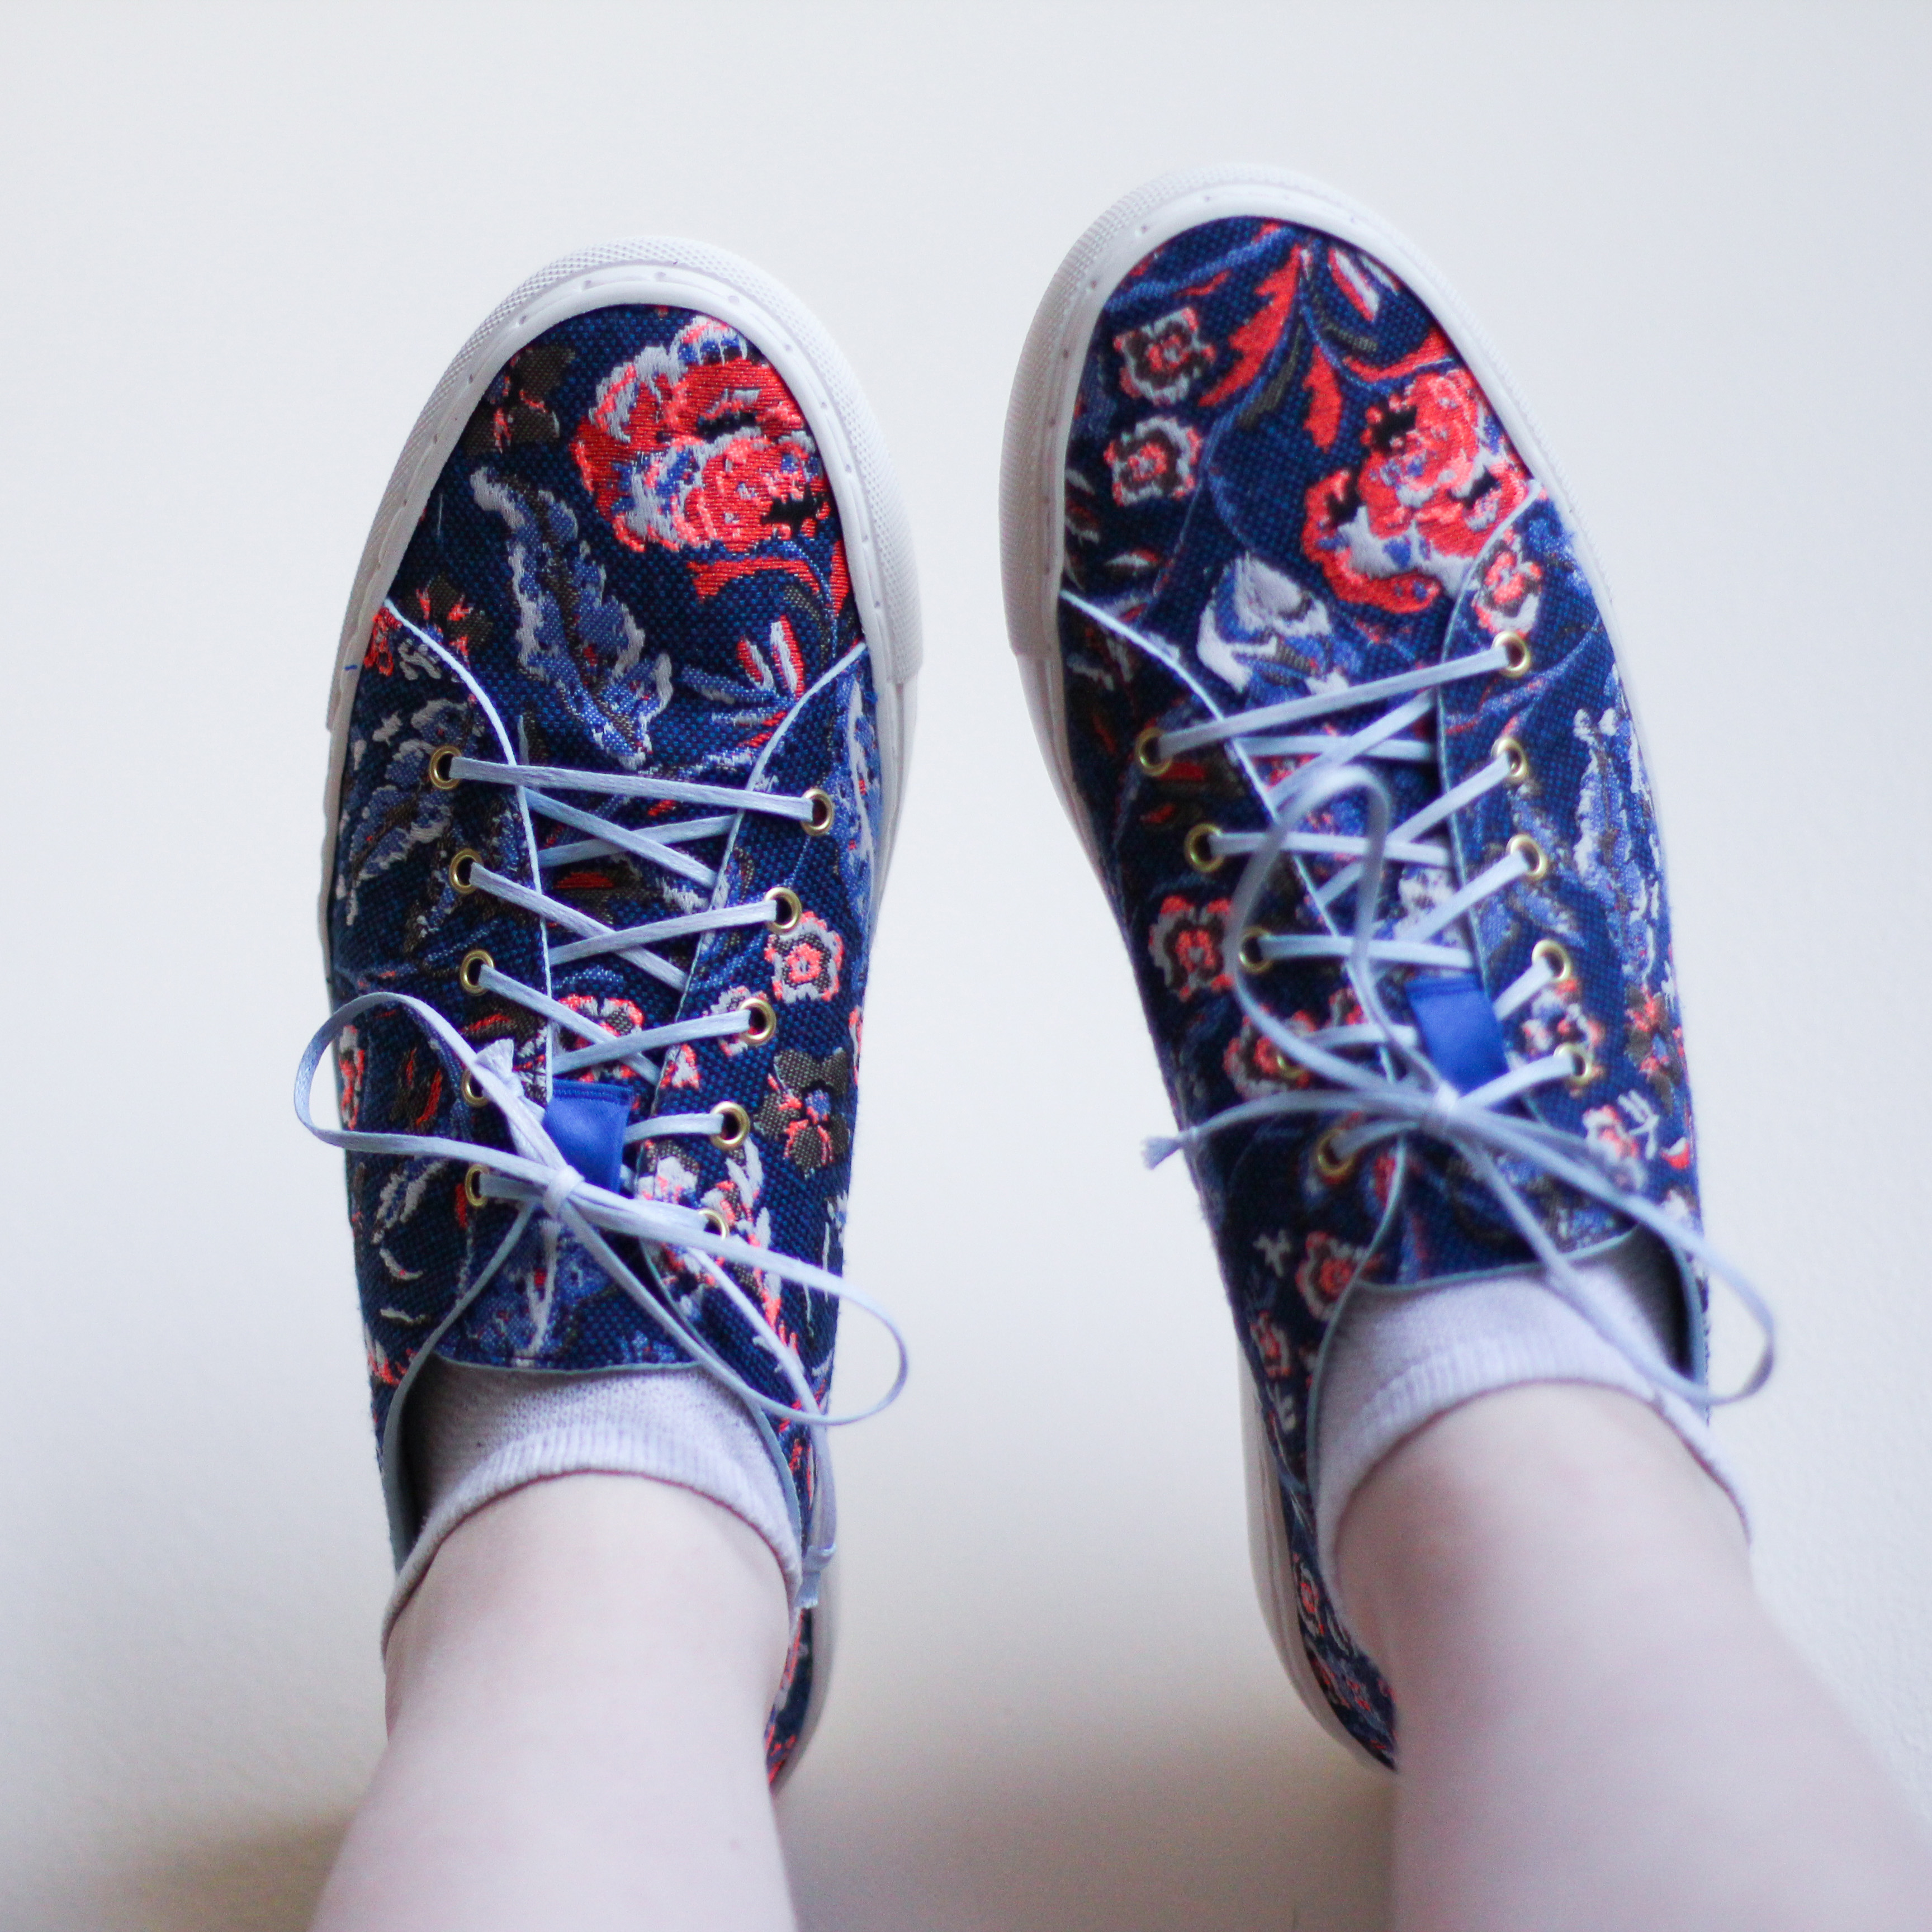
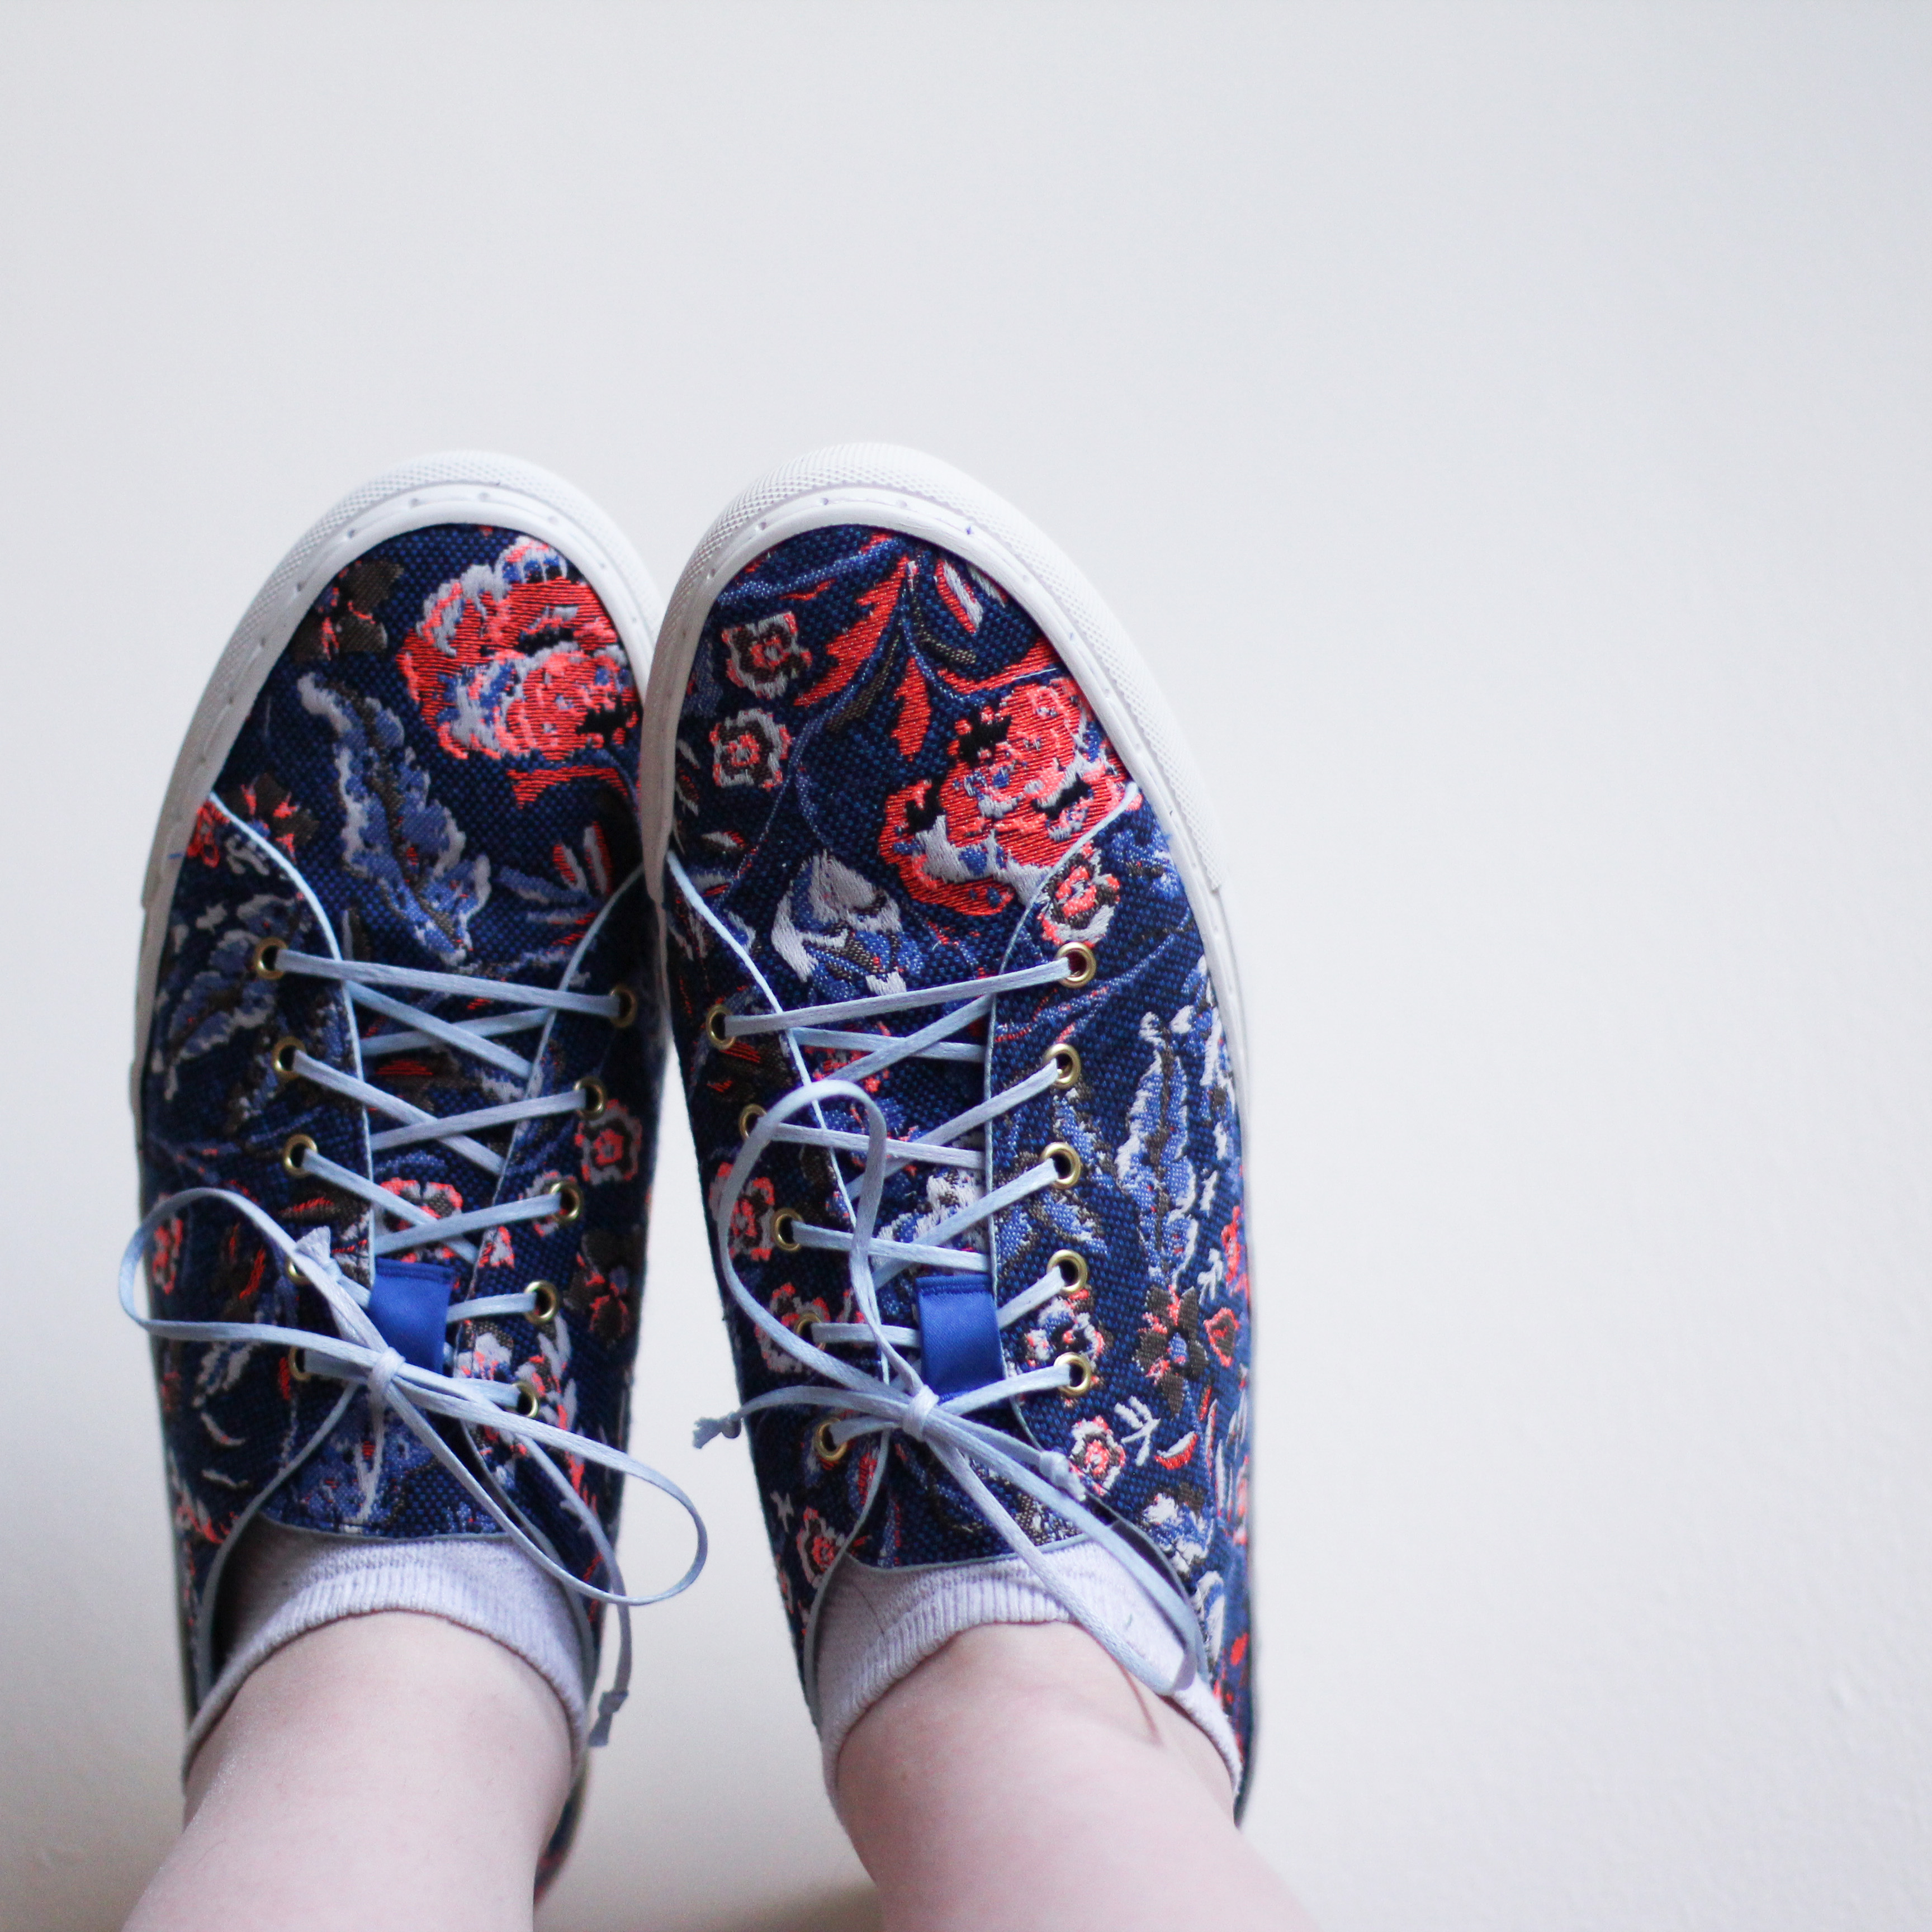
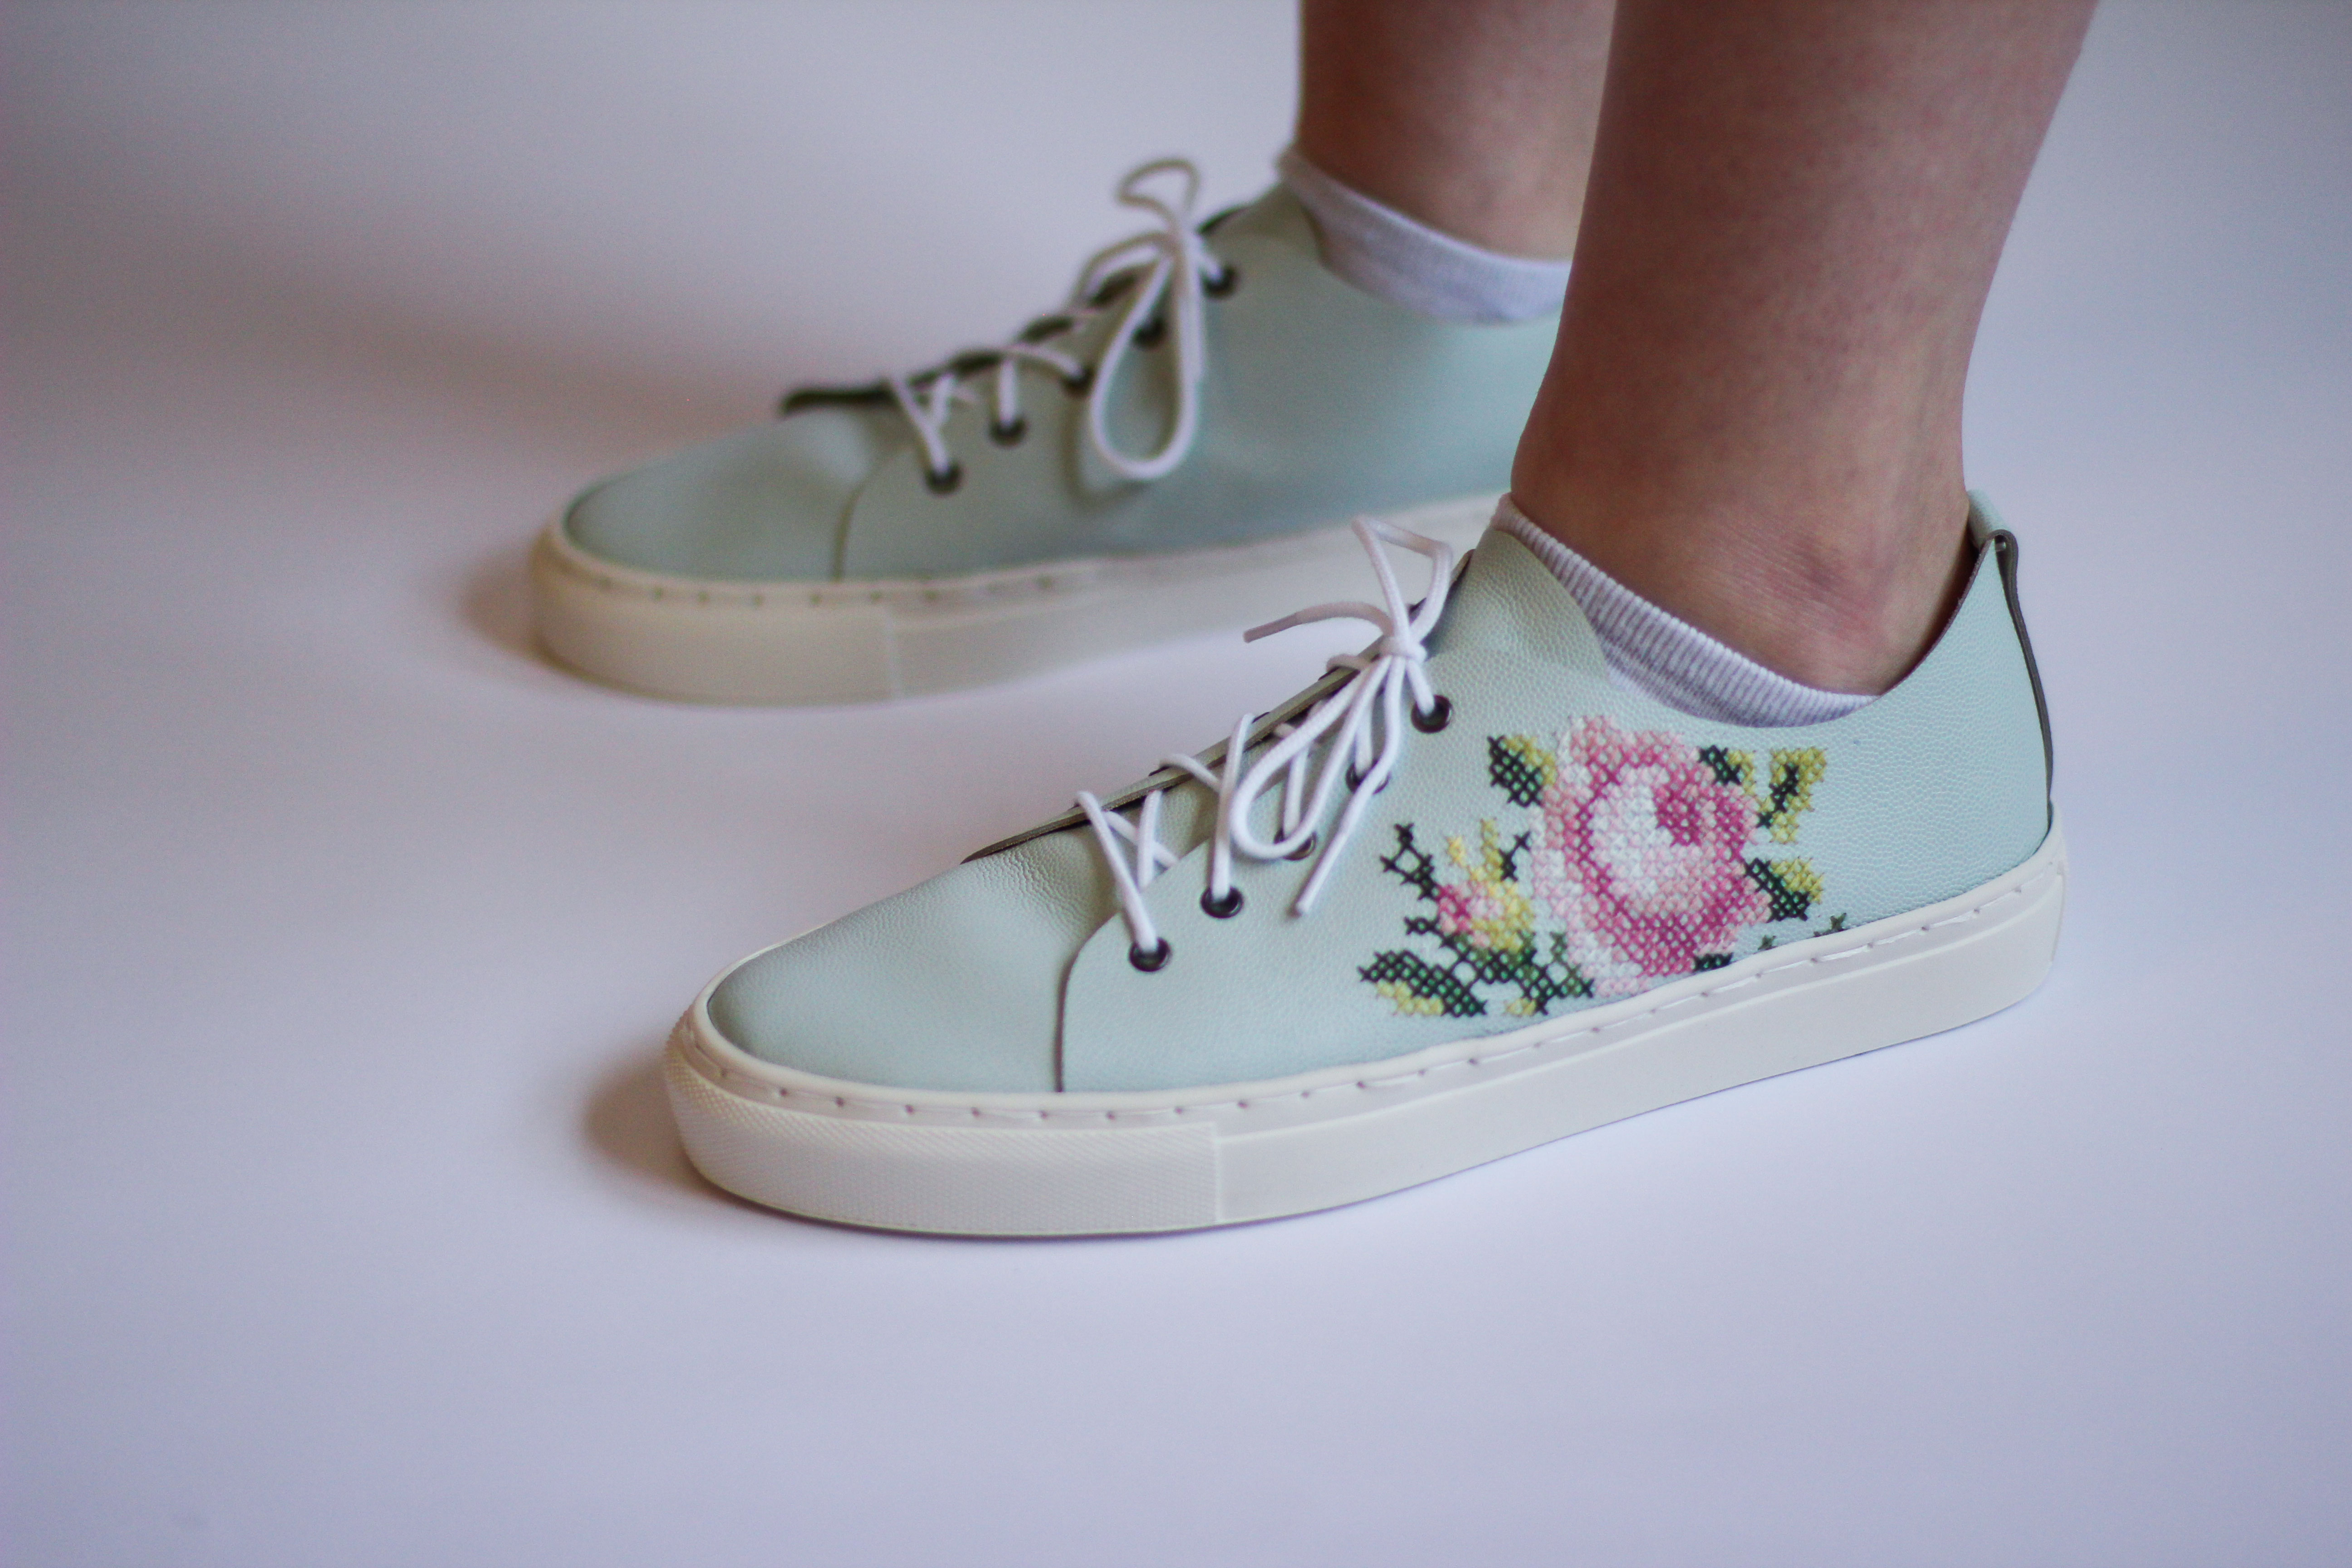
If you can recall, I tried my hand at making sneakers using SneakerKit last summer, but I made the (beautiful) mistake of attempting to cross-stitch leather. I also wasn’t totally pleased with the quality of the kit. Since then, though, the sneaker-making bug came back, and SneakerKit changed the insoles that were giving us trouble. SneakerKit is based in the Netherlands, and since international shipping is pricey, I thought our trip to Amsterdam would be a great chance to get another pair.
I follow SneakerKit on Instagram, and for a long time I’ve been seeing them share sneakers using fabric and a product called Decovil. Considering how much I love fabric, the idea of using fabric to make shoes really excited me. I had never heard of this Decovil stuff before (though I assumed it was a sturdy fusible interfacing – which it is), so I looked for it in Amsterdam and found it quite easily. The idea to use Decovil with SneakerKit isn’t my own, and I figured out a lot of it from @tinesews on Instagram, who has a highlighted story (in German) showing how she did it.

And now, I’ll show you my way.
I did stay awake in bed for a few nights trying to think of the best way to do it. Tine lined her sneakers by using spray glue to glue the lining to the Decovil on the inside, and then finished the raw edges with bias binding. I didn’t have spray glue, so I wanted to find another way.
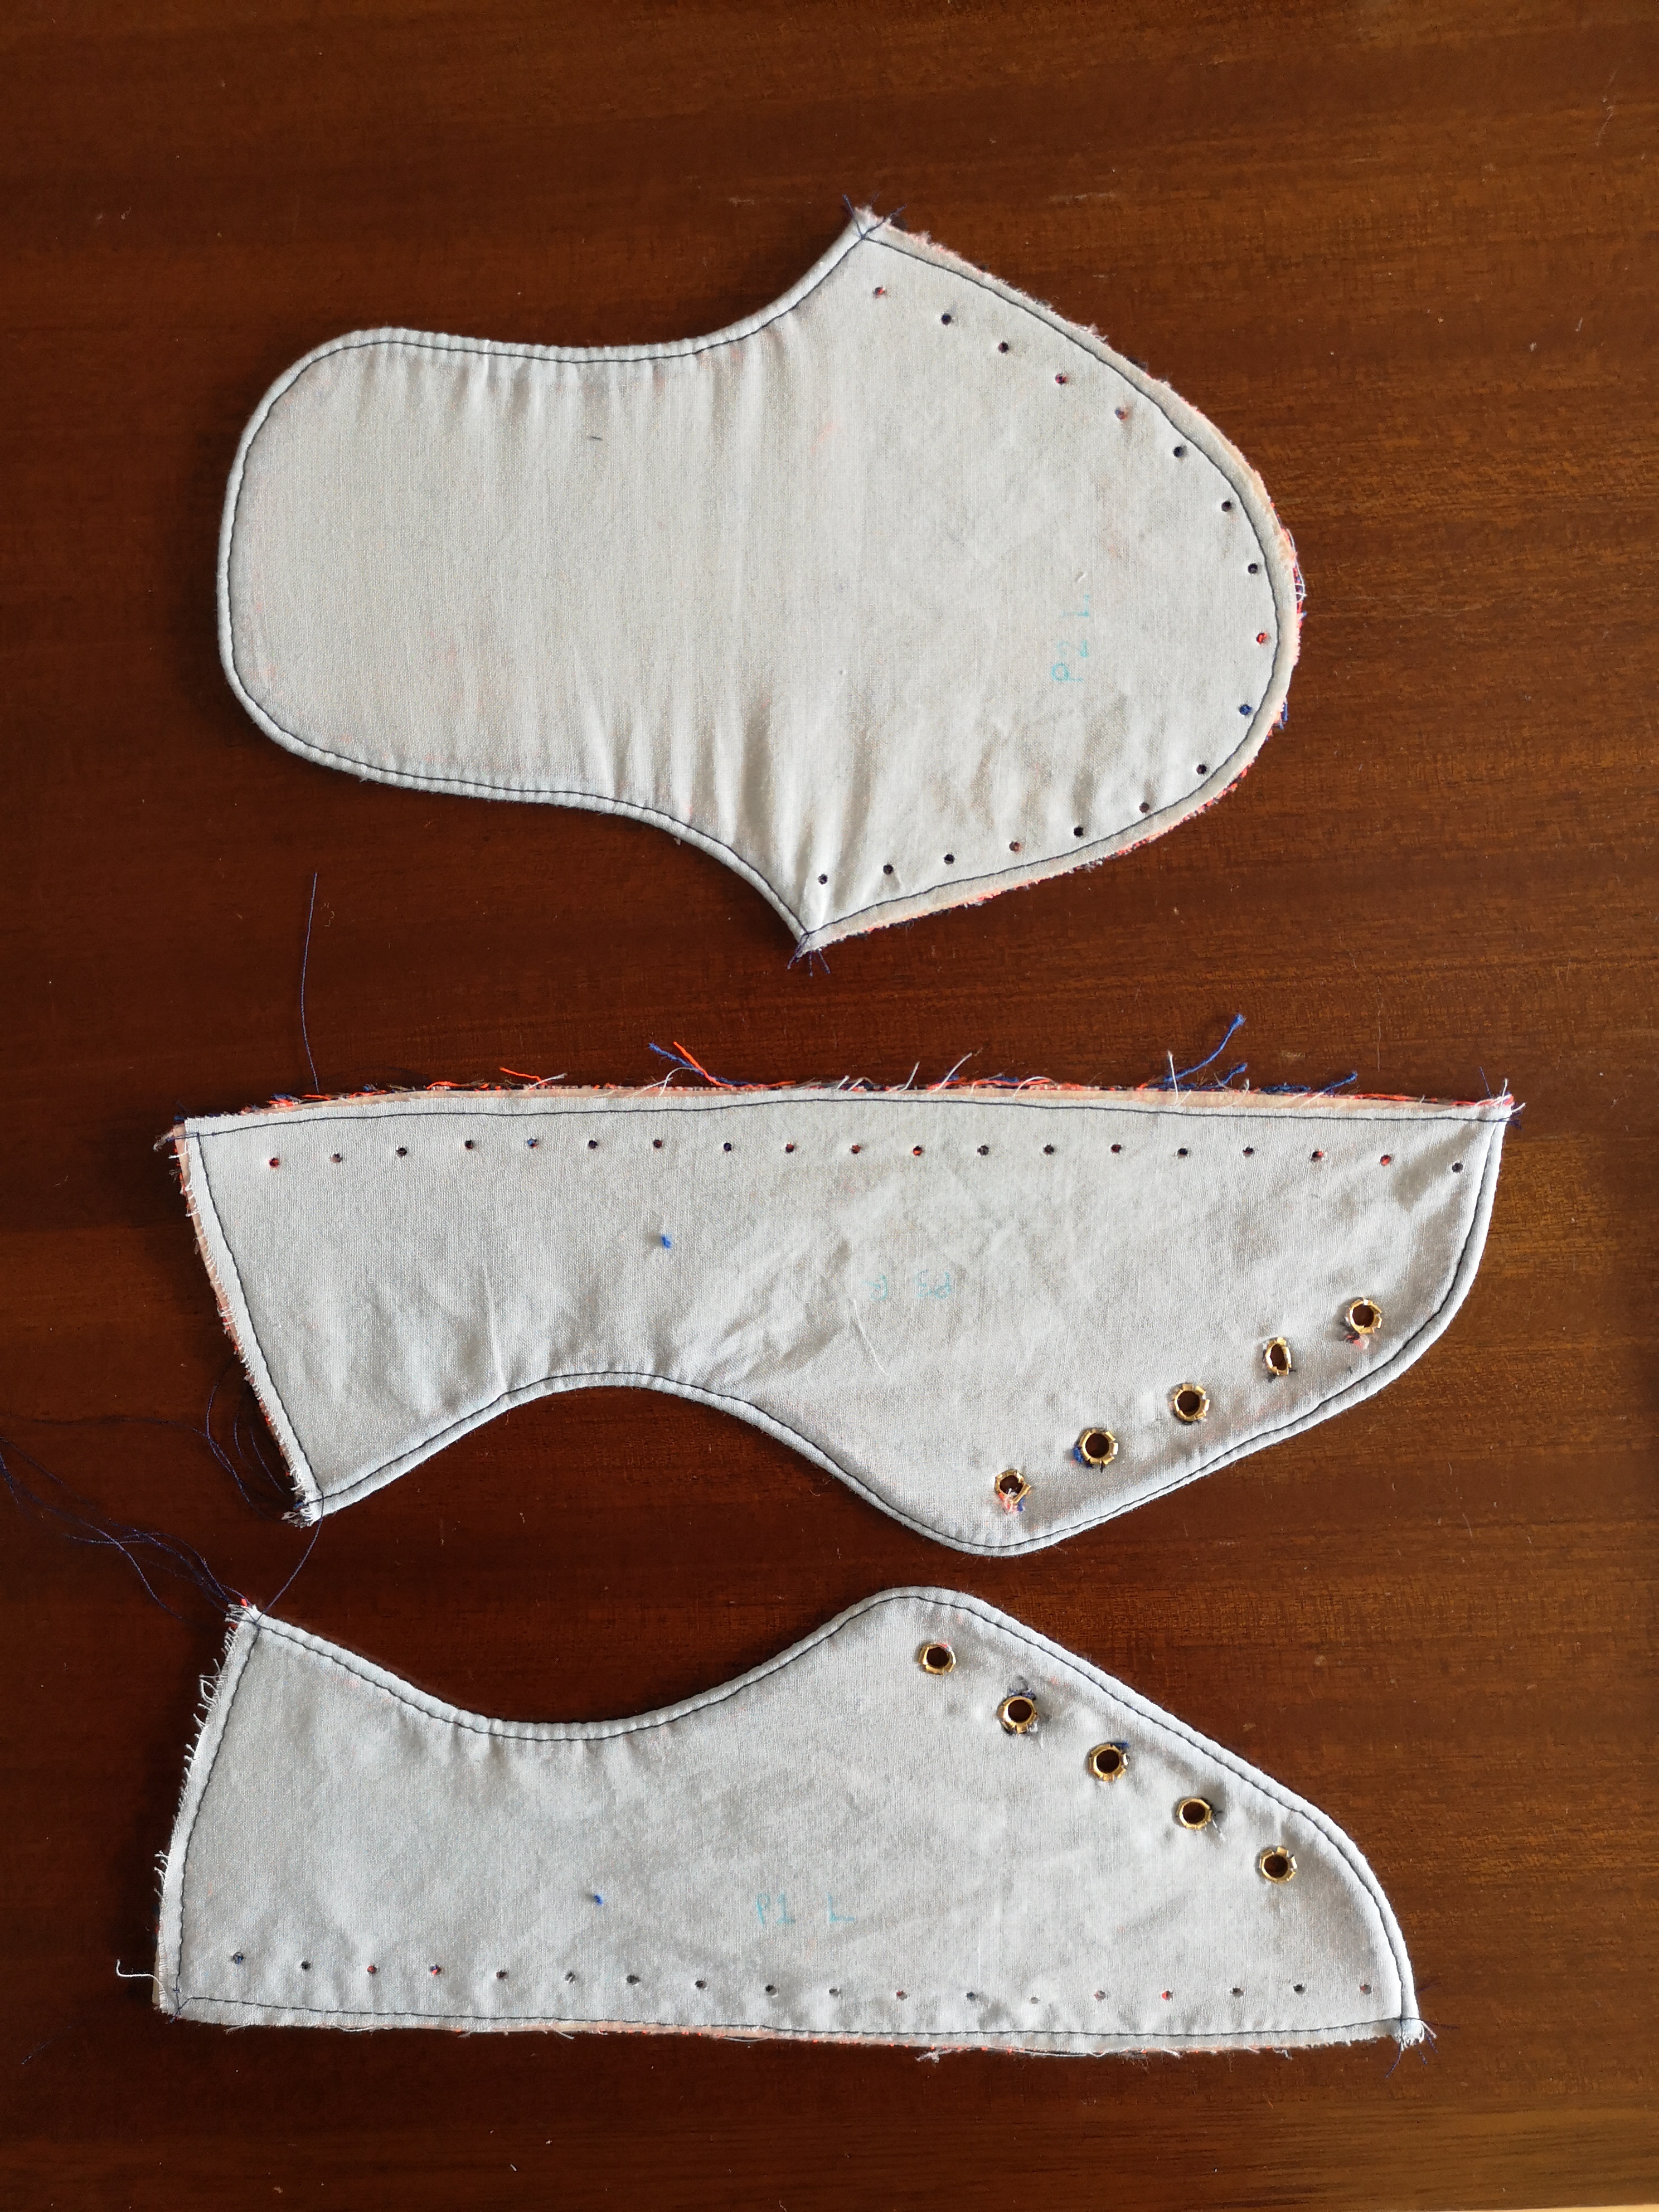
First, I used the template that comes with SneakerKit (downloadable from their website) and traced the pieces onto the non-adhesive side of the Decovil. Basically, I followed the same steps for cutting out leather that SneakerKit provides. I didn’t mark the punch holes.

I cut out the pieces and ironed them to the wrong side of my main fabric, making sure to leave a good border all around each piece for seam allowances. I cut out the pieces, but eyeballed a 1/2″ seam allowance along the top edges of the sneaker sides, and around the long part of the centre piece that would be the tongue.

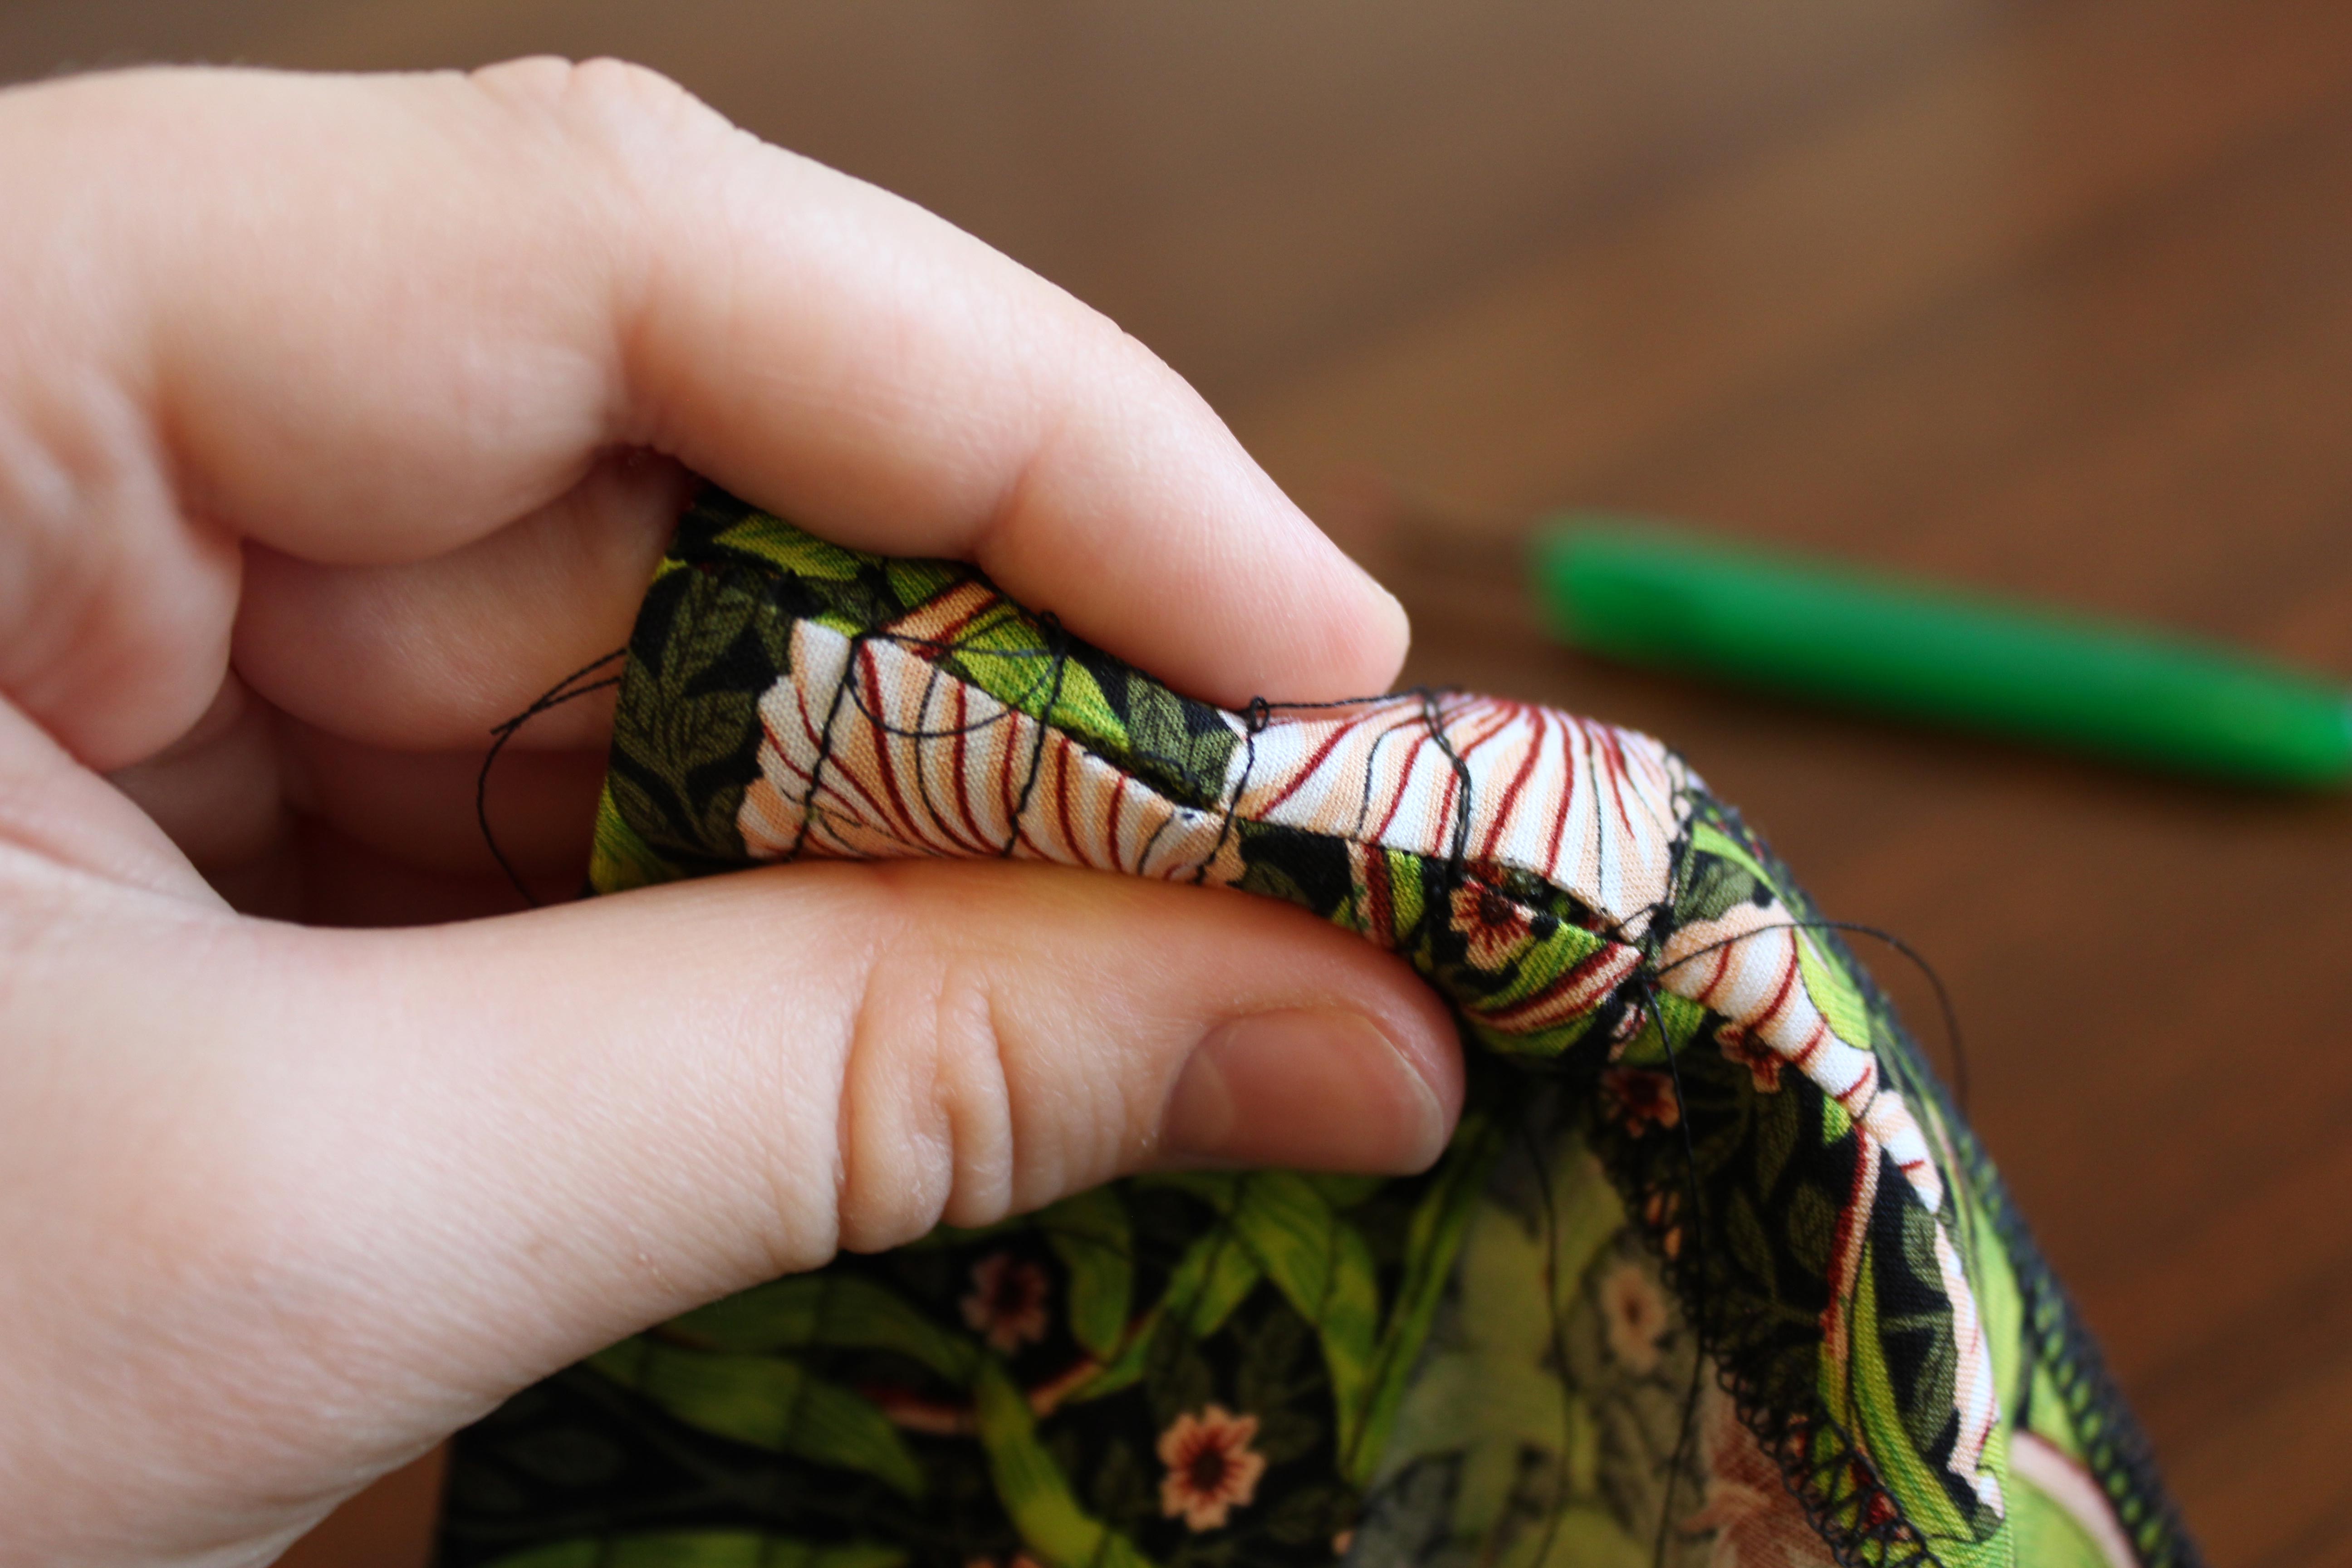
Then I placed these pieces on the lining fabric and cut out the lining using the interfaced main fabric as a template. I sewed the lining to the right side of the main fabric, stitching right along the edge of the Decovil.
I trimmed the seams and clipped the curves, and turned the lining fabric to the inside. I found the lining fabric got kind of tight and pull-y, but I managed to press it out enough that it wasn’t a problem.
Then I topstitched the edges, which also helped keep the lining from flipping out. I also stitched down the open raw edges of the pieces so the lining wouldn’t pull back up.
Once all the pieces were sewn, I marked them and prepared them according to the SneakerKit instructions, but I didn’t punch holes up the back of the shoe/ankle. This is because those holes are used to stitch the two side pieces together (P1 and P3) and I decided I would do this on the sewing machine.
On the tongue, there is supposed to be a little slit in the leather for the laces to be held in place. Since cutting into the fabric would leave an ugly raw edge, I decided to stitch a small piece of bias binding on top of the fabric. I used a very narrow and dense zigzag stitch to tack it in place where marked on the pattern.

I installed eyelets before proceeding. This was a huge pain in the neck. I bought Prym 4mm eyelets in Amsterdam and the tool that came with it kept squishing the eyelets into ovals. To fix this, I used the little hole-punch that came with it and did one or two knocks with the hammer using the tapered end (the end that doesn’t have a hole-cutting…circle) and this helped get things going in the right direction. I then finished them off using the little tool.
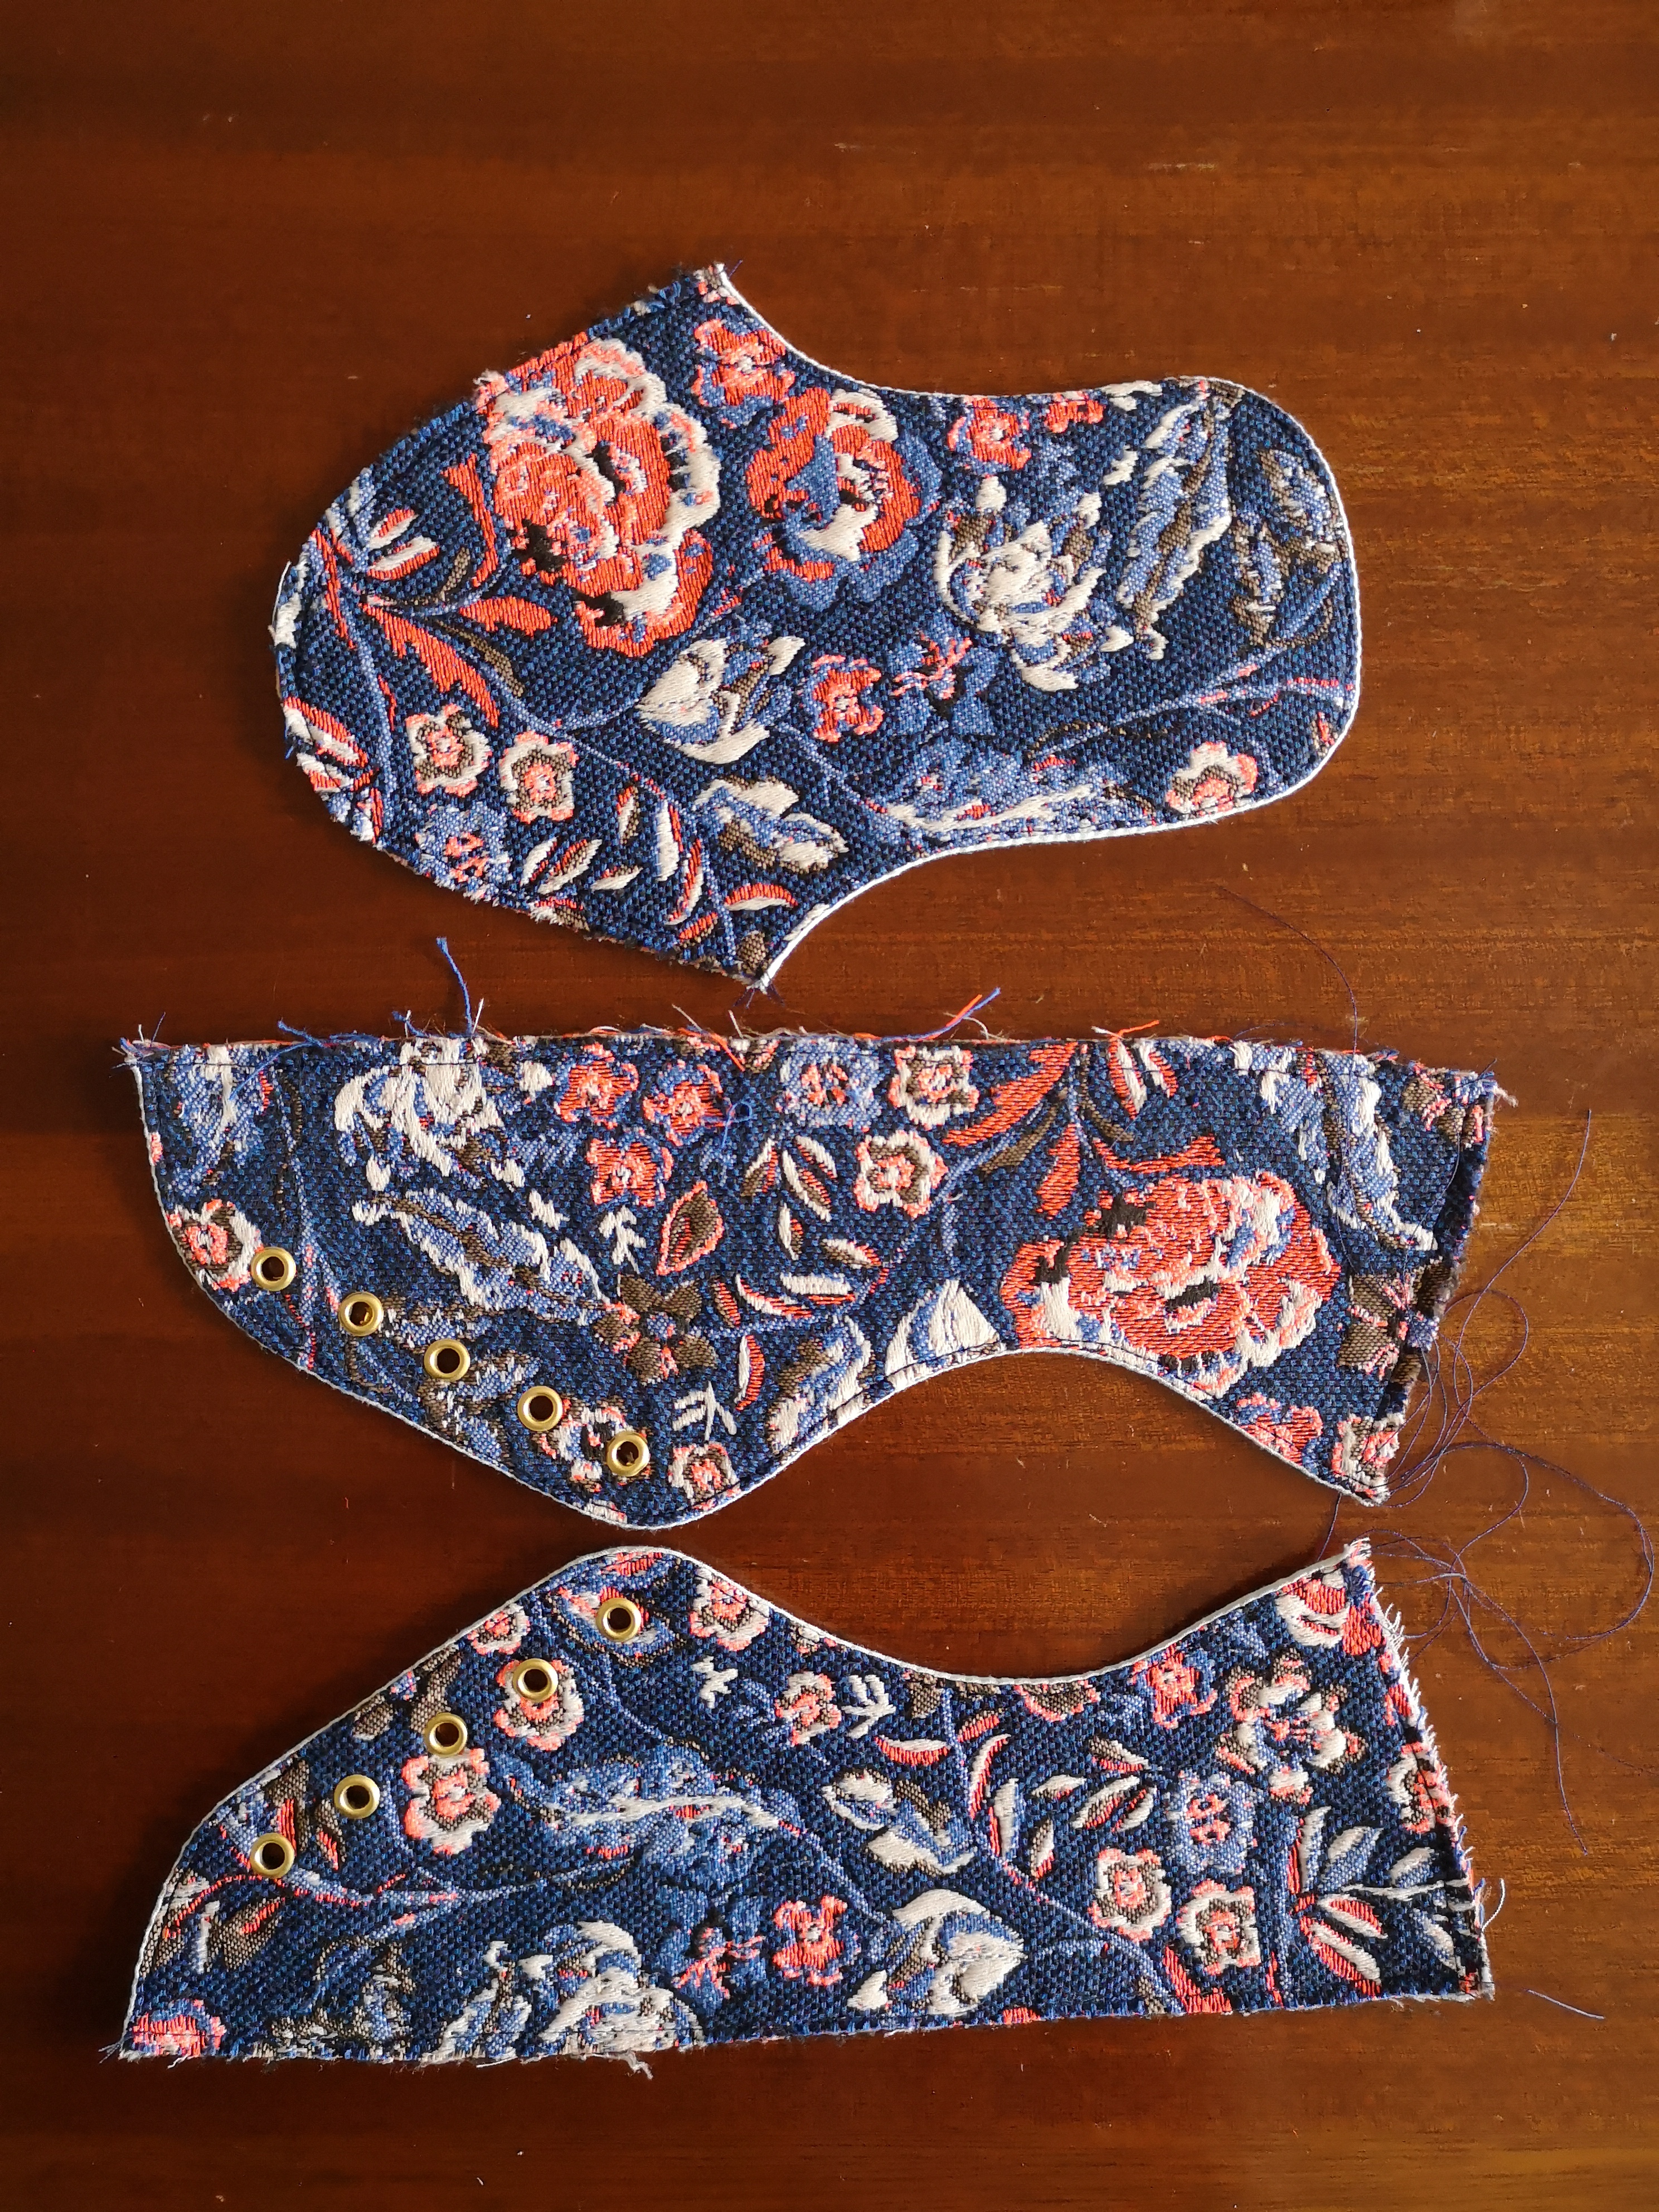
Once all the pieces were ready for assembly, I sewed bias binding onto pieces P1 and P3 (at the back) instead of using the small rectangular piece in the pattern (I used the machine for this – it sewed fine through the Decovil using a size 80 needle). I also found that at this point the fabric was fraying on all my pieces, so I covered each raw edge in fray check.

After that point, I assembled the sneakers according to the Sneaker Kit instructions! And that’s it! They say you can finish SneakerKit in a day, but with all the prep I had to do with the Decovil, the lining, and the eyelets, it took me two. Still, not too shabby for a new handmade pair of shoes!
Shopping for Fabric & Yarn in Amsterdam
Unlike on Prince Edward Island (my latest vacation locale), there are a good number of fabric shops in Amsterdam, along with a good number of blog posts on fabric shops in Amsterdam. The one I used was the Seamwork Guide to Amsterdam, but of course this is my own take on it.
Ever since I’ve started travelling without my family and their itineraries, I’ve started to make my trips revolve around fabric and yarn shops. I always feel slightly guilty that I didn’t go to more museums instead, but at the end of the day fabric shops are how I see new places and what they have to offer. In Amsterdam, just walking to the fabric shops I got to see so much of the city.
Anyways, on this trip I really spent most of my time in fabric and yarn shops, and I have no regrets. Here’s where I went and what I thought:
The first place we visited was the very well-known yarn shop, Stephen & Penelope, made famous by owner and knitwear designer/celebrity, Stephen West. I went in knowing that their yarns are pricey (around 30 euro a skein on average), but I couldn’t go to Amsterdam and not check it out. Many of the yarns there were imports that I can get in various Canadian yarn shops, and I didn’t feel the need to pay in Euros + 21% VAT for something I could get at home. The only yarn I was tempted by was Stephen & Penelope’s in-house yarn brand which was just recently released, and pretty well priced at 20 euro a skein – but I didn’t have any projects in mind for it, so I passed it by.


Right next door is A. Boeken, a small but impressive fabric shop. I went there twice, since the notions section was so impressive that I needed one trip for fabric and another trip for trims and buttons. It was pretty busy and hard to look around with a lot of focus, so I only got two fabrics there. I didn’t find anything there that was really extraordinary, but their prices are reasonable and they have every trim and button you can imagine. I bought loads of trims as well as some metal eyelets for some sneakers I plan to make (I had SneakerKit ship me another kit while I was there). They seemed a bit understaffed and it was a bit hard to find someone to cut yardage for me but I otherwise found the staff nice and helpful.


Right down the nearest side street to A. Boeken is Tinctoria. I didn’t plan on buying anything there but I did a lot of natural dyeing in school and had to check it out. The fabrics there were beautiful, but quite expensive (I can imagine the work that went into them, so they were priced fairly, just out of my price range). The owner had a huge basket filled with off-cuts and pieces with mistakes on them, and she said I could dig through the basket and she would price the pieces by weight. I found some beautiful velvet scraps, but then realized I had enough scraps at home and didn’t need to buy more.


Across the little canal bridge from A. Boeken, Stephen & Penelope, and Tinctoria, is Capsicum Naturstoffen – I went in because A) it was raining, and B) I felt like I needed to visit all the fabric stores in the city. I wasn’t really expecting to find the most exciting fabric I would find on my trip. The store itself is lovely – beautiful textile homewares (pillows, tableclothes, etc) and scarfs, as well as some garments. The fabric they have is folded up, rather than on bolds, and just kinda looks like giant pillows on a shelf. The woman working there was incredibly helpful and explained the pricing and manufacturing processes of the fabrics. I chose a beautiful double ikat cotton with colourful squares on a cream background and I love it so much. It was pricey (and on the lower end of the range in the store – the hand-woven jacquard silks were 110 euro a metre), but it was a really lovely “treat” to bring back from my visit to Amsterdam.

One morning we hopped over to De Steek, which was close to our Air BnB in the Jordaan neighbourhood. I hadn’t seen De Steek on any blogs or guides, but it was on the list of stockists for Papercut Patterns, and I was in search of a Meridian Dress pattern in print (spoiler – De Steek doesn’t actually carry Papercut Patterns). De Steek is focused on sustainability, and a lot of their fabrics are deadstock or ecologically made. I bought some nice cotton seersucker and a neat “eyelet” knit. They also carry lovely lingerie and legging kits, as well as Merchant and Mills and Named patterns. They have a sewing studio so if you need to get your sewing fix on while abroad, that’s the place to go.

We spent a morning checking out Albert Cuypstraat market, an outdoor market which I think is open 7 days a week. I didn’t take any photos because I was kind of overwhelmed by how much stuff was there. The market has food and weird off-brand socks and stuff, but they also have fabric booths that sit outside actual fabric stores. There are quite a few along Albert Cuypstraat, but the ones I went to were Kniphal and N&N Stoffen. I really liked Kniphal (they have amazing upholstery fabric if you’re looking for any) and they had lovely garment fabrics, but none that I especially wanted. I couldn’t quite tell how they were organized but it was fun to just browse around. N&N Stoffen had a lot of knits and baby fabrics (like double gauze with little whales on them and whatnot) and no fabric that really interested me, but I did like their selection of books and magazines. I ended up going home with a La Maison Victor book of dresses (called Jurken 2) as it had loads of dress patterns I think I’d like to use.
Another amazing shop I visited was actually in The Hague (or Den Haag as the Dutch call it), called Cross and Woods. I went there with my friend Priscilla who I met through Fibreshare, and it reminded me a lot of The Workroom and EweKnit here in Toronto (especially since EweKnit is also a sewing/knitting shop). A lot of their fabrics were Merchant and Mills, Nani Iro, and Liberty, all of which I can get at EweKnit, so I didn’t do any fabric shopping there. They had gorgeous yarns that I couldn’t get at home, and I had a lovely time picking out some skeins with the help of the very kind store owners.
And that’s it! Please comment if you think I missed any shops worth a visit. If you haven’t been to Amsterdam, I hope this helps in planning your textile-y trip!
Adventures in Shoemaking: Desert Boots at Art & Sole Academy

I haven’t been sewing much over the last month – between travelling to Prince Edward Island and Boulder, Colorado, I’ve really only had time to work on some gifts I had put off making. I did get in some great shoemaking, though – and it was the real deal this time.
For a long time, I had been wanting to take a class at the Art and Sole Academy in East Toronto. Eitan and I started by taking the Shoemaking 101 class, a quick 2-hour intro to the process of making shoes. It isn’t a class where you get to make anything, but you learn all about the materials and tools that make a shoe. I knew during that class that I HAD to take a proper workshop and make something. After a bit of nudging, Eitan agreed to take the Intermediate class with me starting at the end of June.
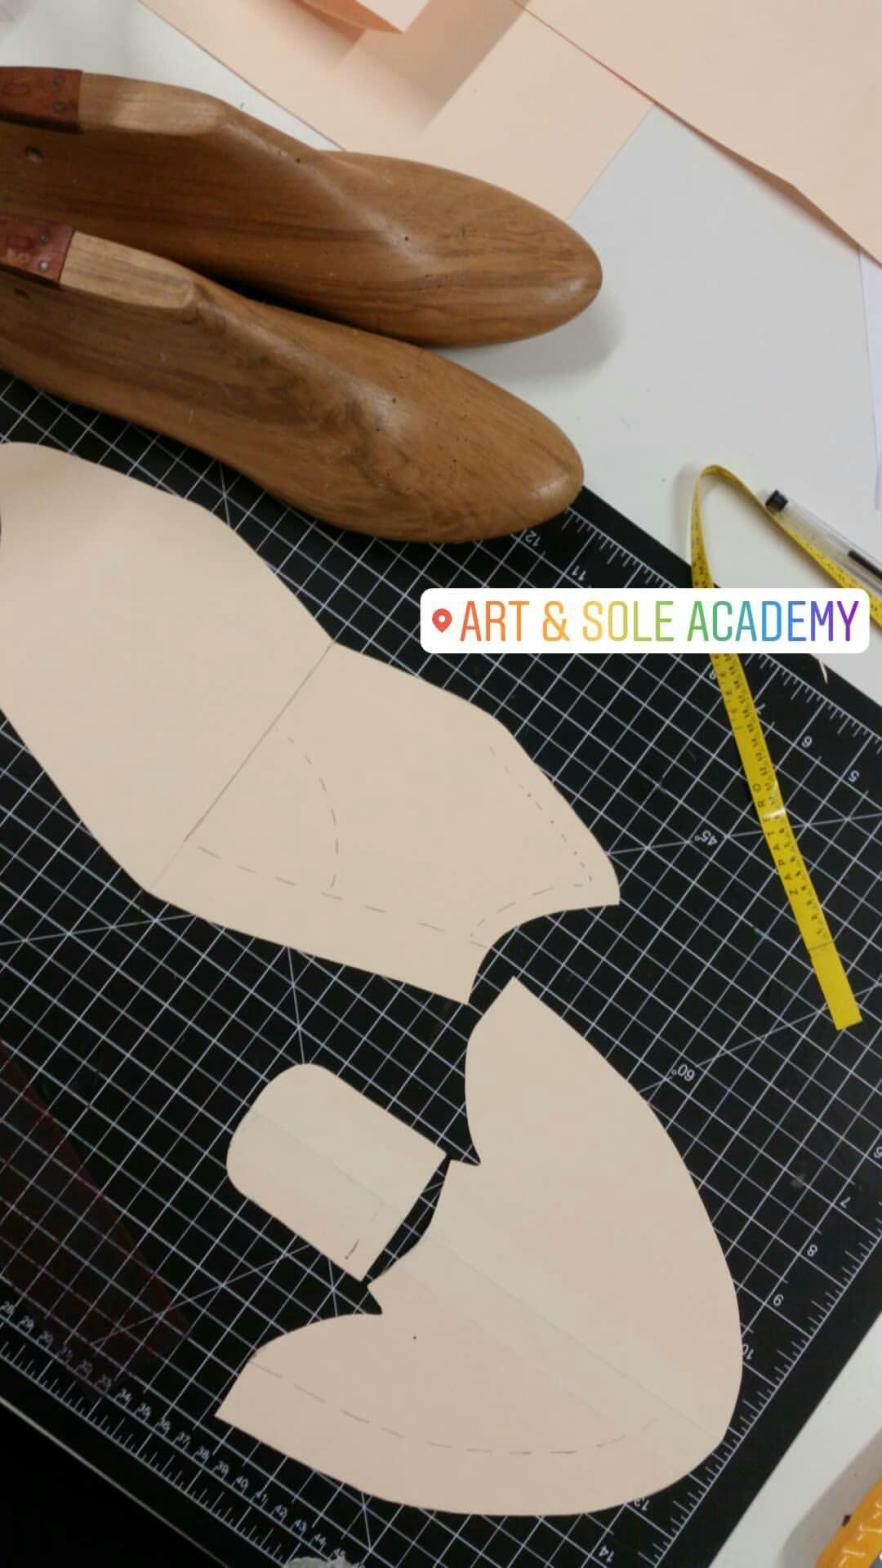
At Art & Sole, the classes are pretty small, and each student works on their desired “intermediate level” shoe – we had one student working on heels, three working on Oxfords, and I was working on desert boots. Jen, our wonderful instructor, would spend the class guiding each of us along individually, depending on what we were working on. The class was 5 sessions, but all but one of us needed to come back for several hours (fortunately, Jen includes this time in the tuition). That leaves you with a total of 35+ hours of shoemaking. Phew!
We all started off the same way – by making our pattern. This process actually took almost two sessions. You tape up your last (the wooden form on which the shoe is built) with masking tape, and then peel it all off and put it on card stock. You divide that into pattern pieces, and those are the pieces you use to cut out your leather.

I bought some lovely kid suede at Perfect Leather on King St., and lovely magenta lamb skin for a contrast lining. I had to cut pattern pieces from both of these, and then sew them together on the sewing machine.


Then came a process called lasting, which is basically stretching the leather over the last, and hammering it down on the bottom. Then you glue it all down where you nailed it (shoemaking involves a LOT of glue). Since all the leather gets built up and lumpy on the bottom, you have to do something called skiving. This involves taking a knife and shaving away the leather so the bottom is nice and flat. I struggled with this a bit, and my knife slipped and made a nice little slice in my arm. Luckily Jen had a first aid kit on hand, and she and Eitan bandaged me up.
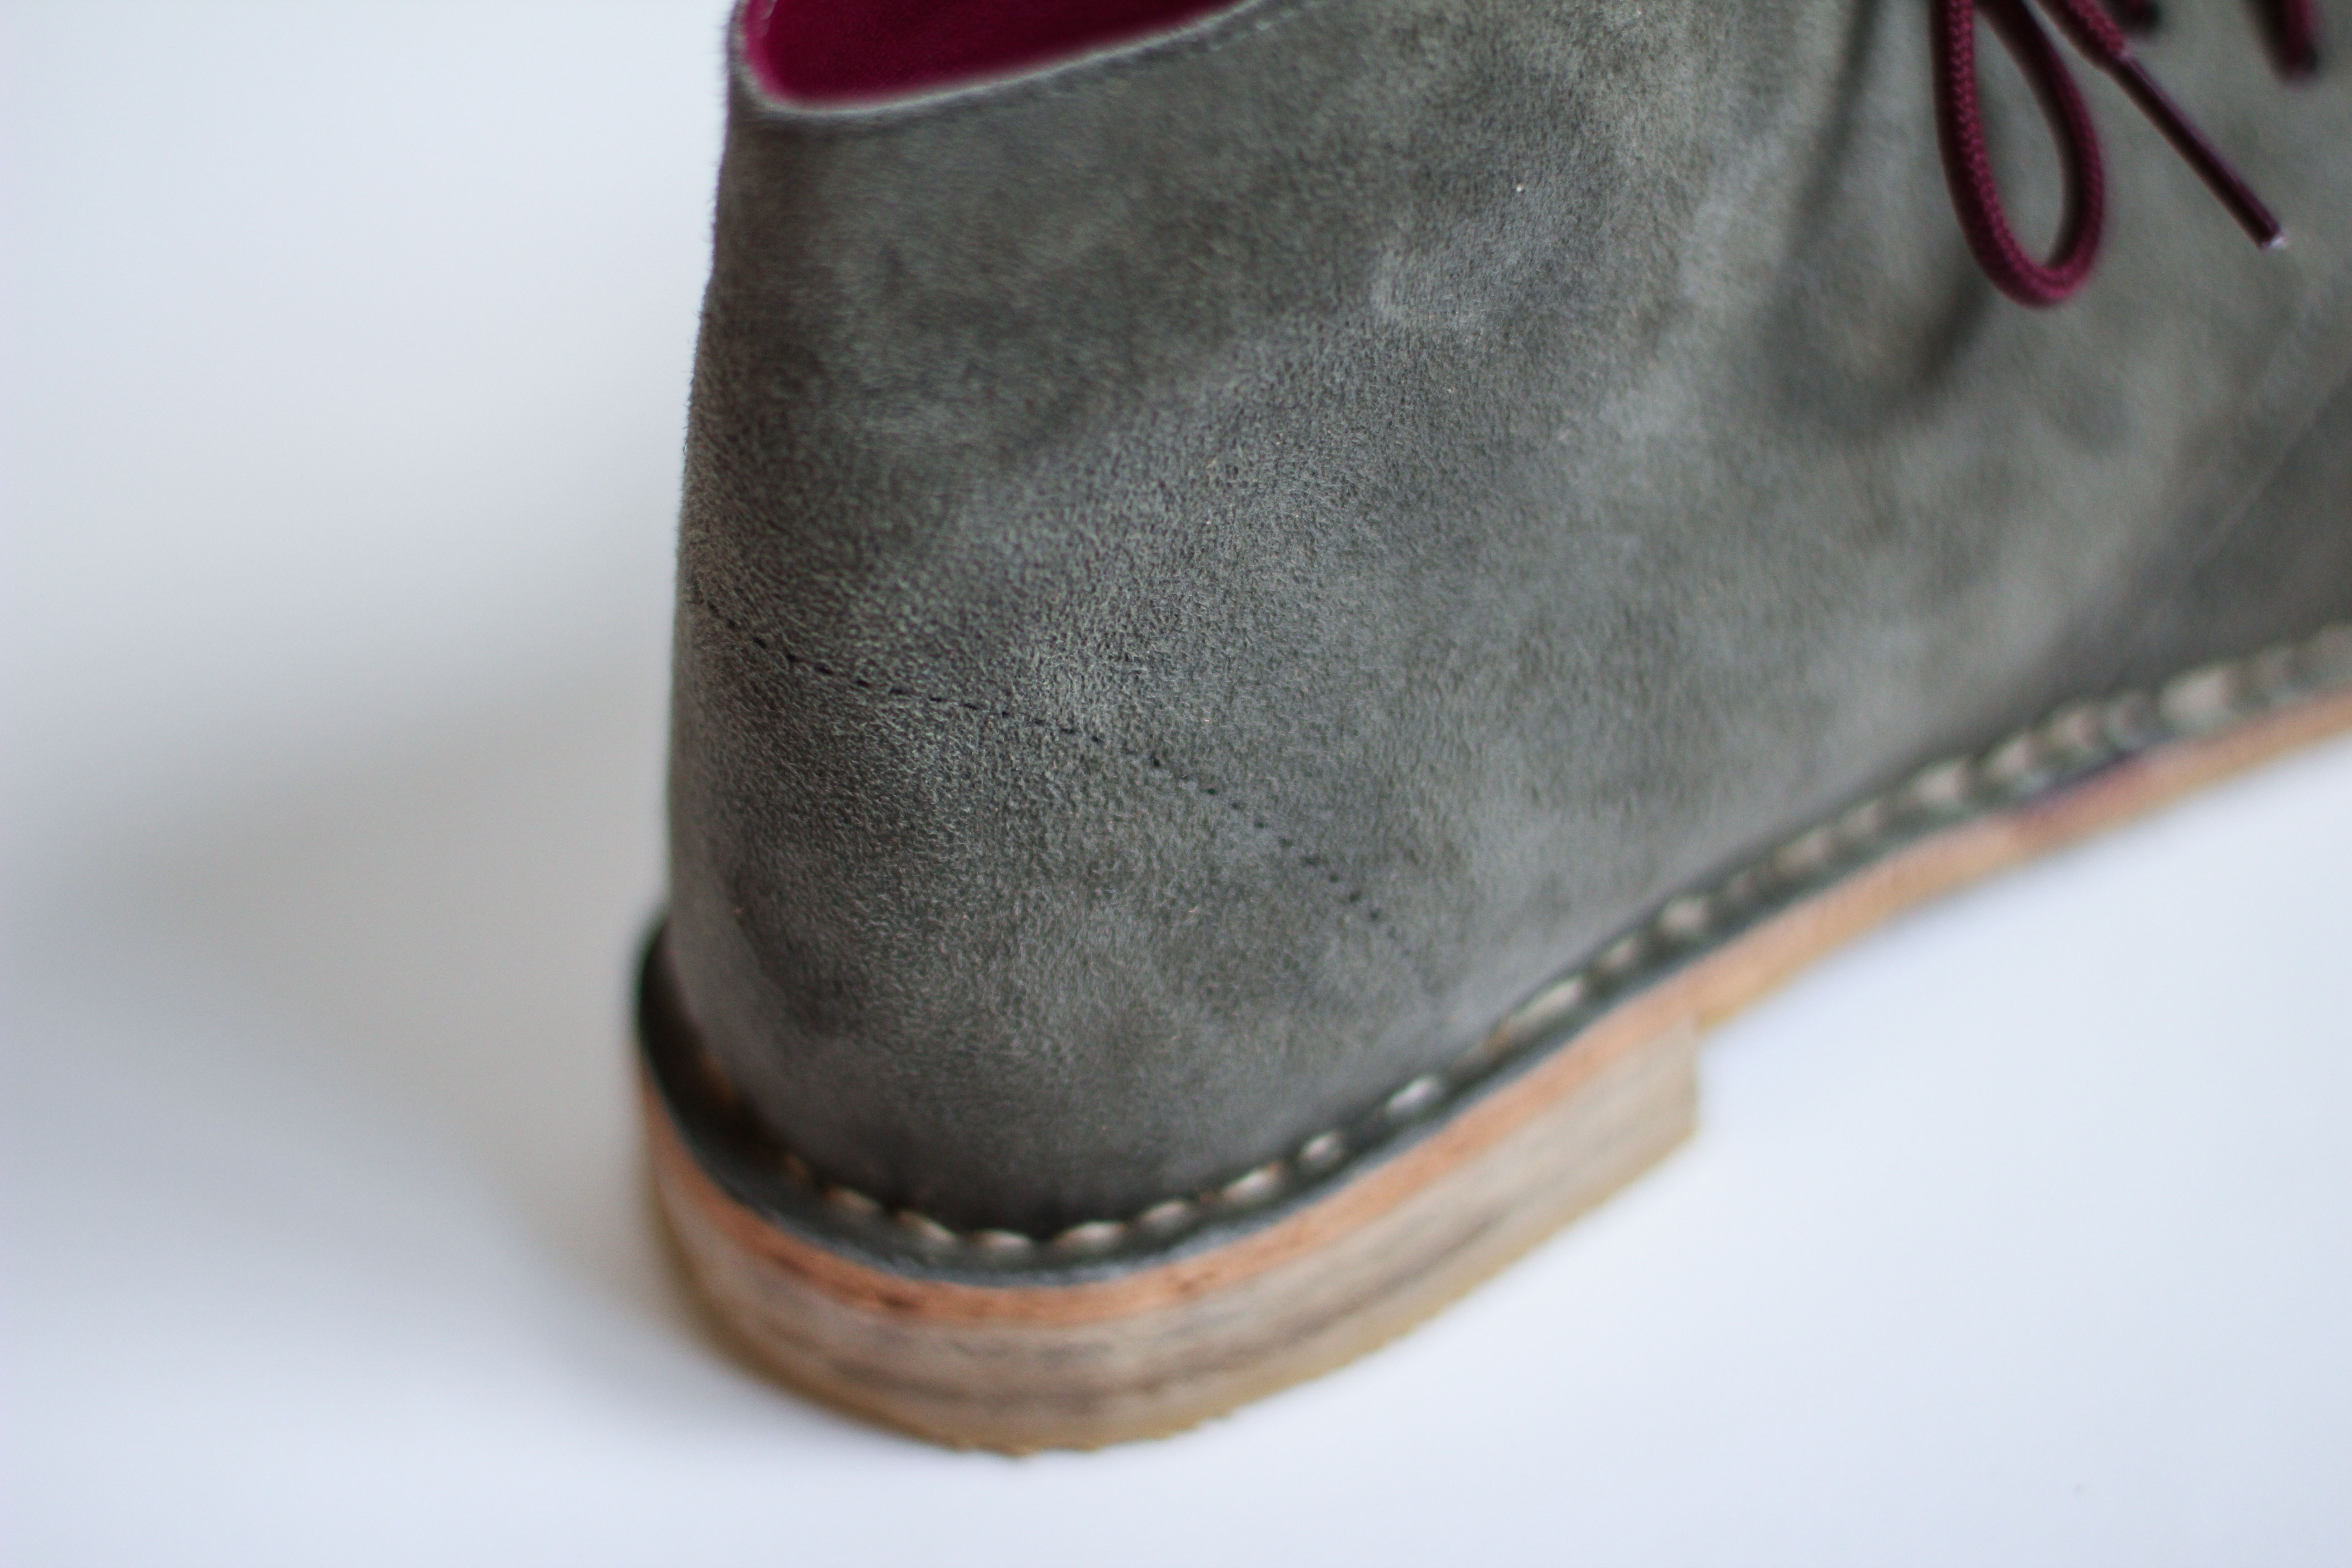
Anyways, I wasn’t letting a cut stop me! After lasting the lining and a layer of toe and heel stiffeners (a small piece of vegetable-tanned leather that helps keep the toe and heel of the shoe nice and strong), I had to glue on the midsole, which for a desert boot, you cut out extra large and cut away the excess after stitching is done. After glueing on the midsole, I had to glue the upper leather (the suede) to the midsole, and then I had to stitch it down. I did this stitching by hand, using a handy little stitching tool and waxed thread.
 Then I had to glue on the heel and the rubber treads. Using a belt sander, I sanded all the edges of the sole smooth, did a little cleaning up, added foam insoles, and they were done!

I tried them on, and they were a touch snug, but Jen told me that an easy solution is lightly wetting the insides and walking around in them for a bit. Leather becomes very malleable when wet, and will mould to the shape of your foot quite nicely! The only thing I don’t love about my new shoes is that the soles are a bit thin – I think just one more layer of leather would’ve made them perfect. As is, I can feel the heel through the bottom of the shoe. Still, pretty impressive for a first time shoe-maker!


I am already thinking about which classes to take at Art & Sole next! I would love to make sandals some day (which is easier than making shoes), and I’d also love to make ballet flats. I have the knowledge now to make shoes again on my own, but the tricky thing is that shoemaking involves a lot of tools (I may have a sewing machine and x-acto knife, but I don’t have a belt sander…). Lasts are also pretty tricky to find, and are integral to making structured shoes. But, maybe one day I’ll invest in a pair of lasts and sort out some way to make some shoes at home. Until then, I’ll have to stick to Sneaker Kit or going back to Art & Sole Academy!
Adventures in Shoemaking: SneakerKit Review
Lately I’ve been really into the idea of making my own shoes. When I looked up at-home shoemaking, I had a lot of trouble finding any resources. I found a few other bloggers who make their own shoes and have shared their experiences, but I’ve learned that shoemaking is generally a pretty guarded secret. What I did manage to find was a small brand called SneakerKit, which began on Kickstarter just a few years ago. They sell at-home sneaker-making kits, which include a sole, insole, thread, needle, and pattern. The shoes don’t need lasts or glue – they’re entirely stitched together. Their website is not terribly informative, and I found it hard to navigate. I also couldn’t find any reviews on the product (I love reviews) – but I convinced Eitan to just jump into it with me.
We each ordered a kit, but found it a bit stressful to choose a size – the website has no sizing guide and every European conversion guide we found online was different. We couldn’t find any information anywhere on the website on how to choose a size right for you, or what the difference is between their “slim” soles and their “regular” (or “Publico” soles). I managed to find this Kickstarter page (scroll far down), which had a conversion chart – we went with our Japanese size, which is really just based on the cm length of your foot from toe to heel (so straightforward!). In US sizes I’m generally a 9.5-10, and I ordered a 41.5. Eitan is a US 11, and he got the 44.5. I’d say both of our soles were the right size for us in the end.
Shopping for leather was a more frustrating endeavour than I had anticipated. SneakerKit does give you the option to order from their selection of leather, but I wanted to shop for it in person and know the feel of what I was getting. I had never shopped for leather before, and headed downtown to Perfect Leather on King St W. I don’t know if this is the case at all leather stores, but at Perfect Leather they only sell by the piece. I needed cowhide, which I thought would be the sturdiest and most flexible option for making sneakers – but that would mean I had to buy an entire cow’s worth – about 20 sq ft (leather is often sold by the square foot – Sneakerkit only requires 2 sq ft). A man working there showed me a selection of goat skins (which are smaller as the animal is smaller), and insisted it was perfect for shoe making. It wasn’t – it was much too thin and would’ve had my toes poking through the top of the shoe. He said they will not cut leather, so I could choose between the small goat skins and the gigantic rolls of cowhide.
Well.
Being the fabric hunting madwoman that I can be, I rummaged through the shelves of goat skin and found a few smaller pieces of cowhide (when I pulled them out and placed them on the table to measure them, the man would scratch his head and tell me “This is cowhide”. Duh.) I found a textured piece of seafoam blue leather that was absolutely what I was looking for, and I also managed to find gray leather for Eitan. While I was frustrated that I didn’t have the rest of the store available to me as an option, I was pretty pleased that I didn’t have to settle.
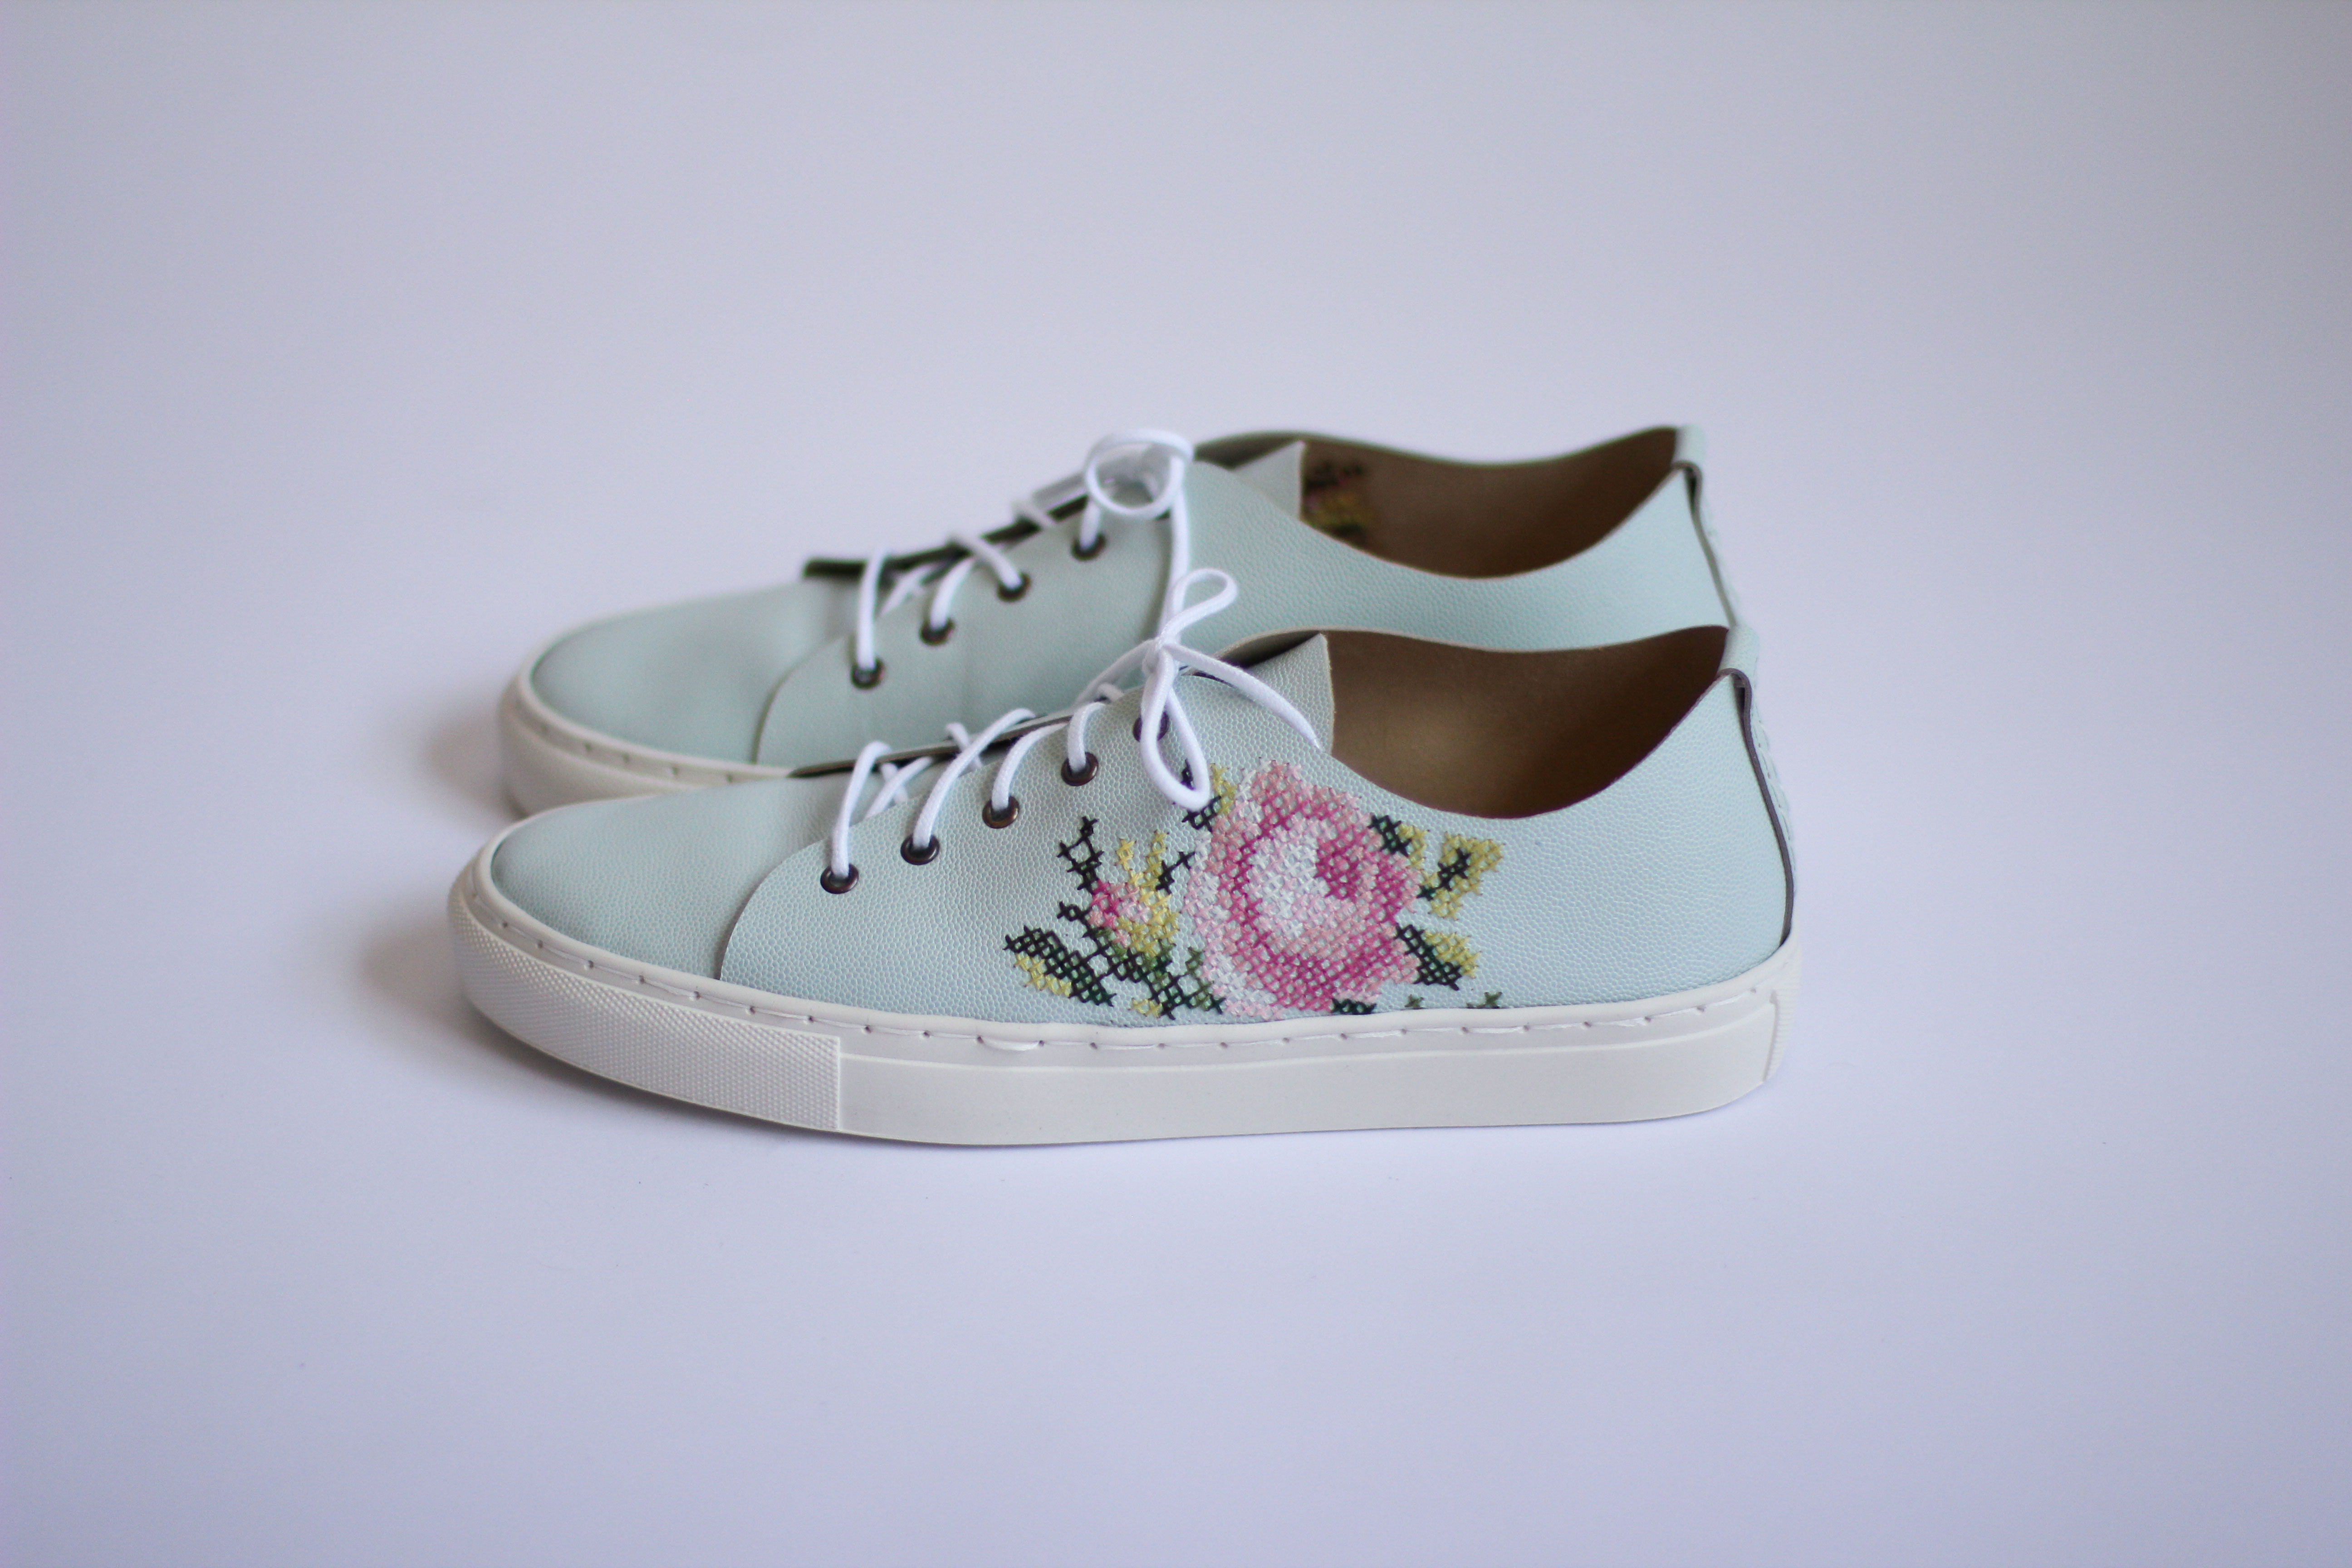
While I was on the streetcar I had a grand, ambitious idea to cross stitch my shoes. I knew it was too ambitious, but that didn’t stop me. I thought that if I pre-poked a grid of holes in the leather, it would be a cinch. It was NOT a cinch.

Leather is, well, skin. It kind of has this self-healing quality, and shortly after I hammered all the holes in with my awl, the holes slowly closed up. This made it incredibly difficult to get a needle through. Also leather is “sticky” (which is why you need a specialty leather needle for a sewing machine), and the needle often got stuck going through (granted, I was using a regular sewing needle. There may exist needles intended for this specific task). Many times I questioned if I should stop and start over with the leftover leather I had. Many. Many. Times.
But I’m stubborn, so I persisted. I decided it would be best to have asymmetrical shoes and have a smaller bud on the other shoe, so that I wouldn’t have to endure the same pain twice. After three days, my hands were cramped and I had blisters on my fingers, but I was pretty dang pleased with myself. As Poison sings, “every rose has its thorn” (or in this case, needle). I Mod Podge-d the stitching on the inside because I didn’t want my foot to wear away at it too much.
 Then came the construction. I was kind of lucky since I took so long to cross-stitch my shoes that Eitan finished his pair before me, so I kind of learned from him, rather than from SneakerKit’s vague online instructions.
The instructions are kind of hard to understand, and the videos don’t have any commentary. The trickiest parts were hard to see. Also, even when you get the gist of it, sewing the leather to the sole is kind of finicky. Both of us had to redo one of our shoes once. It’s pretty much all about getting the tension right. It’s easy enough to pull the stitches and adjust the tension, except that on both of my shoes, at some point the needle split the thread in one of the stitches and it became impossible to pull the stitches tight. I had to kind of bring the loose parts into the inside of the shoe and hope the insole hid them.
Eitan was so excited to wear his shoes the first day – and for good reason, they look great! He wore them for a day at work and when he came home he took the insoles out – the bottoms had completely crumbled. We are waiting for a response from SneakerKit to find out what’s going on, but in the meantime I cut a second pair of insoles out of scrap leather and placed them underneath the ones included in the kit, just in case.
Otherwise the shoes are pretty comfortable, but they don’t seem to be incredibly practical. When I bend my toe I can see the stitches and the holes in the leather, and I feel like anything could seep inside my shoes with ease. Anyways, I spent so much time on the cross-stitching that I wouldn’t want to wear them anywhere they’d get dirty, so for that reason alone they’re not very practical. Eitan is worried that the stitching will come undone, and I get that (we kept joking about his shoes spontaneously falling apart at the office).
In the end, I wasn’t really expecting that I would spend many days strolling for hours in the first sneakers I had ever made. I’m going to call these my art sneakers, more for show than for wear, but I do still hope to wear them once in a while. It is awfully satisfying to make the things you wear on your feet.
Tutorial: Make a Ruched Elastic-Waist Skirt

When I was a teenager, I pretty much only ever sewed one skirt pattern – a rectangle with a ruched elastic waistband. I made a version in cotton voile, which I wore on my first date with my husband. I made a version in flannel, before I knew how to choose appropriate fabrics for projects. I made a very bulky one out of cotton sateen, and one out of cheap cotton/poly batiste (which I am embarrassed to say, I still wear at home). It was just an incredibly versatile pattern.
I made all those skirts using instructions from Anna Maria Horner’s blog, where you can still find a PDF of the pattern for a lined skirt. I’ve since developed my own method of making this skirt, which I find quicker and uses less fabric (I found that most fabrics I used had no need for the lining). AMH’s pattern will work great for you if you’re using a very lightweight or sheer fabric.
Anyways, if you’d like to learn how I do it, please follow along! If you can sew a straight line on a sewing machine, you can make this super-easy skirt! The hardest part is inserting the elastic.
What You’ll Need:
- 1.5-2 yds fabric of your choice (I like flowy fabrics like rayon, you can use any lightweight fabric such as cotton voile/lawn. You could probably use silk, but it’ll be a bit trickier to sew the elastic channels).
- Matching thread
- Safety pins (I like to have both regular ones and the tiny ones on hand)
- 1/4″ wide elastic – enough for 3 times your waist measurement
- Seam ripper
Measuring and Cutting:
The only piece you’ll need to cut for this skirt is essentially a large rectangle.
For the width, you’ll want to measure at least 10″ more than your HIP measurement. I recommend cutting more than that, though, because it will give you more gathers at the waist. I went with the width of my fabric from selvedge to selvedge – 60″.
If your fabric isn’t very wide (44″ for example), fold the fabric in half and cut two rectangles at HALF your desired width.
The width you choose doesn’t need to be precise – just choose less width for less gathers (just make sure it is bigger than your hip measurement), and more width for more gathers (I find between 60-80″ total width is ideal).
For the length, determine your preferred skirt length, and add 2 3/8″ (for the waistband) and 1″ (for the hem). For example, if you want a 25″ long skirt, your rectangle will need to be 28 3/8″ tall.

Sewing:
Start by sewing the side seams, right sides together (1 seam if you only cut one rectangle, 2 seams if you cut two rectangles). Finish the seam and press open (I like to serge the edges first, before sewing, using a 3-thread overlock stitch).

Then, you’ll want to fold over the top edge of your skirt 1/2″ and press. Then fold again 2″ in, and press well. You can pin the fold in place if you want, but if your folds are crisp I don’t find it necessary. Make sure to keep the fold the same width all the way around.

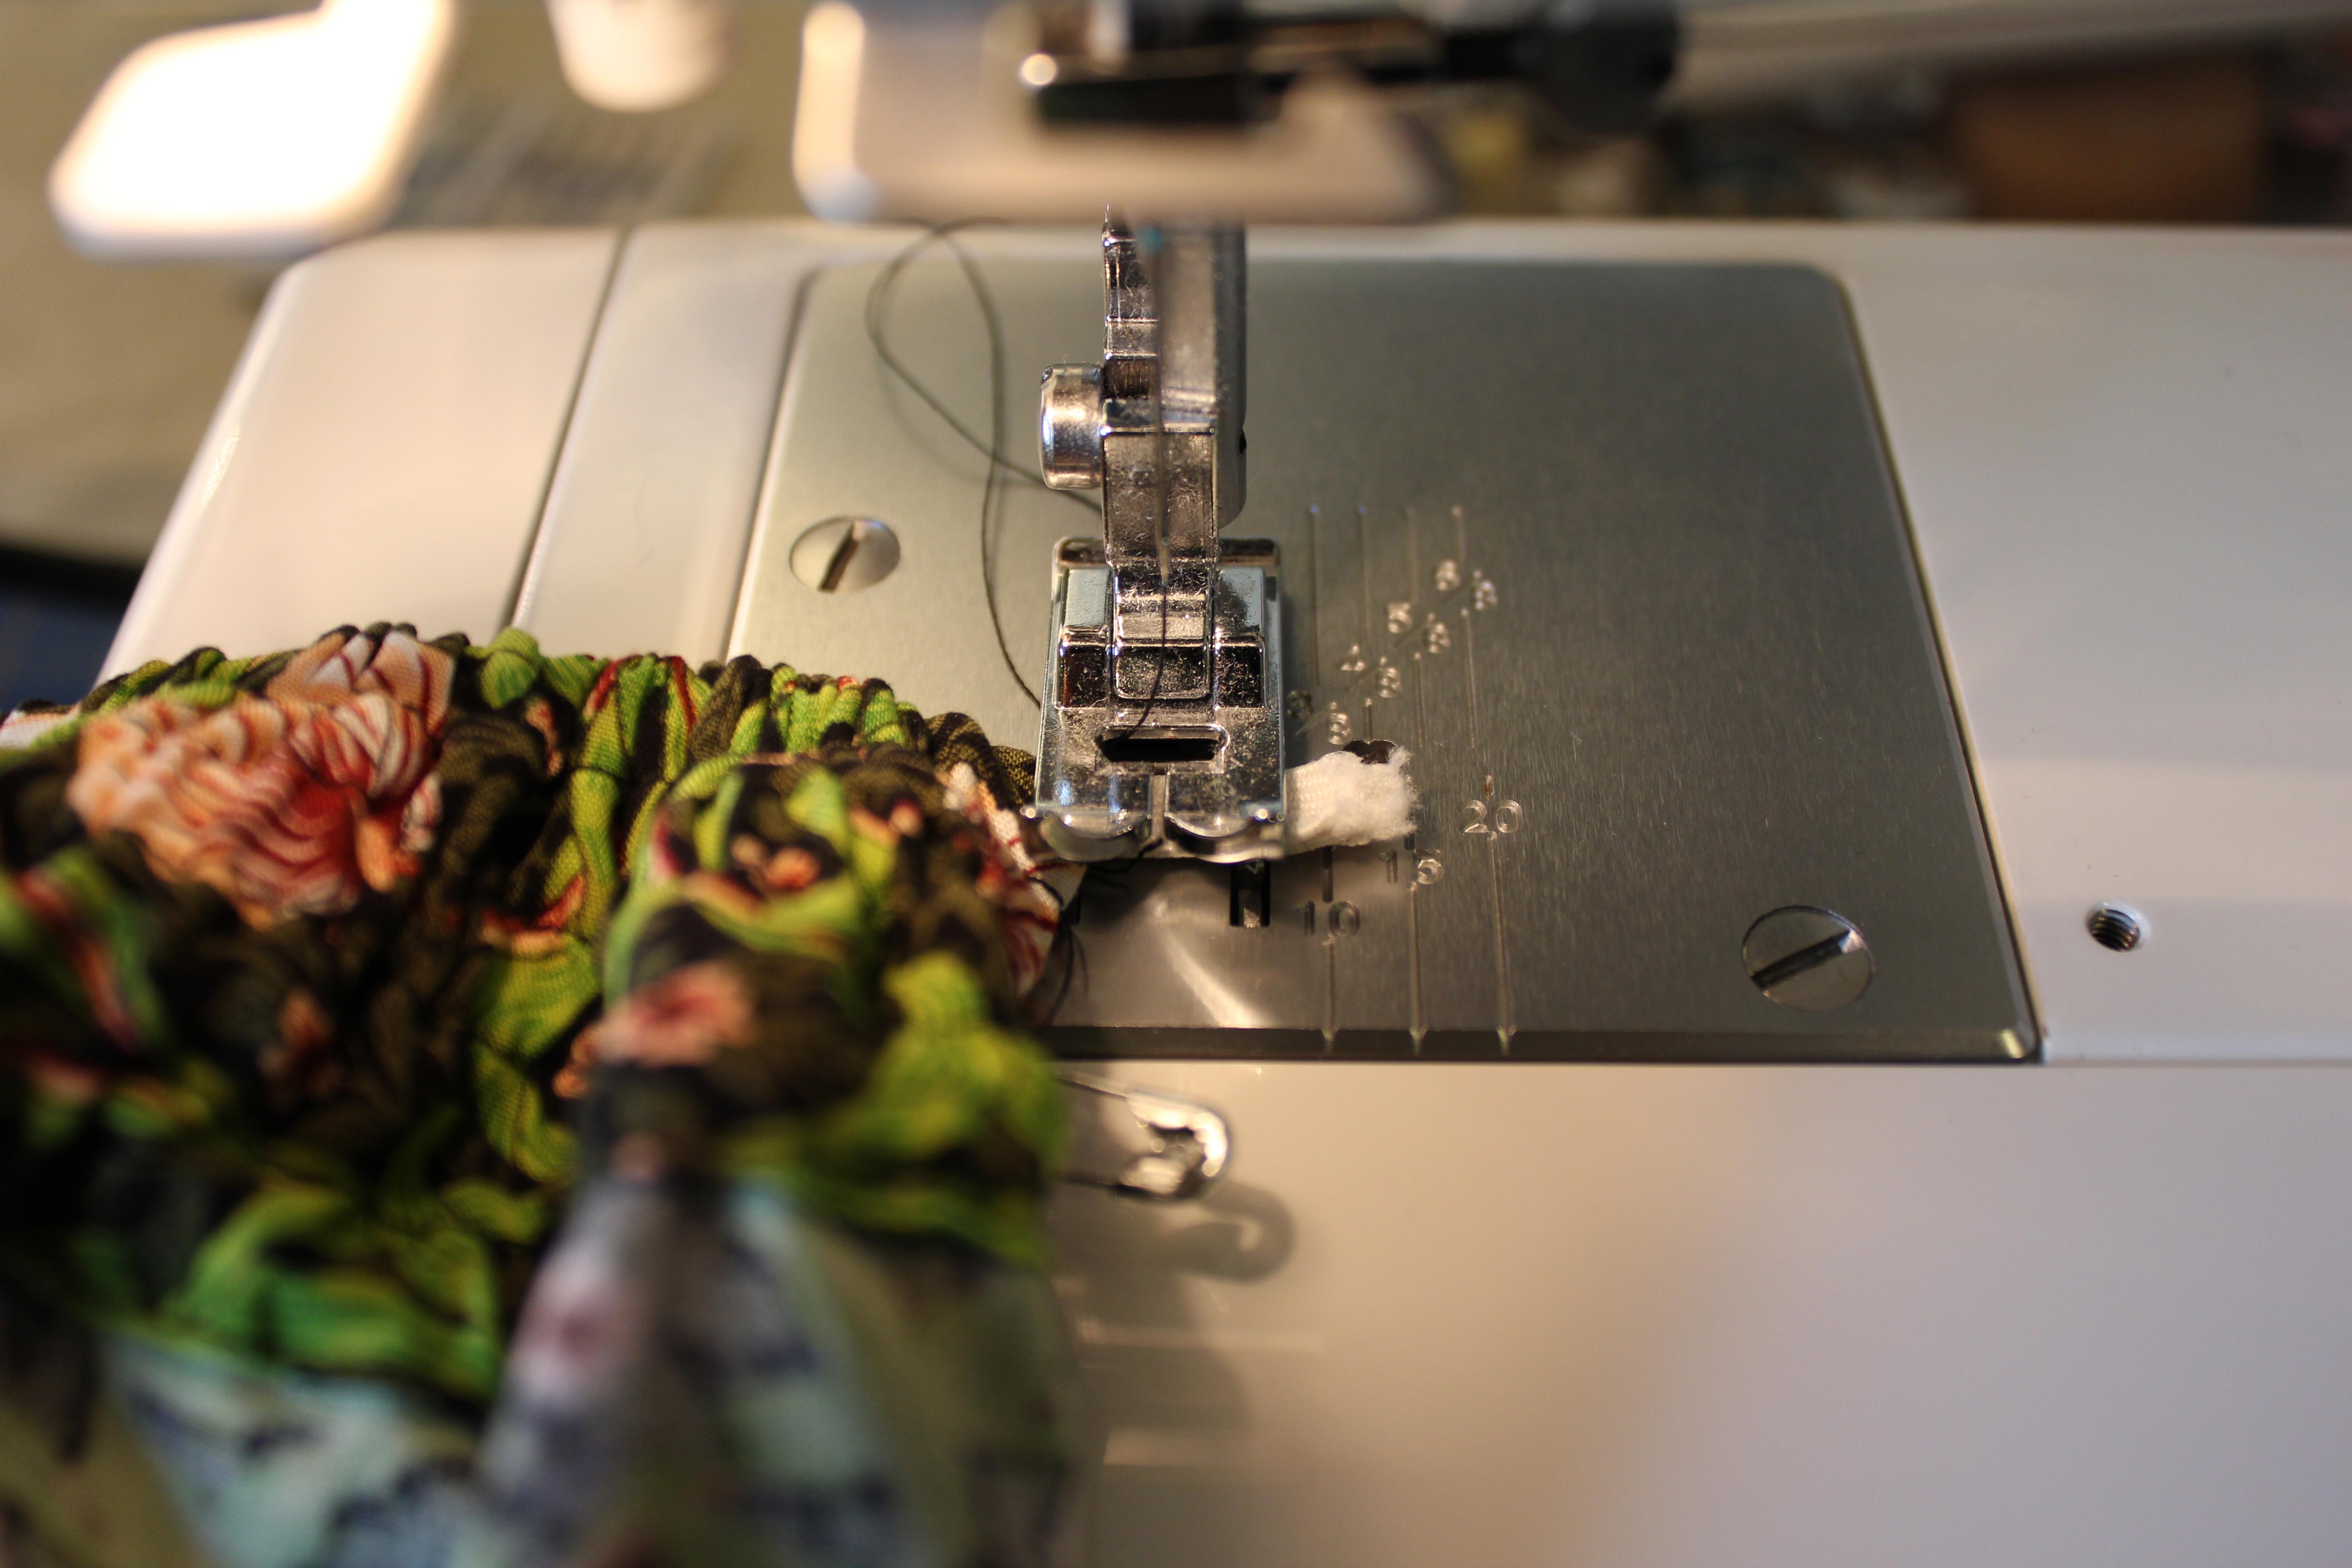
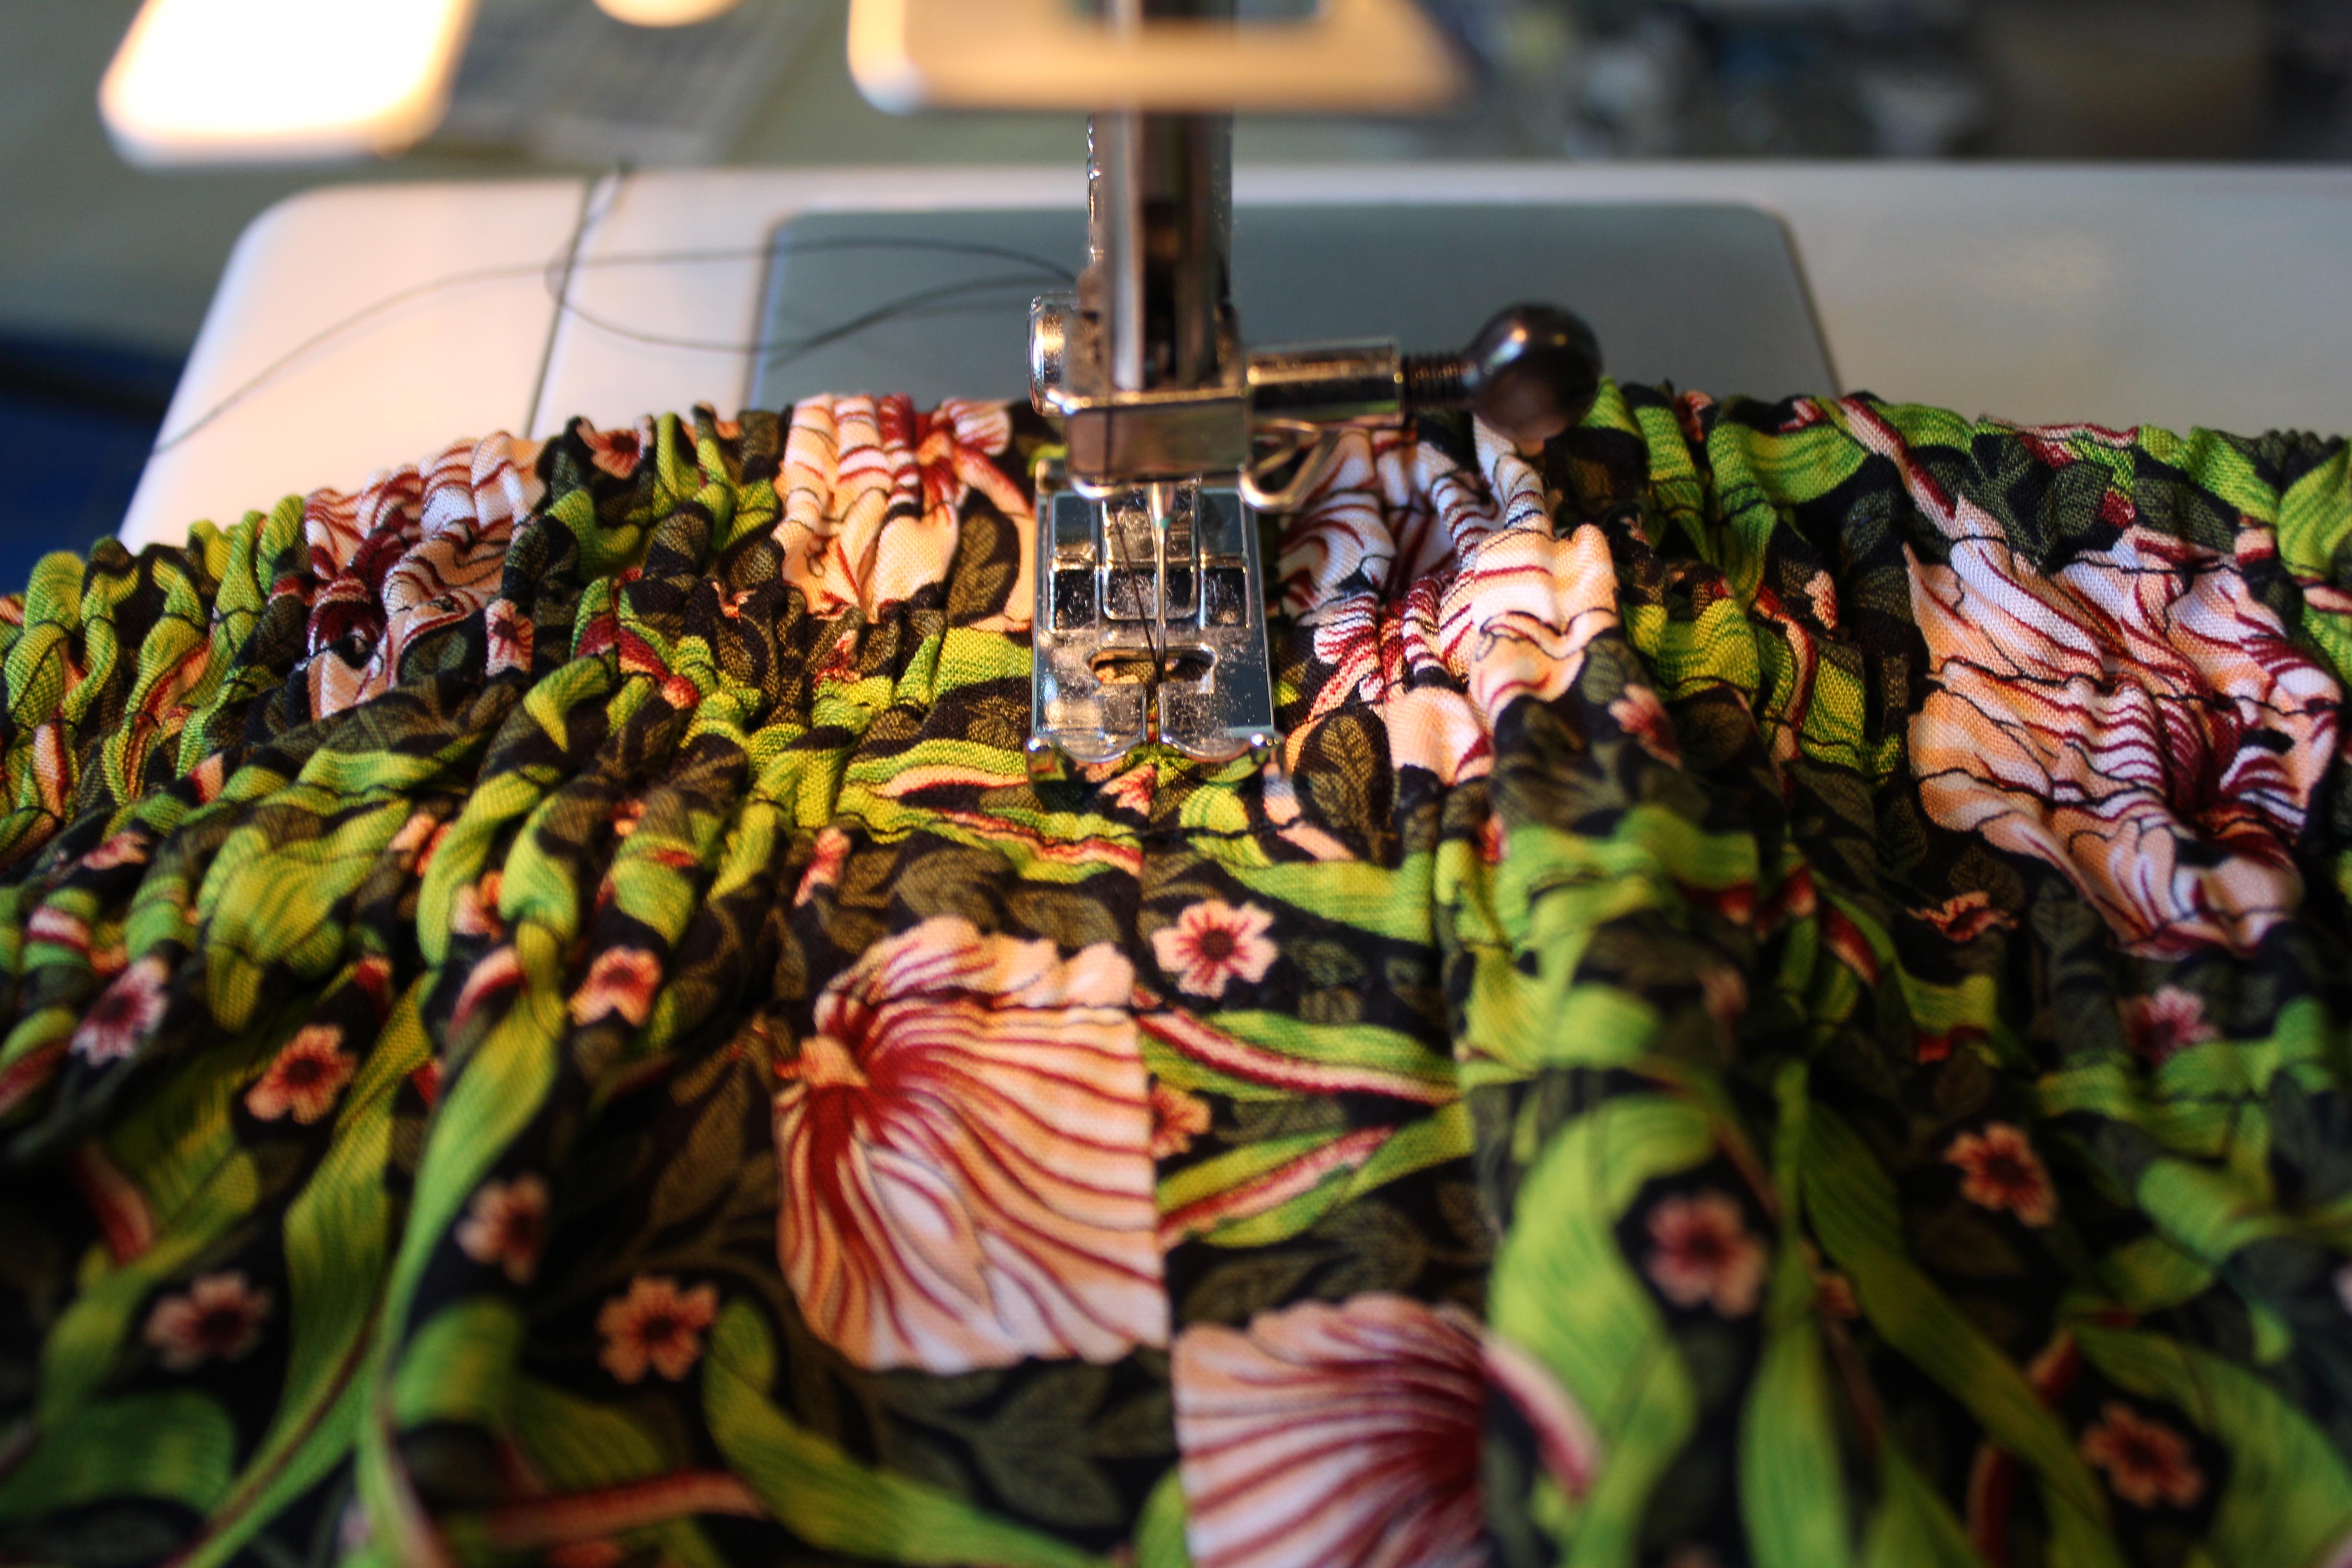
Now we’re going to stitch the elastic channels. Make sure the folded edge of your skirt is lined up with the 3/8″ mark on your sewing machine. You want to make sure that you stay at (or slightly, slightly past) that line – if you go below it, your elastic may not fit through. Stitch all the way around until you meet back up with the beginning.

Move the edge of the skirt to the 6/8″ mark, and stitch around like you did before. We will be creating a gap between the first elastic channel and the second one.
Repeat this step one more time to create the second elastic channel. At this point, I’ll have run out of lines on my machine to measure by. You can either mark your machine with a line of tape, or do what I do, and keep a careful eye on the distance between the presser foot and the previous line of sewing (for me there is a 1/8″ gap between the edge of the foot and the stitch line).

Then, flip your skirt over so that you can see the bottom fold of the waistband. Carefully stitch right along the folded edge.

Now for the final row of stitches. Line up your needle between the last two rows you stitched, and sew all the way around. I flipped the skirt back to the right side, but you can do this from whichever side you prefer.
The elastic channels are now finished! Your waistband should look like this.

Now we can actually insert the elastics. At the back/side seam, on the INSIDE, carefully seam rip the first, third, and fifth channels. Make sure you don’t seam rip the seam at the right side of the skirt.

You’ll have three little holes through which to thread your elastic.
Now, cut off three lengths of elastic, each the length of your waist measurement (you can subtract 1-2″ if you want a tighter waistband. You can also tighten the elastics before sewing up the casing).
Attach a small safety pin to one end and a large one at the other. Make sure the pins aren’t pinned too close to the edge of the elastic, otherwise they might tear off in the middle of the channel, which is pretty frustrating – trust me.

Insert the end with the small pin into the first open channel, and use the pin to inch the elastic through.

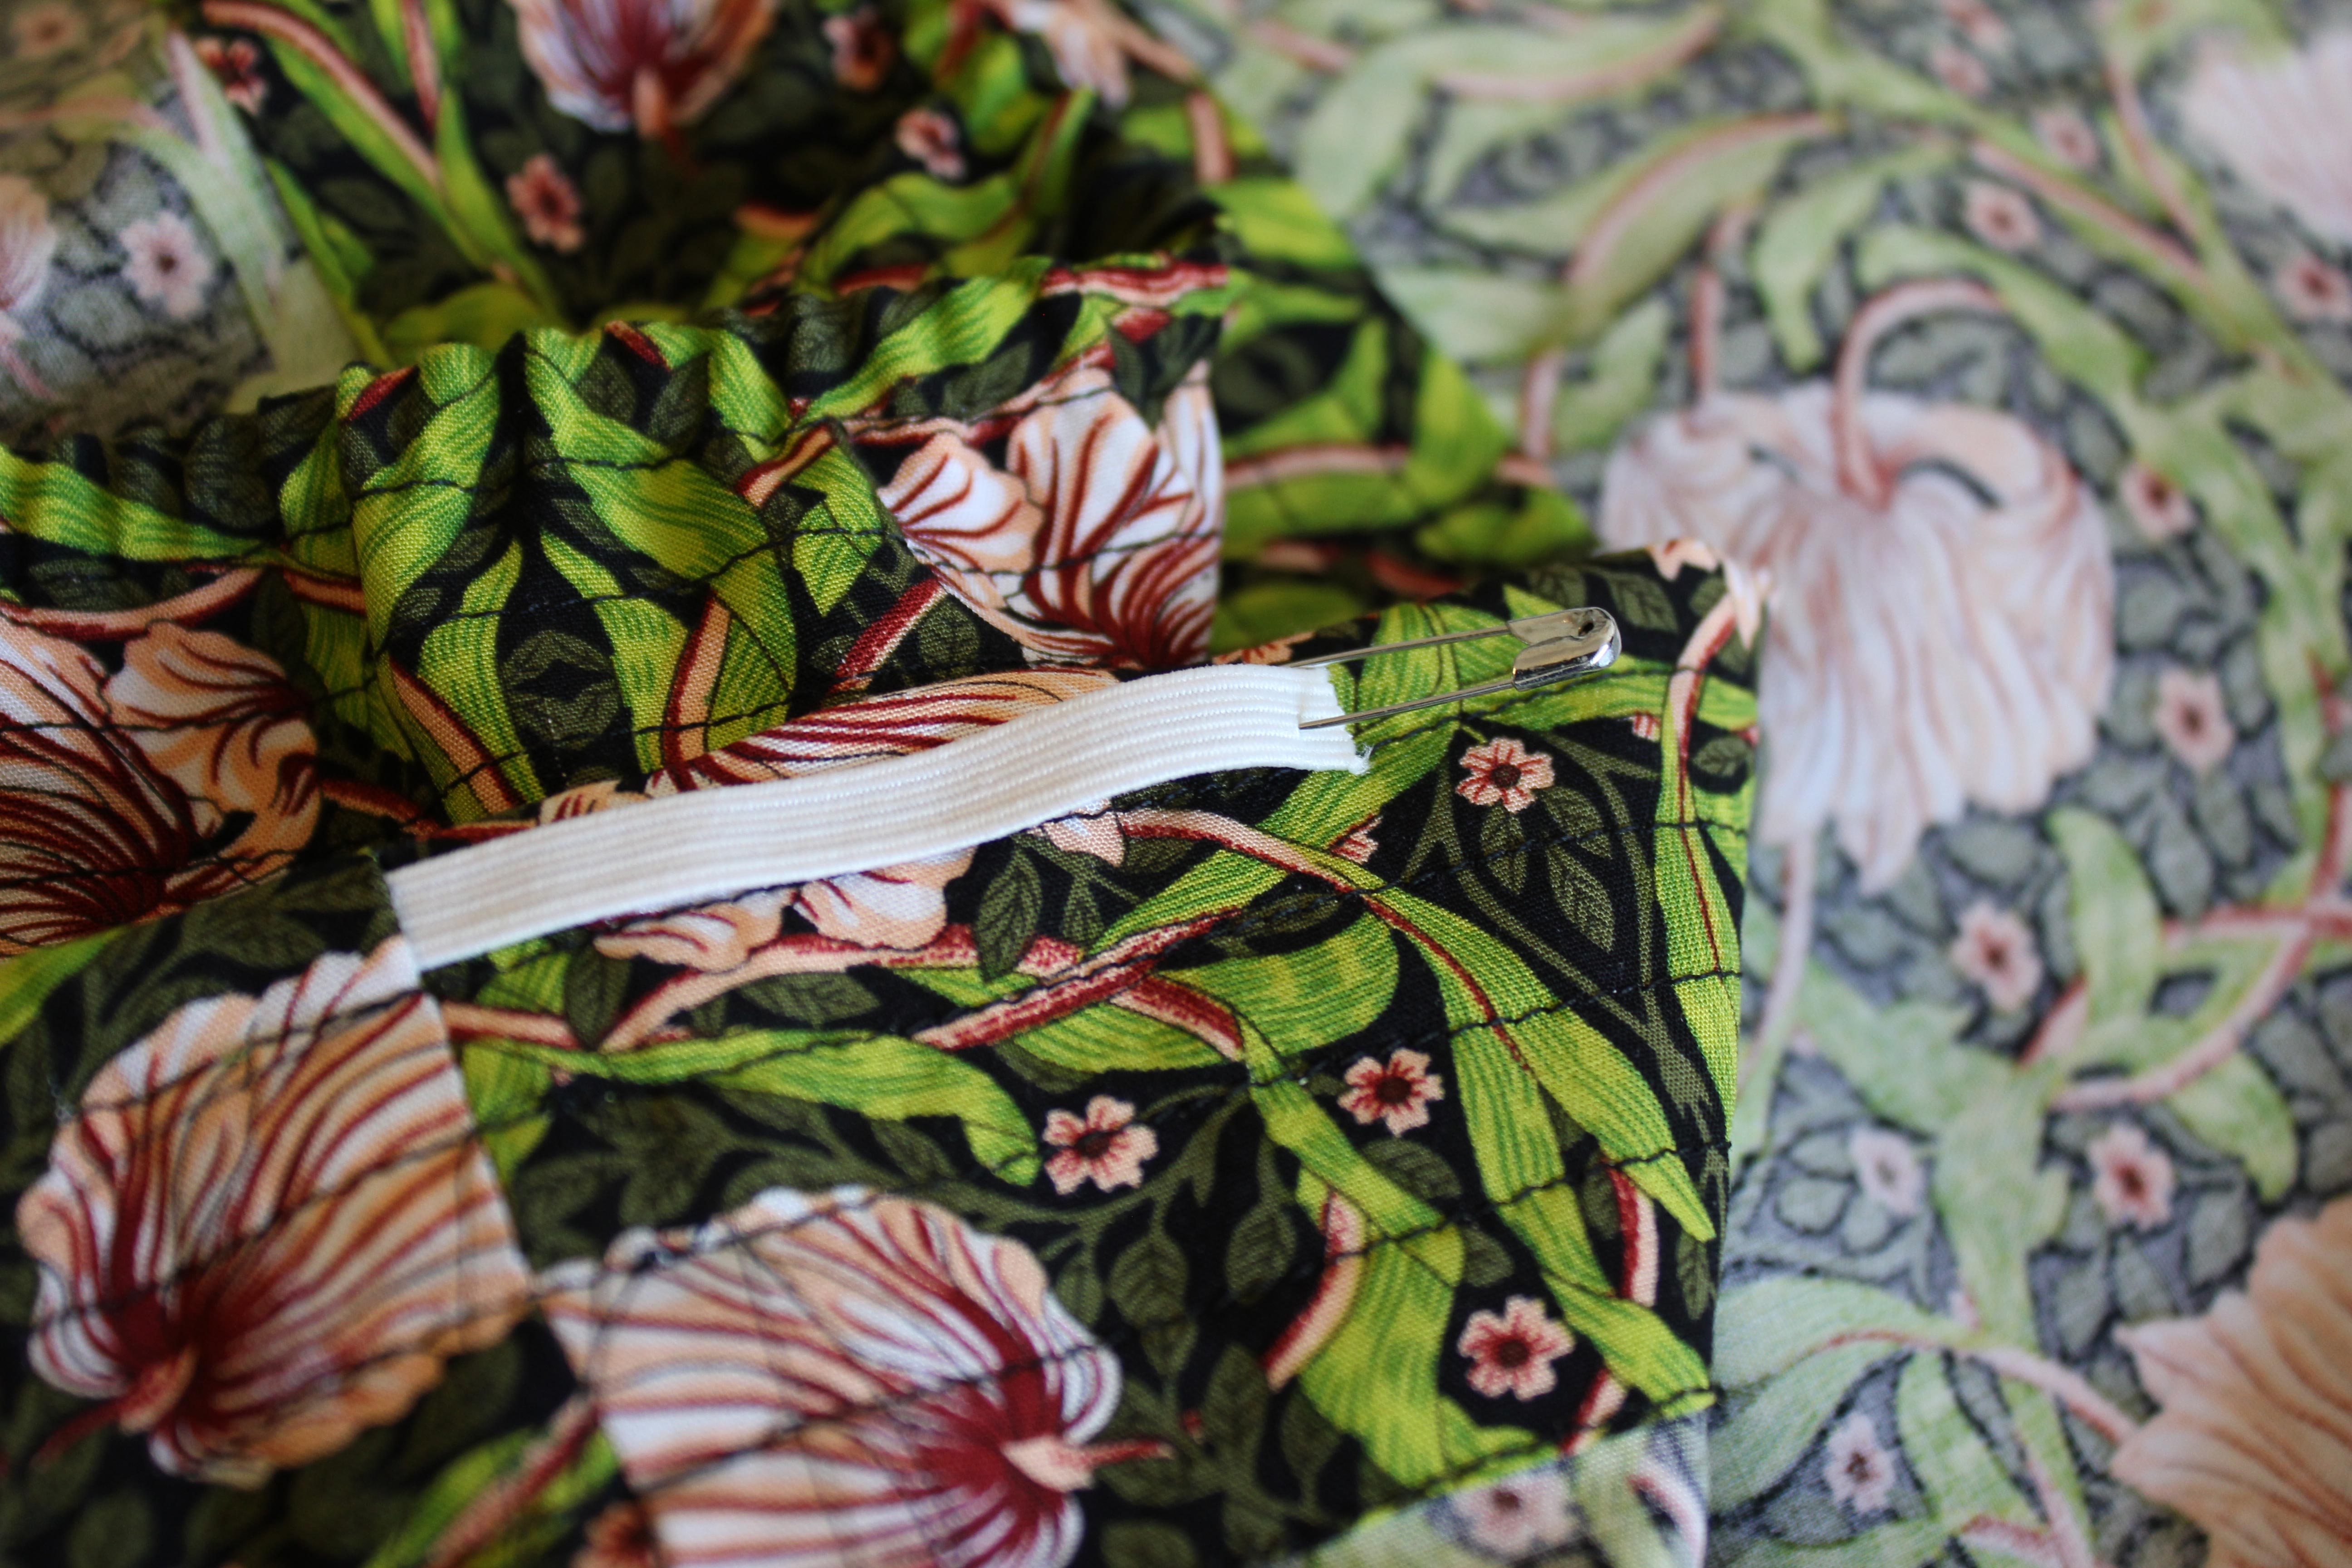
Push the elastic all the way around the skirt, until you reach the opening again. The large safety pin should act as a “stopper” and keep the elastic from being pulled all the way through.
Once the elastic has been pulled all the way back to the beginning, pin the elastic ends together so they don’t slide into the skirt.

Repeat this process for the other two pieces of elastic. Your waistband should look like this.

Make sure the elastics aren’t twisted, and sew the pinned ends together. I like to sew back and forth several times to make sure it’s secure. Trim the elastic ends about 1/8″ from the stitching.
Pull the waistband to help ease the elastic ends inside the channels. Try on the skirt and make sure you’re happy with the snugness, and make sure the gathers are evenly distributed.
Use a ladder stitch or whip stitch to stitch up the channel openings. I find that after all the stretching, the gaps between the channels have opened up a bit as well, so I stitch the whole seam closed to make sure everything is secure. Sometimes the first channel opens up on the right side as well, so stitch that closed if you have to.
Then, lay your waistband flat and stitch in the ditch at the seam to secure the elastics and keep them from twisting around too much in their channels.
To finish, turn up and press the hem 1/2″ twice, and sew. You’re done! Try on your new skirt and give it a twirl!
If you have any questions, please let me know in the comments below!
